Learn how to completely hand make a 3 tier resin tray using dried, pressed flowers and gold leaf. Stay with me as I walk you through this step-by-step tutorial, complete with supply links for your convenience.
I have a weakness for pretty serveware and am always on the lookout for new and unique pieces to add to my collection. While I was planning my daughter’s first birthday party, I landed on a “Wild One” wildflower theme. I came across beautiful transparent floral and gold tiered trays and knew I had to have one. But I didn’t like the price tag I was finding online, so I decided to DIY my own.
To make a 3 tier resin tray, I did quite a bit of research to ultimately choose the supplies and steps I thought were most conducive to the outcome I was looking for. As with anything in life, you learn lessons as you go! I would change only one thing about my technique. Otherwise, I was extremely happy with the supplies I chose and step by step process I completed.
Let’s go over the supply list first. I have linked the exact products I purchased and used below.
Want to save this tutorial for later? Pin it here!

This post contains affiliate links for your convenience which may reward me in the event of a sale. Note that I only recommend tools and products I have personally used and loved. As an Amazon Influencer, I earn from qualifying purchases
Supplies Needed to Make a 3 Tier Resin Tray
-Pressed dried flowers (tweezers included in this kit)
-Pen
-Drop Cloth and rags
-Measuring cup (measured in mL)

Step 1: Create your Floral Composition
After you gather all of your supplies, create a draft composition with your dry flowers. The resin begins to cure quickly, so you want to be able to quickly place the flowers once the resin has been poured into your molds. I chose to trace around the molds on parchment paper, and cut the shapes out. That way, I had an exact replica of the molds to create my floral composition on.


I laid my florals out in a round pattern, using the same general color scheme on each layer. There are no rules here! You can carefully use your fingers to move the flowers, but you may find it easier to use the tweezers that come in this dried floral kit.
Step 2: Clean your Molds
Once your floral compositions are complete and you are ready to begin the hands on portion of your project, you want to make sure your silicone molds are clean and dust free to make a 3 tier resin tray. I sprayed mine with rubbing alcohol and wiped them down carefully with a lint free rag. Any little bit of dust or debris will show in this project and be cast in your tiered trays forever.
Step 3: Mix & Pour your Resin
After you have cleaned your molds, it’s time to jump in and mix your first batch of resin. Epoxy is messy and sticky and temperamental, so make sure to have a good understanding of the instructions beforehand. Each epoxy resin kit comes with its own set of directions, and you should follow them exactly. I will outline the directions that came with this specific resin kit.
First, be sure to cover your bases to do this project safely. You want to be in a room or space with good ventilation, wear gloves, cover your workspace and be sure you are working on a completely level surface. Keep a pack of baby or wet wipes handy to clean any drips or spills quickly as you go.

Per the directions that came with my resin kit, I mixed Part A and Part B in a 1:1 ratio. I was pouring two layers total, and decided to make them each about 300mL total. So I measured 150mL of Part A, then poured it from the measuring cup into my smaller plastic cup, followed by 150 mL of Part B.
I used a rubber spatula to mix Parts A & B for 3 minutes. Mix slowly and gently to decrease formation of bubbles. You want to make sure any striations or visual strands of color difference are gone to ensure a complete mix of both parts. Gently scrape the sides and the bottom of the cup as you mix to make sure you incorporate all of the epoxy together.
About 1 min into mixing, I added an entire piece of gold leaf from this pack to the mixture. As I continued to stir for 2 more minutes, the gold leaf naturally separated and incorporated into the resin.


Once you have completed mixing parts A & B together for 3 min, I prepared a warm water bath in a second larger cup and let my mixed epoxy cup sit in the warm bath for 5 min. During this time, I could visibly see the bubbles rise to the surface and pop. Warming the mixture is supposed to help decrease the number of bubbles.
When it’s time to pour, do so slowly and gently into each mold. Pour around the edges of the mold, and a bit in the middle. Allow it to spread on its own, then use the tip of your spatula to gently spread the resin evenly. Dont’ use anything rough to spread it- the silicone molds are fragile and scratch easily.

Step 3: Lay Pressed Dried Florals, Pop Bubbles & Pour Final Layer of Resin
This is where the steps get complicated and I will change my process next time! First, I will share what I did for this tray. Then, I will share what I plan to do to achieve a better outcome next time.
Once I poured my resin, I immediately placed my florals in the wet resin using tweezers. You want to work relatively quickly since the resin begins to cure as soon as it is mixed. That’s why I liked having my florals already arranged so I knew exactly where to place them. After they were placed, I used a long neck kitchen lighter to quickly skim the surface. The heat will pop any bubbles that have formed in the resin and will be visible in the final product. However, since my florals were already laid I had to be careful and work around them to not catch them on fire.


I let the first layer of resin + flowers set overnight to cure enough before adding the second and final layer of resin. Take a quick look and make sure none of the gold leaf or flowers are sticking up past the edges of the silicone tray. If they are, use scissors to cut it down so it sits even with or below the edges.
Mix the second layer of resin according to the directions and process you completed the first time. Error on the side of caution and mix more resin to make sure you have enough. I measured 150mL of Part A again, then poured it from the measuring cup into my smaller plastic cup, followed by 150 mL of Part B.
Again, make sure your surface is completely flat so the trays will be even. Pour this next layer on top of the first and use the rubber spatula again to make the resin covers all the florals and is spread into the edges. This layer needs to set at least 24 hours before you can pop the trays out of the molds. You may also want to cover your trays with a box, container, baking tray, etc. to keep out dust or debris from sticking and settling into the final product.
Revised Process to Make a 3 Tier Resin Tray- What I Will Do Next Time
Now, let’s get into the problems with this technique and how I plan to improve my process in the future. Unfortunately, the flowers drifted in the wet resin as it was setting and ended up traveling away from where I initially placed them. It’s not a huge deal and probably not something anyone would notice but me. But if you are like me and detail oriented, you may not be pleased when your flowers drift. It throws off the spacing and design you worked so hard to create in step 1. We are chasing perfection here at Emily Rone Home when we make a 3 tier resin tray!
Next time I will pour the first layer of resin+gold leaf, use the lighter to pop any bubbles and let it set overnight BEFORE I place my flowers. This will add another day or night of dry time, but I think it will yield more precise results.
Once the resin is set enough to not be sticky to the touch, I will apply a thin layer of glue to stick my flowers down. That way, they will stay exactly where I place them instead of floating around in liquid resin. Based on my research, you need to let the glue completely dry before pouring the next layer of resin. Otherwise, things may discolor.

After another day or night of dry time, pour the next and final layer of resin and use the lighter again to pop any bubbles.
Step 4: Pop the Trays out of the Molds
After your trays have had 24 hours to cure in the molds, you can carefully peel away the silicone and pop the resin trays out. Although they are safe to be removed after a day, note it will take up to 3 weeks to fully cure and harden. Wait a few days, then apply the hardware that comes with the 3 tier set. Be careful during this step not to scratch the surface.

Step : Add Gilded Gold Edges
The final step to make a 3 tier resin tray is to add gilded gold edges. This elevates the final product and pulls together the embedded gold leaf. In fact, this step is so important I wrote a whole post on my favorite product to use and a step by step procedure.

When I was researching how to complete this 3 tier resin tray project, the inspiration pictures I found all had gold edges but very few tutorials I found explained what materials to use, or how to achieve this look. After some trial and error on my part, I found the absolute best product for the job. For only $10, you can easily achieve perfectly gilded edges to put the finishing touches on your tray. Learn more about this final step here.


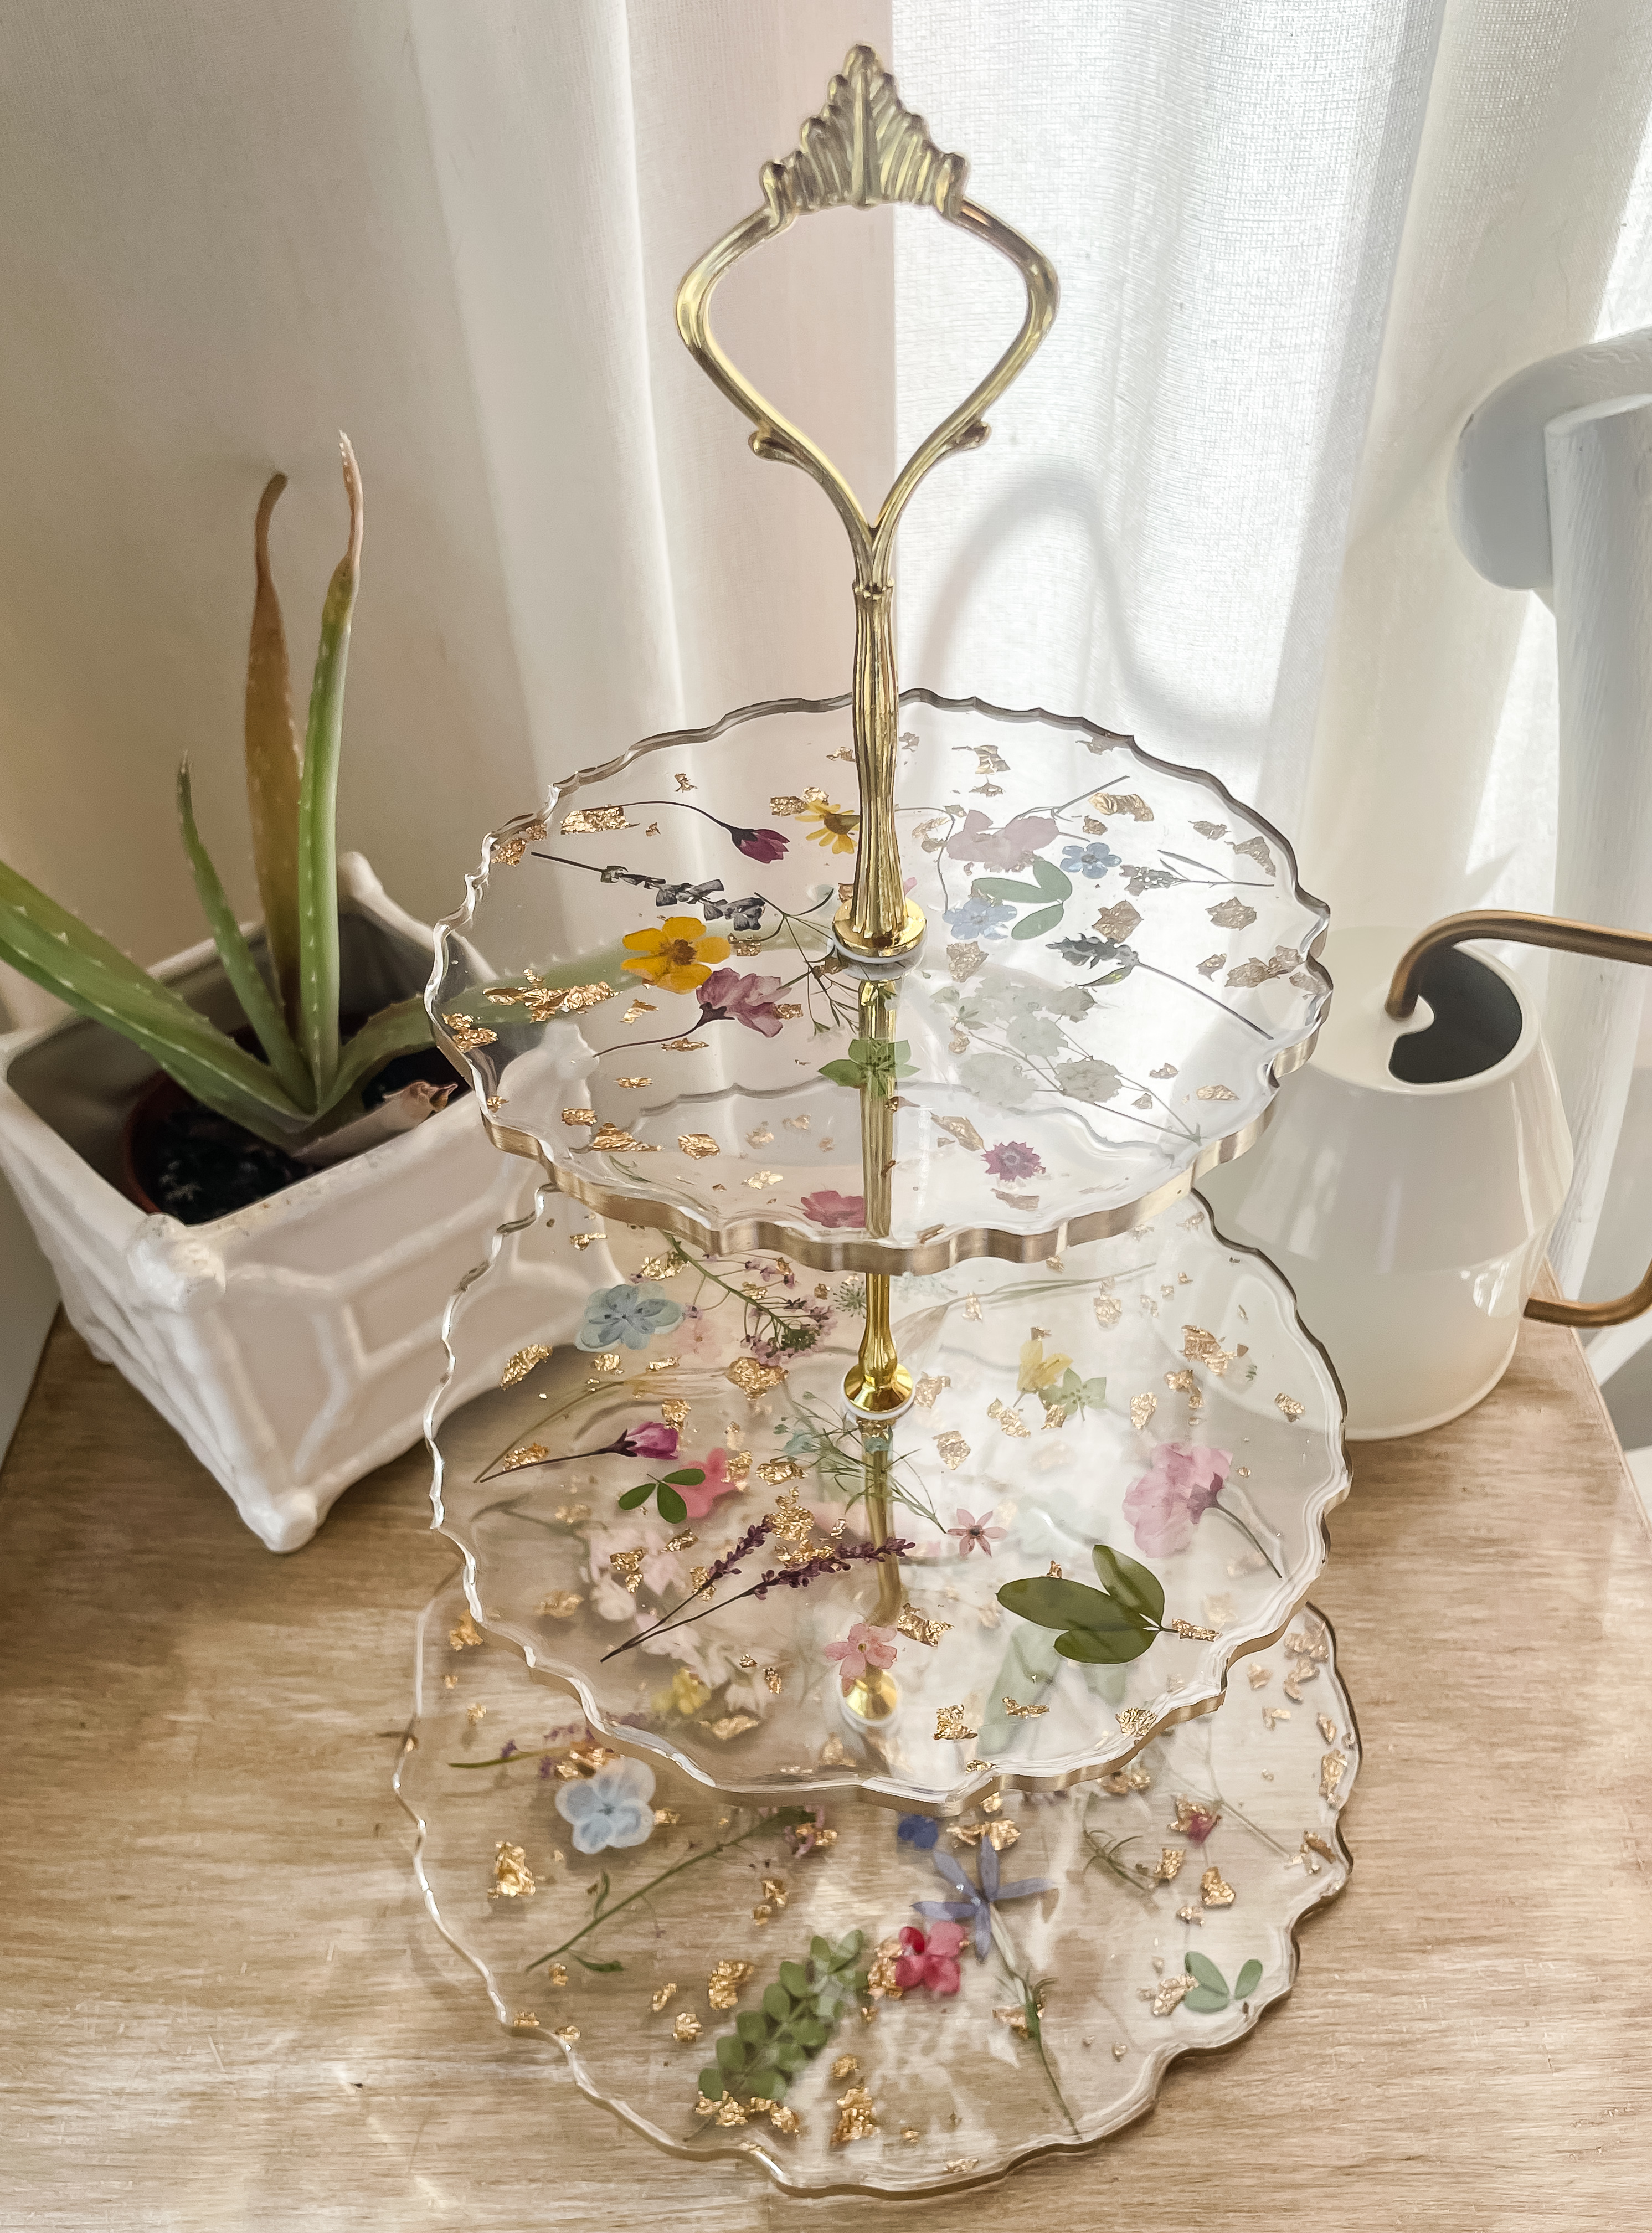
I am in love with the final product and think it looks so unique and high end. It will be the perfect dessert display for my daughter’s first birthday. Let me know if you have any questions. The steps seem tedious, but once you do it once you will get the hang of the technique.
Enjoy the process,


