Learn how to easily add a timeless gilded touch to your serveware. Stay with me as I walk you through this step-by-step tutorial to achieve a gold edge cake stand, complete with supply links for your convenience.
I have a weakness for pretty serveware and am always on the lookout for new and unique pieces to add to my collection. While I was planning my daughter’s first birthday party, I landed on a “Wild One” wildflower theme. I came across beautiful transparent floral and gold tiered trays and knew I had to have one. But I didn’t like the price tag I was finding online, so I decided to DIY my own.
I outlined the complete project tutorial here, but wanted to write a separate post to detail the gold edge cake stand process. The gilded gold edges elevate the final product and pull together the gold leaf worked into the trays.

When I was researching how to complete this 3 tier resin tray, the inspiration pictures I found all had gold edges but very few tutorials I found explained what materials to use, or how to achieve this look. After some trial and error on my part, I found the absolute best product for the job. For only $10, you can easily achieve perfectly gilded edges to put the finishing touches on your tray.
Want to save this post for later? Pin it here!

Supplies to Complete Your Gold Edge Cake Stand
This post contains affiliate links for your convenience which may reward me in the event of a sale. Note that I only recommend tools and products I have personally used and loved. As an Amazon Influencer, I earn from qualifying purchases
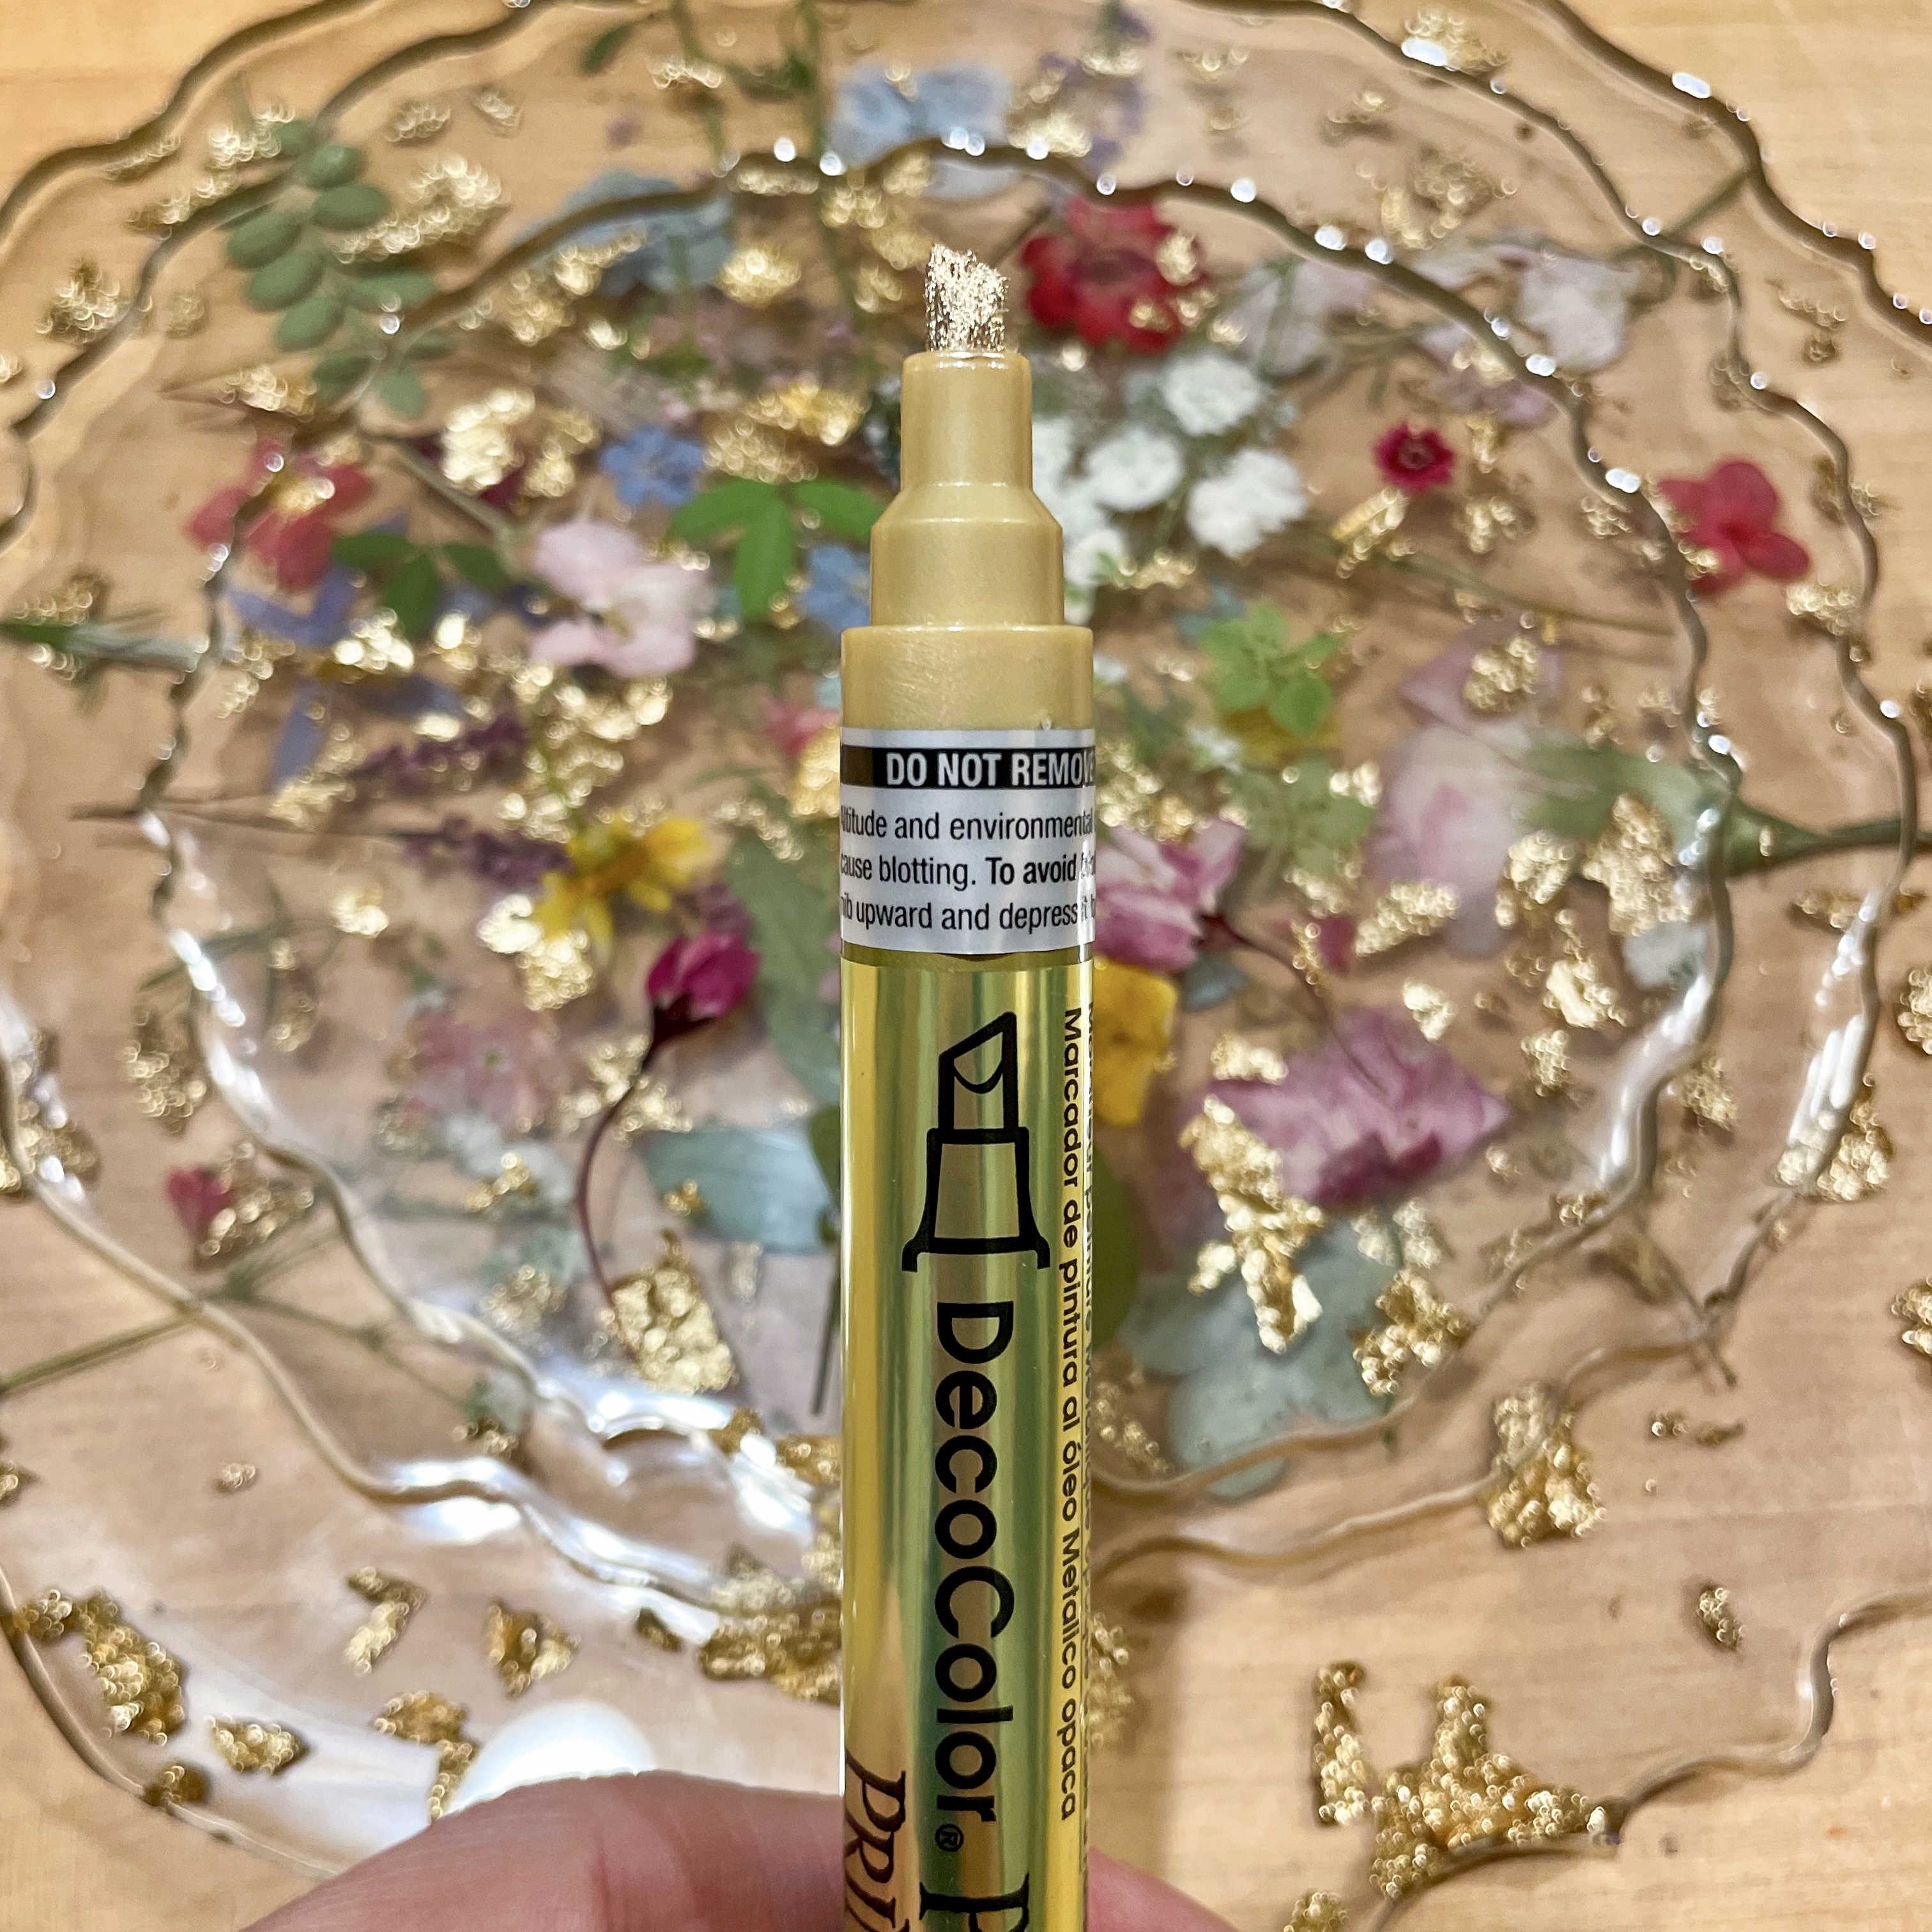
Step 1: Gather your Supplies
Enjoy this short and sweet supply list! That’s what I love about this gold edge cake stand solution- its a single product and under $10, linked here!

This specific gold edge cake stand tutorial is to add gilding to the edges of resin trays. Maybe you purchased a resin tray online, or created your own 3 tiered dried floral tray first. But make sure you have your resin tray, coasters, etc. to add gold edging to.
Step 2: Paint your Edges Gold
This process could not be easier. After two previous failed attempts with different products, I found success with this paint pen.
First, I used a paint brush and my tried and true Rub n’ Buff. Rub n’ Buff is great for these projects:
–Framed Intaglio Art with Gold Edges
–Pop Up Camper Hardware Remodel
… but not so much for this project to be used on resin. You live and you learn!
Next, I tried this metallic gold paint I have used previously to create my gilded edges on 3D oyster art. However, this did not work either! Both products were too transparent and did not give the opaque and bold pop of gold I was going for.
Applying both of these products with a paint brush was also difficult and required a steady, precise hand. I had also seen other products advertised that involved adding a gold powder to a clear acrylic varnish to create a paint to be brushed on. These are complicated and require 2+ supplies. This is another reason why I love the paint pen solution.
Using this affordable product from Amazon, I carefully colored the edges and watched them transform from transparent & clear to bold and gold. All it takes is a single coat after your resin trays have dried and been popped out of the molds. Let the edges dry another 12 or so hours, and you are finished.


I love the way the gold edges complete this 3 tier dessert stand. I can’t wait to use it to display desserts while entertaining. Sometimes the best solutions are the simplest ones.
Enjoy the process,


