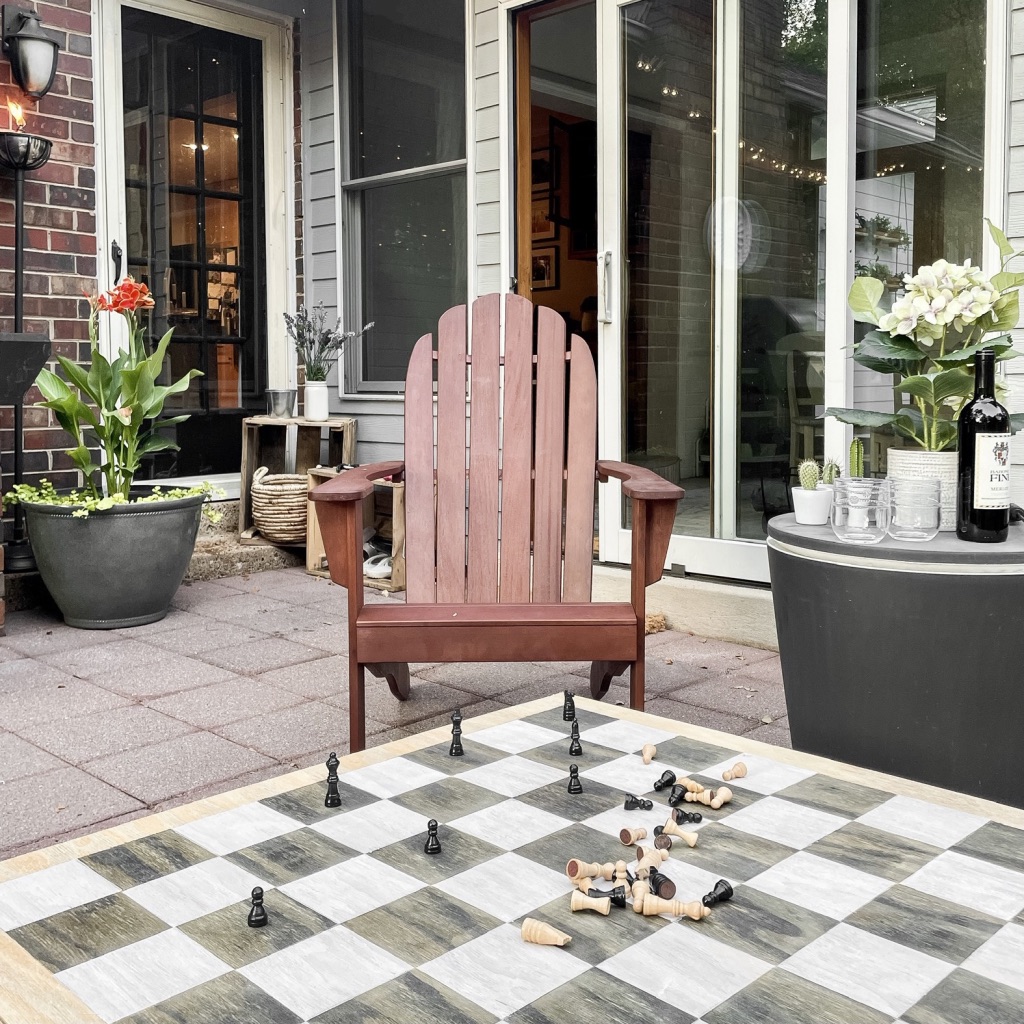
Let me show you how to easily and affordably add functionality to your patio! A tabletop checkerboard is such a fun addition, and bonus- the tabletop is reversible. You can checkerboard one side and paint, stain or leave the other side natural. Get creative! The sky’s the limit. Read on to learn how to DIY this checkerboard tabletop in 7 easy steps.

This project snuck in during the last week of the Spring 2021 One Room Challenge! I don’t know about you, but I love any excuse to be outside.
As part of the One Room Challenge, I hung string lights using a DIY whiskey barrel planter, cleaned up our garden space, and made some DIY pallet wood crates. I also bought rugs, a fire pit, and 4 Adirondack chairs to create a defined comfy seating area.
The fire pit is great, but summers in Memphis are brutal so there is no chance of getting to use it from about May to October during a typical year. I wanted another option for the fire pit during these hot months, and thought a DIY checkerboard tabletop was the perfect solution.
SUPPLIES TO CREATE A DIY CHECKERBOARD TABLETOP
-3×3 piece of plywood (I purchased a 4×4 piece from Home Depot and they cut it down to 3×3 for me)
-80, 120 and 220 grit sanding pads
-measuring tape
-pencil
-Sealer
STEP1: Measure & Cut DIY Checkerboard
I purchased this 4×4 piece of plywood from Home Depot. I chose my dimensions based on the size of my fire pit. For mine, a 3×3 square was enough to cover the circumference of our round fire pit without too much excess over the sides.
Conveniently, any big box store should be able to cut your piece of plywood down to your preferred measurements. If not, you could also cut your plywood at home using a miter saw, jig saw or hand saw.
STEP 2: Sand
The plywood I purchased was rough, so I used my mouse sander to achieve a smooth texture. Best practice is starting with your most coarse grit sandpaper (I started with 80), and work your way to finer grits like 120, then finally 220.
I love the mouse sander I have linked. It is compact but gets the job done. Make sure and use proper safety gear including work glasses and a dust mask.
Always use even pressure and sand with the grain of the wood, not against it. The finer the grit of sandpaper, the smoother the finish you are creating. Clean up after sanding with tack cloth to ensure the wood is free from dirt and debris. You want a clean surface before staining and waxing your board.
A quick sanding of both sides and along the edges should be sufficient. You don’t want splinters while trying to play checkers or chess!
STEP 3: Pre-stain
Now you are ready for the Pre-Stain. It is always recommended to apply Pre-Stain to promote even stain penetration and avoid splotching and streaking, especially on lighter and softer wood species. Follow the manufacturer’s recommendations listed on the product to apply Pre-Stain.

STEP 4: Measure and mark lines of checkerboard
I had a small checkerboard on hand, and used it to generate measurements and ratios to enlarge onto your 3×3 plywood board. I measured a 2 inch border, and drew out 48 4×4 squares using a straight edge, measuring tape and a pencil to draw them out.

STEP 4: Stain black
I decided to tape off row by row using my preferred brand of green Frog Tape. Fair warning, this step is time consuming. But in my experience, it created crisp lines and kept the stain within the square without bleed through.
I used a foam brush to paint on the stain, being careful to saturate the middle first, and push out to the edges. Avoid getting the edges too wet, you don’t want to risk bleed through.

STEP 5: Wax white
Once all your black squares are stained and dried, you can paint on the liming wax to create your white squares. Because the liming wax is thicker, and doesn’t run and spread like the stain, I chose to freehand the white squares without tape. It’s up to you! I used a foam brush to apply the liming wax as well, slow and steady.

STEP 7: Seal your DIY Checkerboard Tabletop
Once your board is dry, it’s time to apply a sealer to protect from the elements and sun. However, I still wouldn’t recommend leaving the board out in the rain, but the sealer should protect against fading due to sun. Fair warning, a polyurethane sealant is known to cause whites to yellow, so choose a water based sealer.


