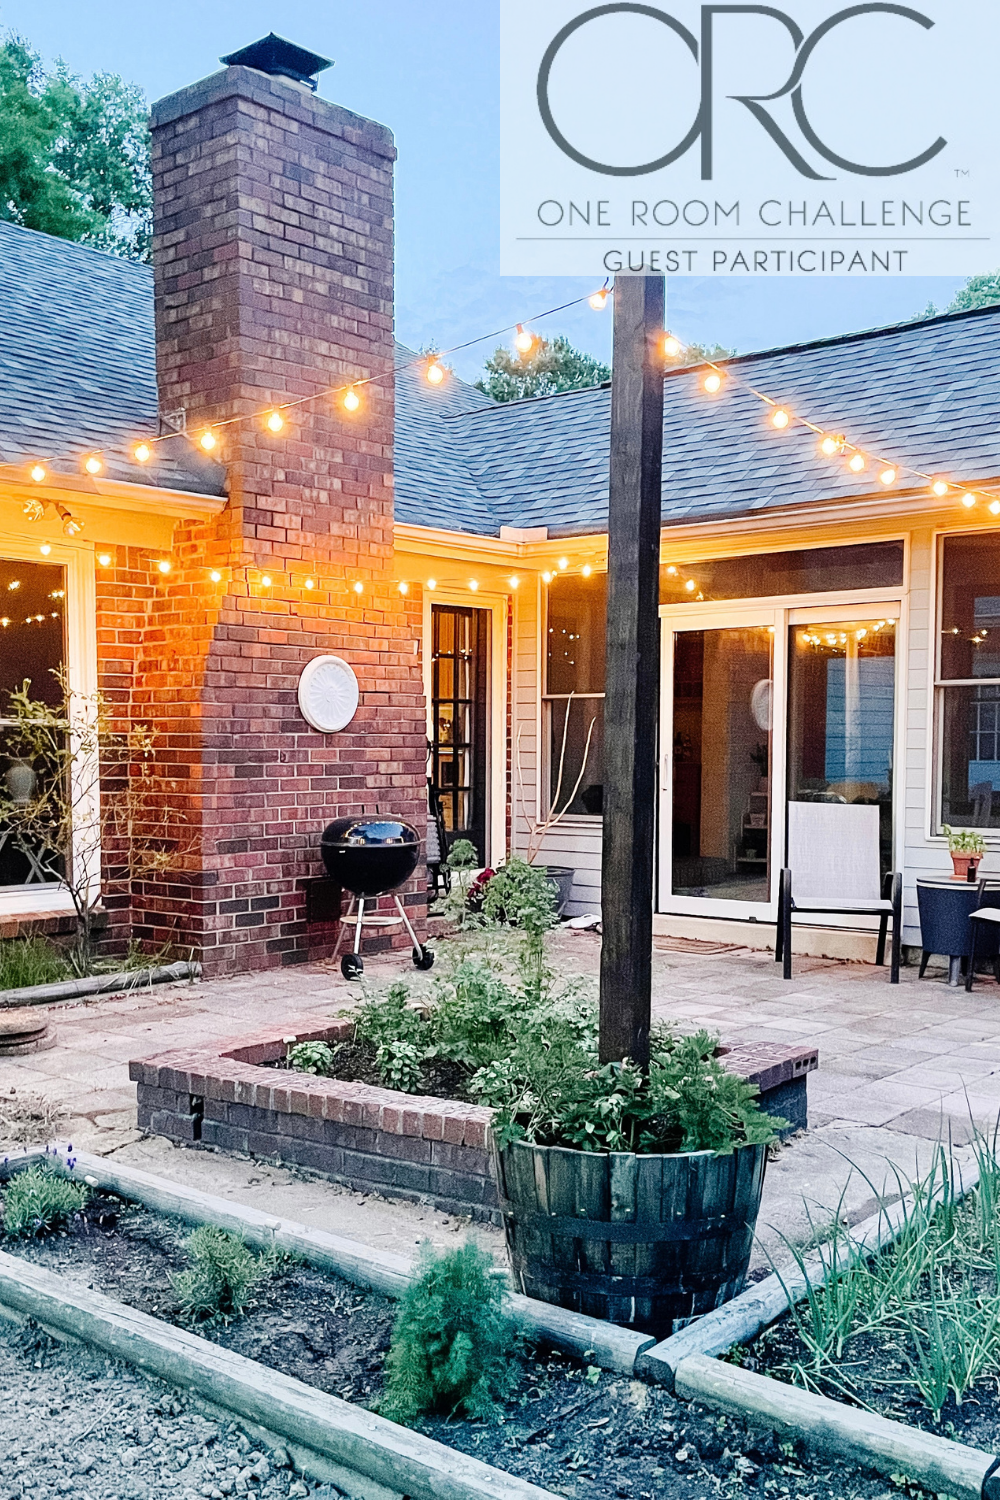
1 room. 8 weeks. Countless DIYers coming together to encourage and inspire. Sounds great, right?! Welcome to the One Room Challenge! Keep reading to discover my plans for my backyard patio One Room Challenge and how to create a DIY potted string light stand
I’m so excited to be participating for the first time as a guest in the 2021 Spring season of the One Room Challenge (ORC)!

In case you are new, here is my “best case scenario/possibly over optimistic/very ambitious” project plan:
- Paint Concrete Patio Floor
Time is flying and we are already at Week 3 of the ORC. I had so much fun with the project this week. I’ve had this idea in my head for at least six months, it was nice to see it finally come to life!
There is inspiration for this project all over Pinterest, but the idea in my head most closely aligned with the tutorial I found on Jenna Sue Design Co. Keep reading to see how I added my own twist and built a DIY potted string light stand to hang cafe lights from in the backyard.

Want to save to read later? Pin it!
SUPPLIES TO BUILD A DIY POTTED STRING LIGHT STAND
–Whiskey Barrel Planter– can we talk real quick about how cool this is? It’s a real whiskey barrel! Even smells like it. Love the authenticity. Because of this, no two are the same and they don’t look perfect, but I love the imperfections
–Exterior paint in the color Glazed Pecan by Behr – you can get it color matched at any paint store (Lowe’s, Home Depot, Sherwin Williams, etc.)
–Purdy Paint Brush and/or paint roller
-One quart of Minwax oil based gel stain in Walnut
–Chip brushes to apply gel stain
–Fast Setting Concrete: I used 2 50 lb bags
-Planter filler to promote drainage and fill space: you could use small rocks/pebbles, packing peanuts, pool noodles, egg cartons, etc.
-Potting soil
–Foam brush to apply sealer
-One quart of sealer- I used Minwax Water Based Helmsman Spar Urethane in a satin finish.
-Drill and drill bits
STEP 1: Prepare the post
For this project, you could leave the post raw depending on the look you are going for, or use a wood stain. I decided to finish my post with my “wood look” technique I applied to finish my front door, front posts, DIY house numbers, and front porch bench. It’s so simple you’ll love the results.

First, you paint the post orange. Sounds crazy, but trust the process! Next, you apply the gel stain, and finally seal with the Spar Urethane. This is the abbreviated tutorial, if you want to find the detailed step by step tutorial from when I re-finished my front door with this “wood look” technique you can find it here.


**Note! It has been a year since I used this technique, and forgot how long it takes for the Gel Stain to dry. In the front door post, I recommended a week. With this project, I handled the post and started trying to drill in the corner brackets after a day or two. Don’t do this! The post was still sticky, and some of the gel stain came off. I had to fix small areas. Don’t be me, be patient and let the Gel Stain dry and cure completely.
STEP 2: Stabilize Post in Your Planter Using Corner Brackets
To stabilize the post inside the planter I used 4 corner brackets. I screwed the longer screws directly through the bracket into the post before I put the post in the barrel. Next, I moved the post into the barrel to drill in the final 4 screws to attach the post to the bottom of the barrel. The barrel wood is not very thick so I used shorter screws.


STEP 3: Secure Post in Your Planter Using Concrete
I had purchased Henry Feather Finish to update the top of our entryway countertop, so I used the leftover to secure the post in the barrel. Keep in mind the barrel is already heavy, and so is the concrete. My goal was to apply a thin layer to mind the weight, while still getting a secure fit. Follow the directions on the box to mix and apply. Unfortunately, I decided that thin layer wasn’t enough security. I wanted to be confident the post would be outlast wind and storms safely. On to plan B.


I bought two 50 lb bags of fast setting concrete mix. Here is when the project got complicated- the whiskey barrel is not solid. Each individual board that makes up the barrel has cracks between them. The directions on the concrete mix say to fill your hole/container up 1/3 of the way with water, then add the concrete mix and stir. When I filled the planter up 1/3 of the way with water, the water all leaked out.
To accommodate, I pre-mixed the concrete and water in a 5 gallon bucket in stages. I tried to make the first batch drier so it wouldn’t leak out the sides of the planter. Unfortunately, I still got some leakage. I used old towels to soak it up.


STEP 4: Create Your Planter Layers
I planned on actually using my whiskey barrel as a planter, so I took the necessary steps to make an ideal growing environment. This includes a layer of loose fitting material to help drainage. If you are using a planter with solid sides, I would also drill some holes above the concrete layer to promote drainage. Because of the way the whiskey barrel is built, the cracks between each plank around the sides will provide enough drainage.
I added a layer of foam from a pool noodle on top of the concrete once it dried. I cut and tore the noodle into smaller pieces. This is where you could also use packing peanuts, small rocks, egg cartons, etc. to help fill space and promote drainage.

Next, I added a layer of potting solid before planting Citronella, Dahlias and Marigolds. I chose these plants for their bug repellent properties. To learn more about choosing plants, see my gardening for beginners post here.

STEP 5: Install Cup Hooks
I didn’t notice that I already had hooks installed in our patio ceiling. They must have held either planters or string lights for the previous owner. I intended to install 4 hooks, but the existing hooks worked just fine. I only needed to install 1 hook on the new post inside my planter.
To do this, I used a drill bit slightly smaller than the size of the hook. You can then easily screw the hook in by hand.
STEP 6: Hang Cafe Lights
I used 3 sets of cafe string lights to outline our patio. Make sure to measure your space so you know how many feet of lighting you will need.

To ensure a solid connection between strands, I tied a shoe lace type knot around each point where the string lights connected to make sure they wouldn’t easily unplug in wind or weather. I also wrapped the lights twice around each hook to make it more stable.


STEP 7: Seal Post
Once the gel stain has had time to dry and cure, I applied my sealing coat to protect the post from the sun and elements. I applied Minwax Water Based Helmsman Spar Urethane with a foam brush. Two coats is preferred, waiting overnight to ensure proper drying.

This is a beginner friendly DIY. I would love to see your project if you give this a shot, don’t forget to share and tag! And as always, pin this tutorial for easy access later.
So far in the Spring 2021 One Room Challenge I completed DIY custom cornhole boards during Week 2, and plan to make some fun outdoor projects from wood pallets next week. Especially with the price of lumber right now, who doesn’t love free wood? Be sure to stay tuned!


Lindsey
Nothing makes me happier in the summer time than cafe lights draped around a patio
Emily
I agree! So glad we get to join the club now under the ambience of cafe lights.