Do you currently have a front door you don’t love, but are lacking the budget for a new wooden door (they can cost thousands!) Let me show you how to get the look you want for less with this step by step tutorial to create a faux wood look front door.
This is one of the first DIY projects I tackled after we closed on our fist home. Do you know that feeling when there is so much to do, you don’t know where to start? Unfortunately, that was me the first weekend in our new house. My husband left to golf (sound familiar?) and I had a to-do list a mile long swirling around in my head. Let me give you some advice – do a brain dump, organize it, give yourself reasonable deadlines, and go for it!

As soon as we moved in, I realized that the front door needed a transformation. It lacked personality and didn’t match the overall aesthetic of the house. I turned to the internet for inspiration and discovered the importance of a statement making front door.
After reading numerous posts, I stumbled upon an incredible front door makeover by Erica from Designing Vibes. She used a gel stain technique to create a faux wood grain look that instantly caught my attention.
The three-step process involved painting the door, applying a gel stain, and sealing it to ensure durability. It sounded like a project that I could handle, and I was excited to give my front door a brand new look. I gathered the necessary materials and started working on the transformation.
The first step was painting the door, which allowed me to create a blank canvas for the gel stain. I chose a neutral base color that complemented the exterior of the house. Once the paint had dried, I moved on to the most exciting part – applying the gel stain.
The gel stain was the magic ingredient that brought the faux wood look to life. It mimicked the texture and appearance of real wood, giving my front door a rich and elegant finish. I followed Erica’s detailed instructions, making sure to apply the stain evenly and let it dry completely between coats.
While the process wasn’t overly complicated, it did require some patience. Waiting for each layer to dry was the most time-consuming part, but it was well worth it. After several days of applying the gel stain and letting it cure, it was time to seal the door.
Sealing the door provided an added layer of protection and ensured that the finish would withstand the test of time. I opted for a high-quality sealant recommended by Erica, as it promised to provide long-lasting results. Applying the sealant was the final step in the process, and I eagerly waited for it to dry, eagerly anticipating the grand reveal.
Your front door not only sets the tone for your home, but is often the backdrop for many of life’s milestones. We recently had our first child, and hung this DIY baby birth announcement sign on our front door. I loved having the wood look front door I created to display such a sweet announcement.


For the holiday’s, I created a DIY Christmas swag wreath to display. The warm wood tones are the perfect backdrop to any holiday decoration, and ensure nothing clashes.
Let’s start with the complete supply list. Here’s what you’ll need:
Supplies to Create a Wood Look Front Door
-Clean rag
-Drop cloth and/or wet rag for inevitable paint spills
–Purdy Paint Brush and/or paint roller to paint door
-One quart of exterior flat paint in the color “Glazed Pecan” by Behr– you can get it color matched at any paint store (Lowe’s, Home Depot, Sherwin Williams, etc.)
-One quart of Minwax oil based gel stain in Walnut
–Chip brushes to apply gel stain
–Foam brush to apply sealer
-One quart of sealer- I used Minwax Water Based Helmsman Spar Urethane in a satin finish.
This post contains affiliate links for your convenience which may reward me in the event of a sale. Note that I only recommend tools and products I have personally used and loved.
STEP 1- Clean your front door
Using a damp rag, wipe off the dirt and grime that comes with time from your front door. We have a glass storm door that protects our front door so ours was not too dirty, but still an important step.
STEP 2: Prep for paint
Tape around any hardware on the front door you do not wish to or cannot remove. I wasn’t able to remove the metal knocker. It had been painted around before and was really stuck on there, so I taped around it and the door handle. You can also prep with a drop cloth if you prefer, or just get a wet rag for quick clean up of any splatter as you work.

STEP 3: Paint
Paint your front door Glazed Pecan. This is where trust comes in. This method is tried and true (look back at the finished product and have some faith). I was worried my new neighbors were going to think I was crazy with a front door this color orange, but figured it might be a good ice breaker?
Luckily it only stayed orange for a day until I applied the gel stain. Any time I paint doors I start painting the inside panels with a paint brush first, then roll the flat surfaces with a small paint roller. If you need more information on how to paint doors, check out all the other doors I have painted in our home.

STEP 4: Gel stain
Apply the gel stain once the paint is dry (I let mine dry over night just to be safe). I played around with different brushes and application techniques on an old door we had removed from our dining room to practice. You could use scrap wood or any other wooden material you have on hand.
I ended up preferring a chip brush to apply the gel stain. I felt I was able to get a more natural “wood grain” look than with a foam or paint brush. But remember, it’s your project! Try a few different tools and see what you like. I even tried out this faux finish paint graining tool It was neat but tedious, and I wasn’t sure how I would get it into the smaller grooves inside the door panels.
STEP 5: Second coat
Allow the gel stain to dry (I waited overnight), then apply a second coat if needed. Again, use your best judgement and go for the look you like! I did a light second coat in some areas, and darker in others.

STEP 6: Seal
Once the gel stain is dried and cured (I waited a week) apply your sealing coat to protect your door from the sun and elements. I applied the Minwax Water Based Helmsman Spar Urethane with a foam brush. Two coats is preferred, waiting overnight to ensure proper drying.

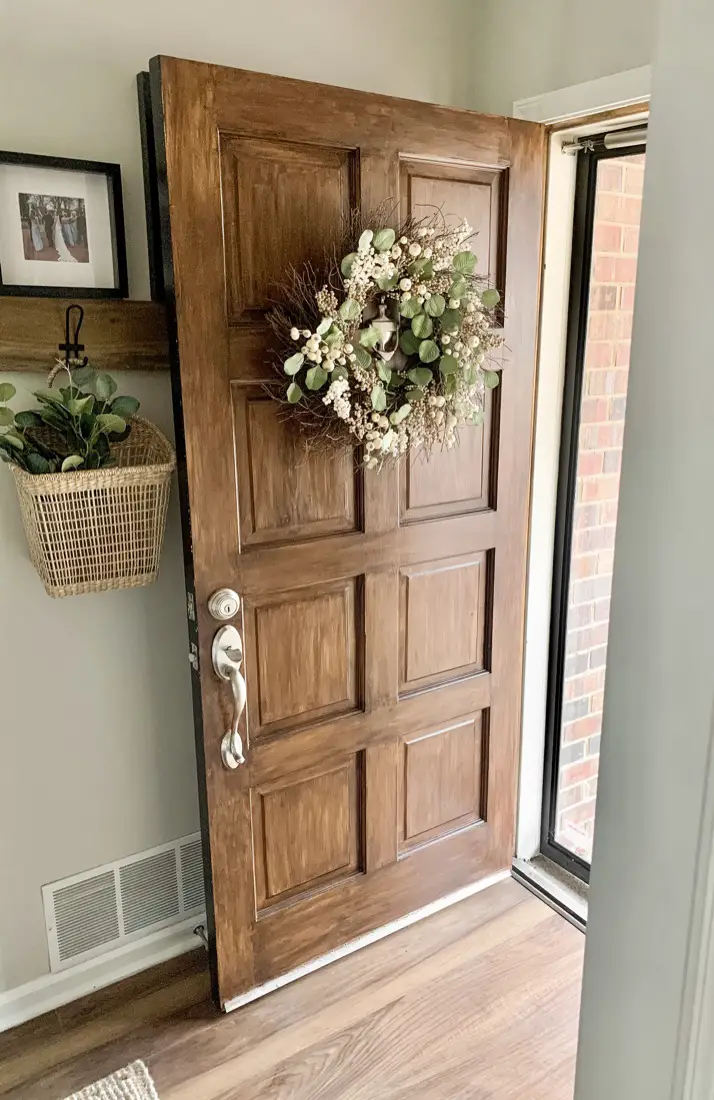
STEP 7: Enjoy Your New Wood Look Front Door
Sit back and enjoy the front door you’ve created! There is no feeling more satisfying. I enjoyed this look so much I ended up applying the same paint and gel stain technique to the posts in the front of my house, a neat front porch bench I bought second hand, and to create new, modern DIY house numbers (see tutorial here!).
Before

After

Enjoy the process,

Loved this “Wood Look” front door tutorial? Pin it here for later!

Looking to add more curb appeal? Check out these other projects that helped update the exterior of our home:
–Update Your Vinyl Shutters Easily with Spray Paint
–Paint Your Home’s Exterior Siding
–Hang String Lights Anywhere Using a DIY Potted Light Post Stand


