Learn how to paint your interior doors black with this step-by-step tutorial, complete with direct supply links for your convenience.
Painting a statement door might have one of the biggest impacts in your home- for just the price of paint! Black doors are definitely trending right now, but let’s hope they are here to stay. If not, it’s just paint! You can easily paint them again in the future if you change your mind.
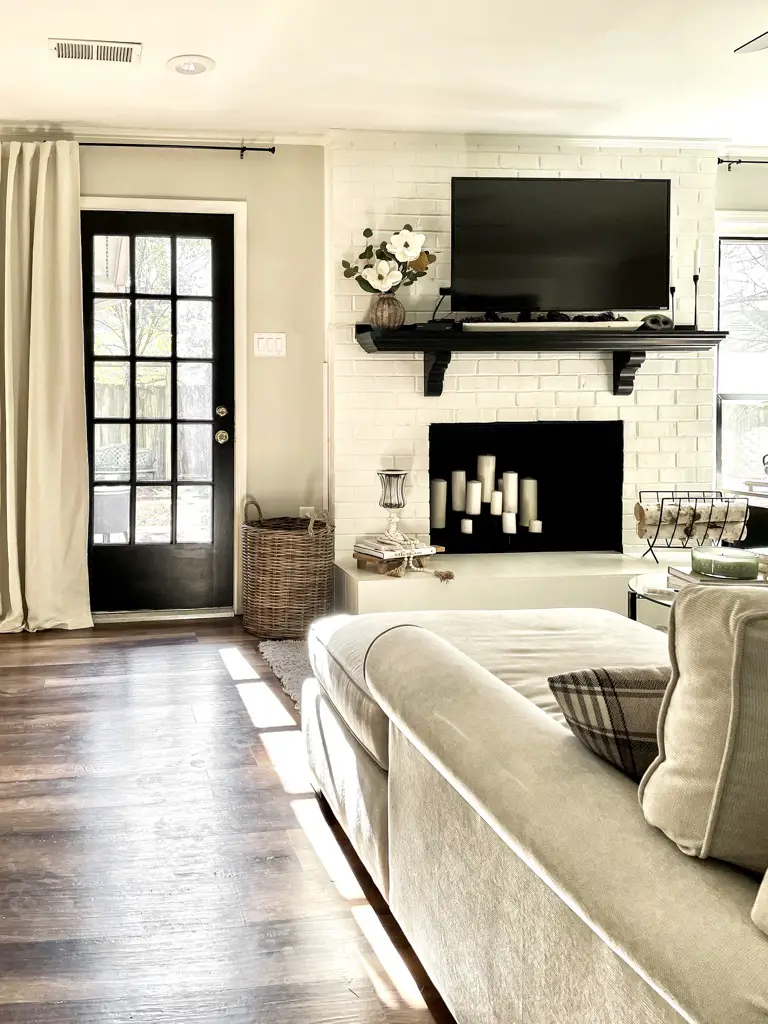
I was once given advice that the color every room needs is black. Painting your doors accomplishes that, while also adding contrast to almost any room. Although I didn’t end up painting all my interior doors black, I love the five I chose.
Read on to learn how to paint your interior doors black.


Supplies
-Rag to clean your door
-Drop cloth and/or wet rag for inevitable paint spills
-One quart of interior satin paint in the color Tricorn Black by Sherwin Williams- you can get it color matched at any paint store (Lowe’s, Home Depot, Sherwin Williams, etc.). Limousine Leather is a close alternative offered by Behr at Home Depot.
STEP 1: Start with a Clean Surface
Clean your door using a rag and a mix of 70% water to 30% white vinegar. Then check for oil based paint. You can check for oil based paint by using a cotton ball dipped in rubbing alcohol to wipe a small section on your. If the paint comes off, it is latex (or water based). If it doesn’t, it’s oil based.
Luckily my doors were previously painted with latex paint. If you discover yours was oil based, you will need to lightly sand your door with fine grit sandpaper to ensure the new primer and paint has something to stick to (so it won’t peel off later!)
STEP 2: Tape and prep
Before you begin painting, it’s essential to prepare the area properly. Start by laying a drop cloth to protect the surrounding surfaces from any stray paint splatters or drips. You may also want to use painters tape to cover handles and hinges, depending on your preference and how confident you are in your painting skills.
Taking the time to prep the area will not only prevent accidental spills and stains but also ensure that you have a clean and professional-looking finish. So, if you’re unsure about your ability to keep a steady hand or if you tend to be a bit messy while painting, it’s a good idea to take the extra step of using the drop cloth and painters tape.
Remember, everyone has their preferred method when it comes to painting, so feel free to experiment and find what works best for you. I prefer to wait until I accidentally drip or spill paint and then simply wipe it off. But ultimately, the choice to tape and prep is yours!
STEP 3: Prime
Once you’ve completed your prep work, it’s time to prime the door to ensure a smooth and even surface before painting.
I like to start by priming the interior panel boxes using the Purdy brush linked here, then move on to rolling the flat sections with primer.
Pro tip: Did you know that you can purchase tinted primer? This can be a game-changer, as it may reduce the number of coats of paint you need since you are using a dark paint color. Not only does this save you time, but it can also help you save money. Primer is generally cheaper than paint, making it a cost-effective choice. If you have multiple doors to paint, opting for a tinted primer could make a noticeable difference.

I have also made my own tinted primer in the past! When I first used a paint sprayer for my garage remodel, I tinted my own primer. It worked great! You can read more about it here.
To delve deeper into the world of painting, check out my Paint 101 post to find a wealth of insider tips and tricks that can elevate your painting game. From choosing the right materials to understanding different paint finishes, it’s a comprehensive guide that can help you achieve professional-looking results.
Remember, patience and attention to detail are key when painting doors (or any other surface)! Take your time, follow the proper steps, and don’t skip the tedious parts like priming.

Not sure about black? I’m also loving the trend of contrast trim and doors in a different shade. I went green in our gender neutral nursery, and it did not disappoint! Check out this post to see more of the contrasting trim+doors option here using Sherwin Williams color of the year.
Did you paint your doors black? I’d love to see!
Enjoy the process,
STEP 4: Paint
After you have finished priming, it’s time to paint. Make sure you allow plenty of dry time in between not only coats of primer, but also before you start painting.
When it comes to painting, the color you choose can make all the difference. And when it comes to black, finding the perfect shade can daunting. I’ve been here before though, and I know I will make the right choice. I have a foolproof step by step paint sampling process that hasn’t failed me yet! I have painted not only every interior wall of our Riverdale Ranch, but also trim, doors, furniture and exterior.
Allow me to introduce you to Tricorn Black by Sherwin Williams. Unlike other black shades that may have undesirable undertones, Tricorn Black stands out for its flawless neutrality.
This black will add depth and dimension to any space, making it perfect for creating a statement. The best part? Tricorn Black pairs beautifully with any other color, allowing you to unleash your creativity and explore endless design possibilities.

Black is bold but don’t be scared, it’s just paint. It will pop and look great. Follow the same steps to paint your door Tricorn Black as you did with the primer- using the brush to paint the interior box panels first, then the roller to paint all the flat parts.
STEP 5: Second coat
Paint a second coat if needed after the first is completely dry. Mine needed a complete second coat since I used white primer, and even a third coat to touch up in some places.

I chose to paint the back of both the front door and the entry door from the garage, the French door in our living room, our coat closet door and the door at the end of the hallway. I love how it draws the eye down the space and gives attention to an area I found challenging to decorate.

Enjoyed this post? Pin it for later here!


