Learn how to quickly and inexpensively paint your unfinished garage walls using a paint sprayer. The power of paint never ceases to amaze me. Read on for the supply list and step by step tutorial.
I’m not sure how common unfinished garages are, but our entire garage was added on in different phases since our home was originally built in 1979. Once a carport, the previous owners enclosed a 2 car garage. Then, a third car garage space was added onto the back, complete with cabinets and space to serve as a workshop. Although it was all up to code, it’s the bare minimum. The concrete floors are grooved and rough. The walls are just unfinished studs. And the cabinets are unfinished wood.

After I took the time to reorganize the entire garage, I wanted the aesthetic to match. Although nothing was functionally wrong with the space, the unfinished walls were a bit of an eye sore. I thought about installing drywall and that was a valid option. But I wanted to see if I could do something even cheaper and faster. I also enjoyed the ease of storage between the studs for leftover trim, pallet wood, etc. Drywall would have eliminated all the between the studs storage. To keep the storage and studs easily accessible for hanging heavy items, I decided to just paint the studs, no drywall necessary.

Don’t have time to read the whole post now? Pin it here to safely save it for later 🙂

Up to this point in my DIY journey, I have managed to get by doing all of these painting projects by hand with brushes and rollers:
However, these unfinished wooden walls were rough, and I was finally faced with a project that would require a paint sprayer.
This post contains affiliate links for your convenience which may reward me in the event of a sale. Note that I only recommend tools and products I have personally used and loved.
Supply List to Paint Unfinished Garage Walls
-Bucket of water
-Handheld scrub brush
-Extension Cord
-Mask (nose and mouth protection)
-Goggles (eye protection)
-Paint
STEP 1: Clean
If I was prepping to paint any other room, I would taken cleaning more seriously. But since this was the garage, I did the bare minimum. When I painted my exterior, I power washed the siding first. But in this case, I didn’t want the mess or to wait for the wood to dry. I chose to use a slightly damp, heavy duty brush and scrub down the surfaces. I removed dirt, dust, dead bugs and lots and lots of spider webs. But I definitely didn’t achieve a surface anywhere near clean enough to eat off of. More or less clean and ready for paint. At the end of the day, you want the primer and paint to stick to the wood, and not the dirt and dust on top of it.

STEP 2: Hang Plastic
This step is the very reason it took me so long to buy and use a paint sprayer. Traditionally, I do very little paint prep. I like to cut in by hand and rarely tape off the edges. I prefer to spend a bit more time painting than prepping. But I knew I would have to spend significant time prepping on the front end with a paint sprayer, and was dreading it. I bought a 12 pack of plastic drop cloth sheets, and used painter’s tape to hang them.


The more I DIY, the more I find I’m less worried about doing everything the “right” way, and more interested in getting things done in whatever manner works for me. So there may be a “correct”, more official way to have the drop cloths, but this worked just fine for me. The only challenge was the dirt and dust on the floor and above the cabinets despite a recent shop vac and sweeping session. The painters tape did not want to stick to these surfaces, and I had to do a bit more cleaning first.
STEP 3: Prime
It’s time to break the paint sprayer out of the box and put it to use. I could explain how to use it, but it’s tedious and personally I found it easier to watch videos than to read about it. I watched a series of YouTube videos created by Graco to make sure I understood the basics.

I chose to prime the walls first to seal in any stains and weatherproof. Primer is also cheaper than paint, so prepping the walls with white primer saves on coats of paint. I heard paint sprayers use a lot of paint, but I still had no idea just how much I would go through. I needed to re-fill the small paint bag after every 2-3 mins of use. This was by far the most tedious part of the process.
I have recommended tinted primer in the past if you are going to using a dark paint color on top of it. I was planning on using Sherwin Williams Cyber Space on one wall and on the workshop cabinets, so using tinted primer would cut down on the number of coats of paint. However, I purchased a large 3 gallon bucket of Primer, and needed most of it white so I didn’t want to tint the whole thing. I used a bit of Cyber Space navy paint to mix in the white primer and tinted it myself.

The electrical cord the paint sprayer comes with is extremely short. This is where the extension cord comes in. It’s necessary in order to complete the job quickly and efficiently.

Before beginning, be sure and wear your personal protective equipment. There will be some overspray, so make sure and cover your nose, mouth and eyes. I also covered my hair. By the end of the day, any exposed skin was covered in a thin sheen of fine paint splatter, so keep this in mind. I’ve seen people zip up in paint suits before, which may be necessary if you don’t want to get any paint on you at all.
STEP 5: Paint
I chose the Graco 360 paint sprayer because you don’t have to thin your paint, thus saving time. To paint, hold the gun about 10 inches from your wall and keep moving at a consistent pace. Allow your spray to go beyond the wall to the top and bottom provides the best and most even coverage, rather than trying to stop right at the top, or right at the floor.

If you are too close, the paint will be applied too thick and will drip and run. If you are too far away, you will get airy coverage, and mostly paint the air.
My walls were looking good after 2 coats, and nearly perfect after I touched up with a third! I primed and painted on a warm spring day with the garage doors open, so the primer and paint dried quickly. Once I was finished with the paint sprayer, I again watched a YouTube video by Graco to ensure I cleaned everything properly. Honestly, cleaning it was a huge hassle. I missed the days of just rinsing one or two paint brushes.
After I had done all I could do with the paint sprayer, I used a smaller paint brush to touch up any spots I was unable to avhieve good coverage with the sprayer. Take one last glance over everything, and make sure you are happy with how it looks.

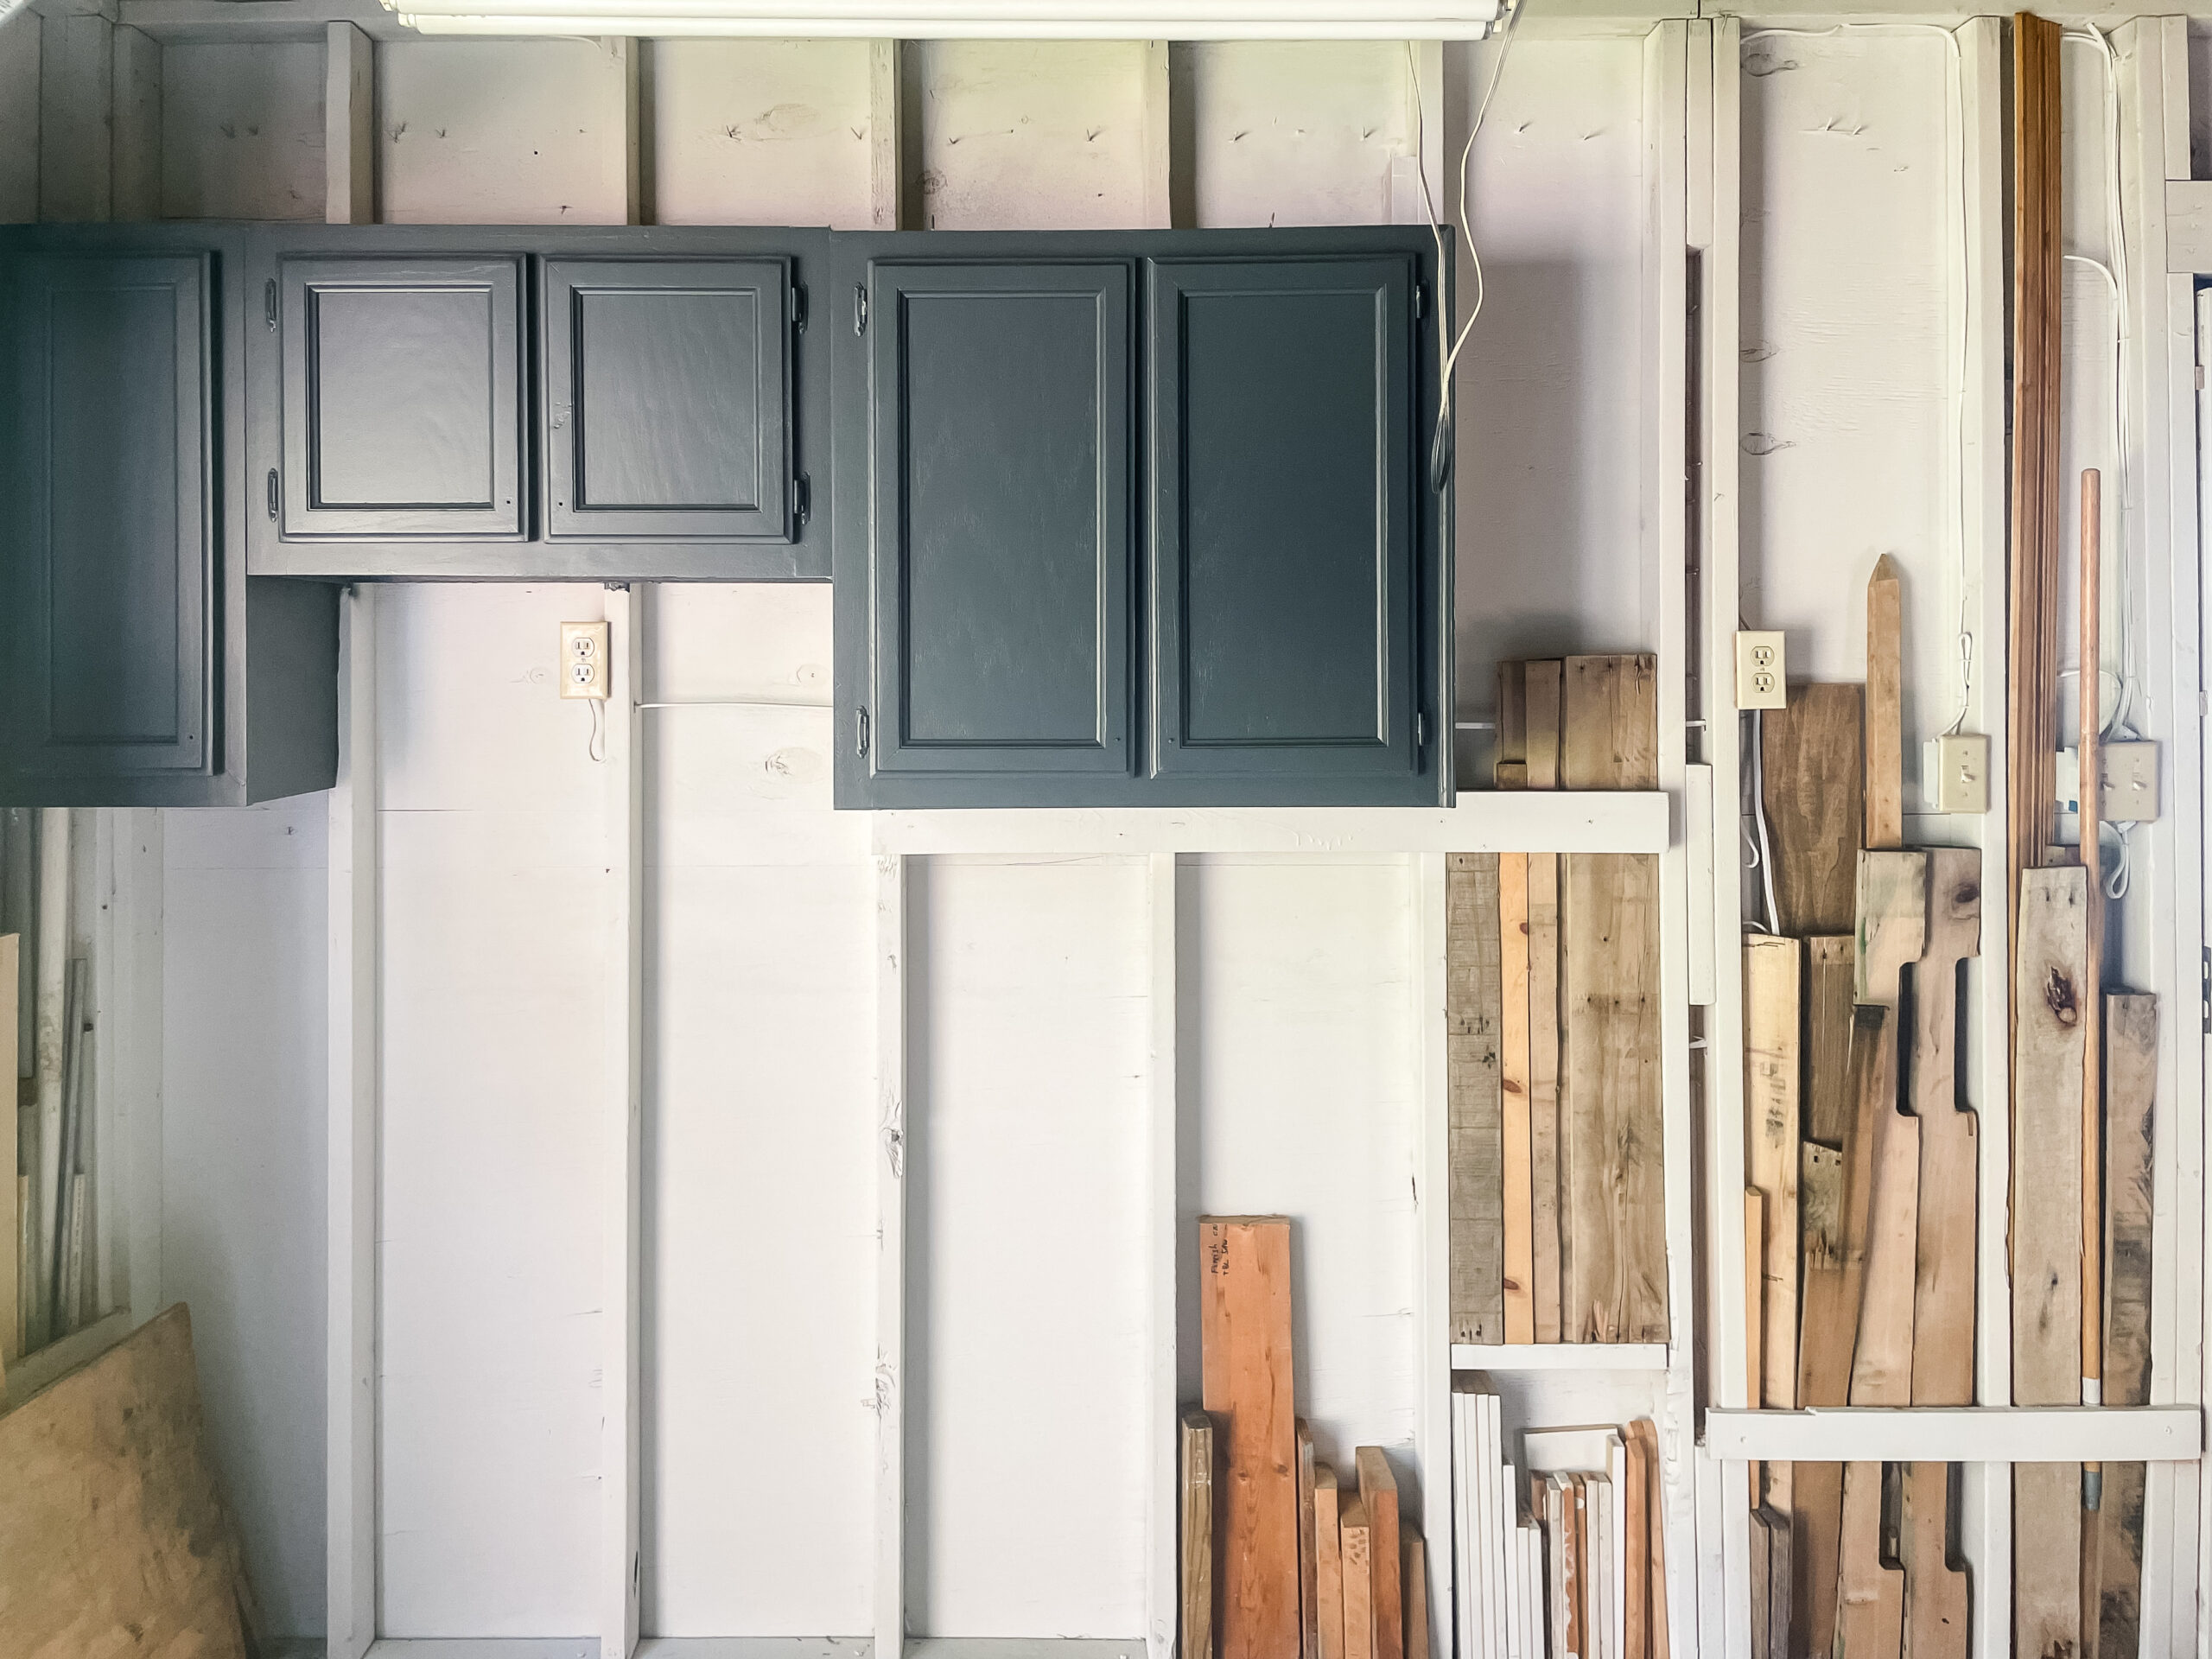
The photo above is a great example of the finish a paint sprayer can provide vs. painting by hand with a brush. This was the first coat of tinted primer I applied to the cabinets (white primer, tinted with Cyber Space navy paint). The bottom cabinets were primed using the paint sprayer. Unfortunately, I was running low on primer, and didn’t have enough to fill the paint pail for the sprayer to finish the top cabinets. I used what littler tinted primer I had left and used a brush by hand. Thats just one coat on both the bottom and top cabinets, but you can see how much more even the paint sprayed cabinets look, with much better coverage.

I am definitely a fan of the paint sprayer now, and think it is a great addition to my DIY toolbox. It was a perfect solution to refresh these garage studs, while lightening and brightening the space. I can’t wait to finish this garage space and see the finished product.


