A step-by-step tutorial to teach you how to create DIY marbled Christmas ornaments using nail polish! Affordable, quick, and so easy. This would be a great family friendly craft this holiday season.
Christmas looks a little bit different ever since we rescued our cat son Oliver. Unfortunately, Christmas tree climbing is one of his favorite activities despite our efforts to deter him (please let me know if you have any good solutions). With this in mind, so many of my “nice” or meaningful glass ornaments never make it out of the box and onto the tree. I’m always looking for pretty, shatterproof alternates.
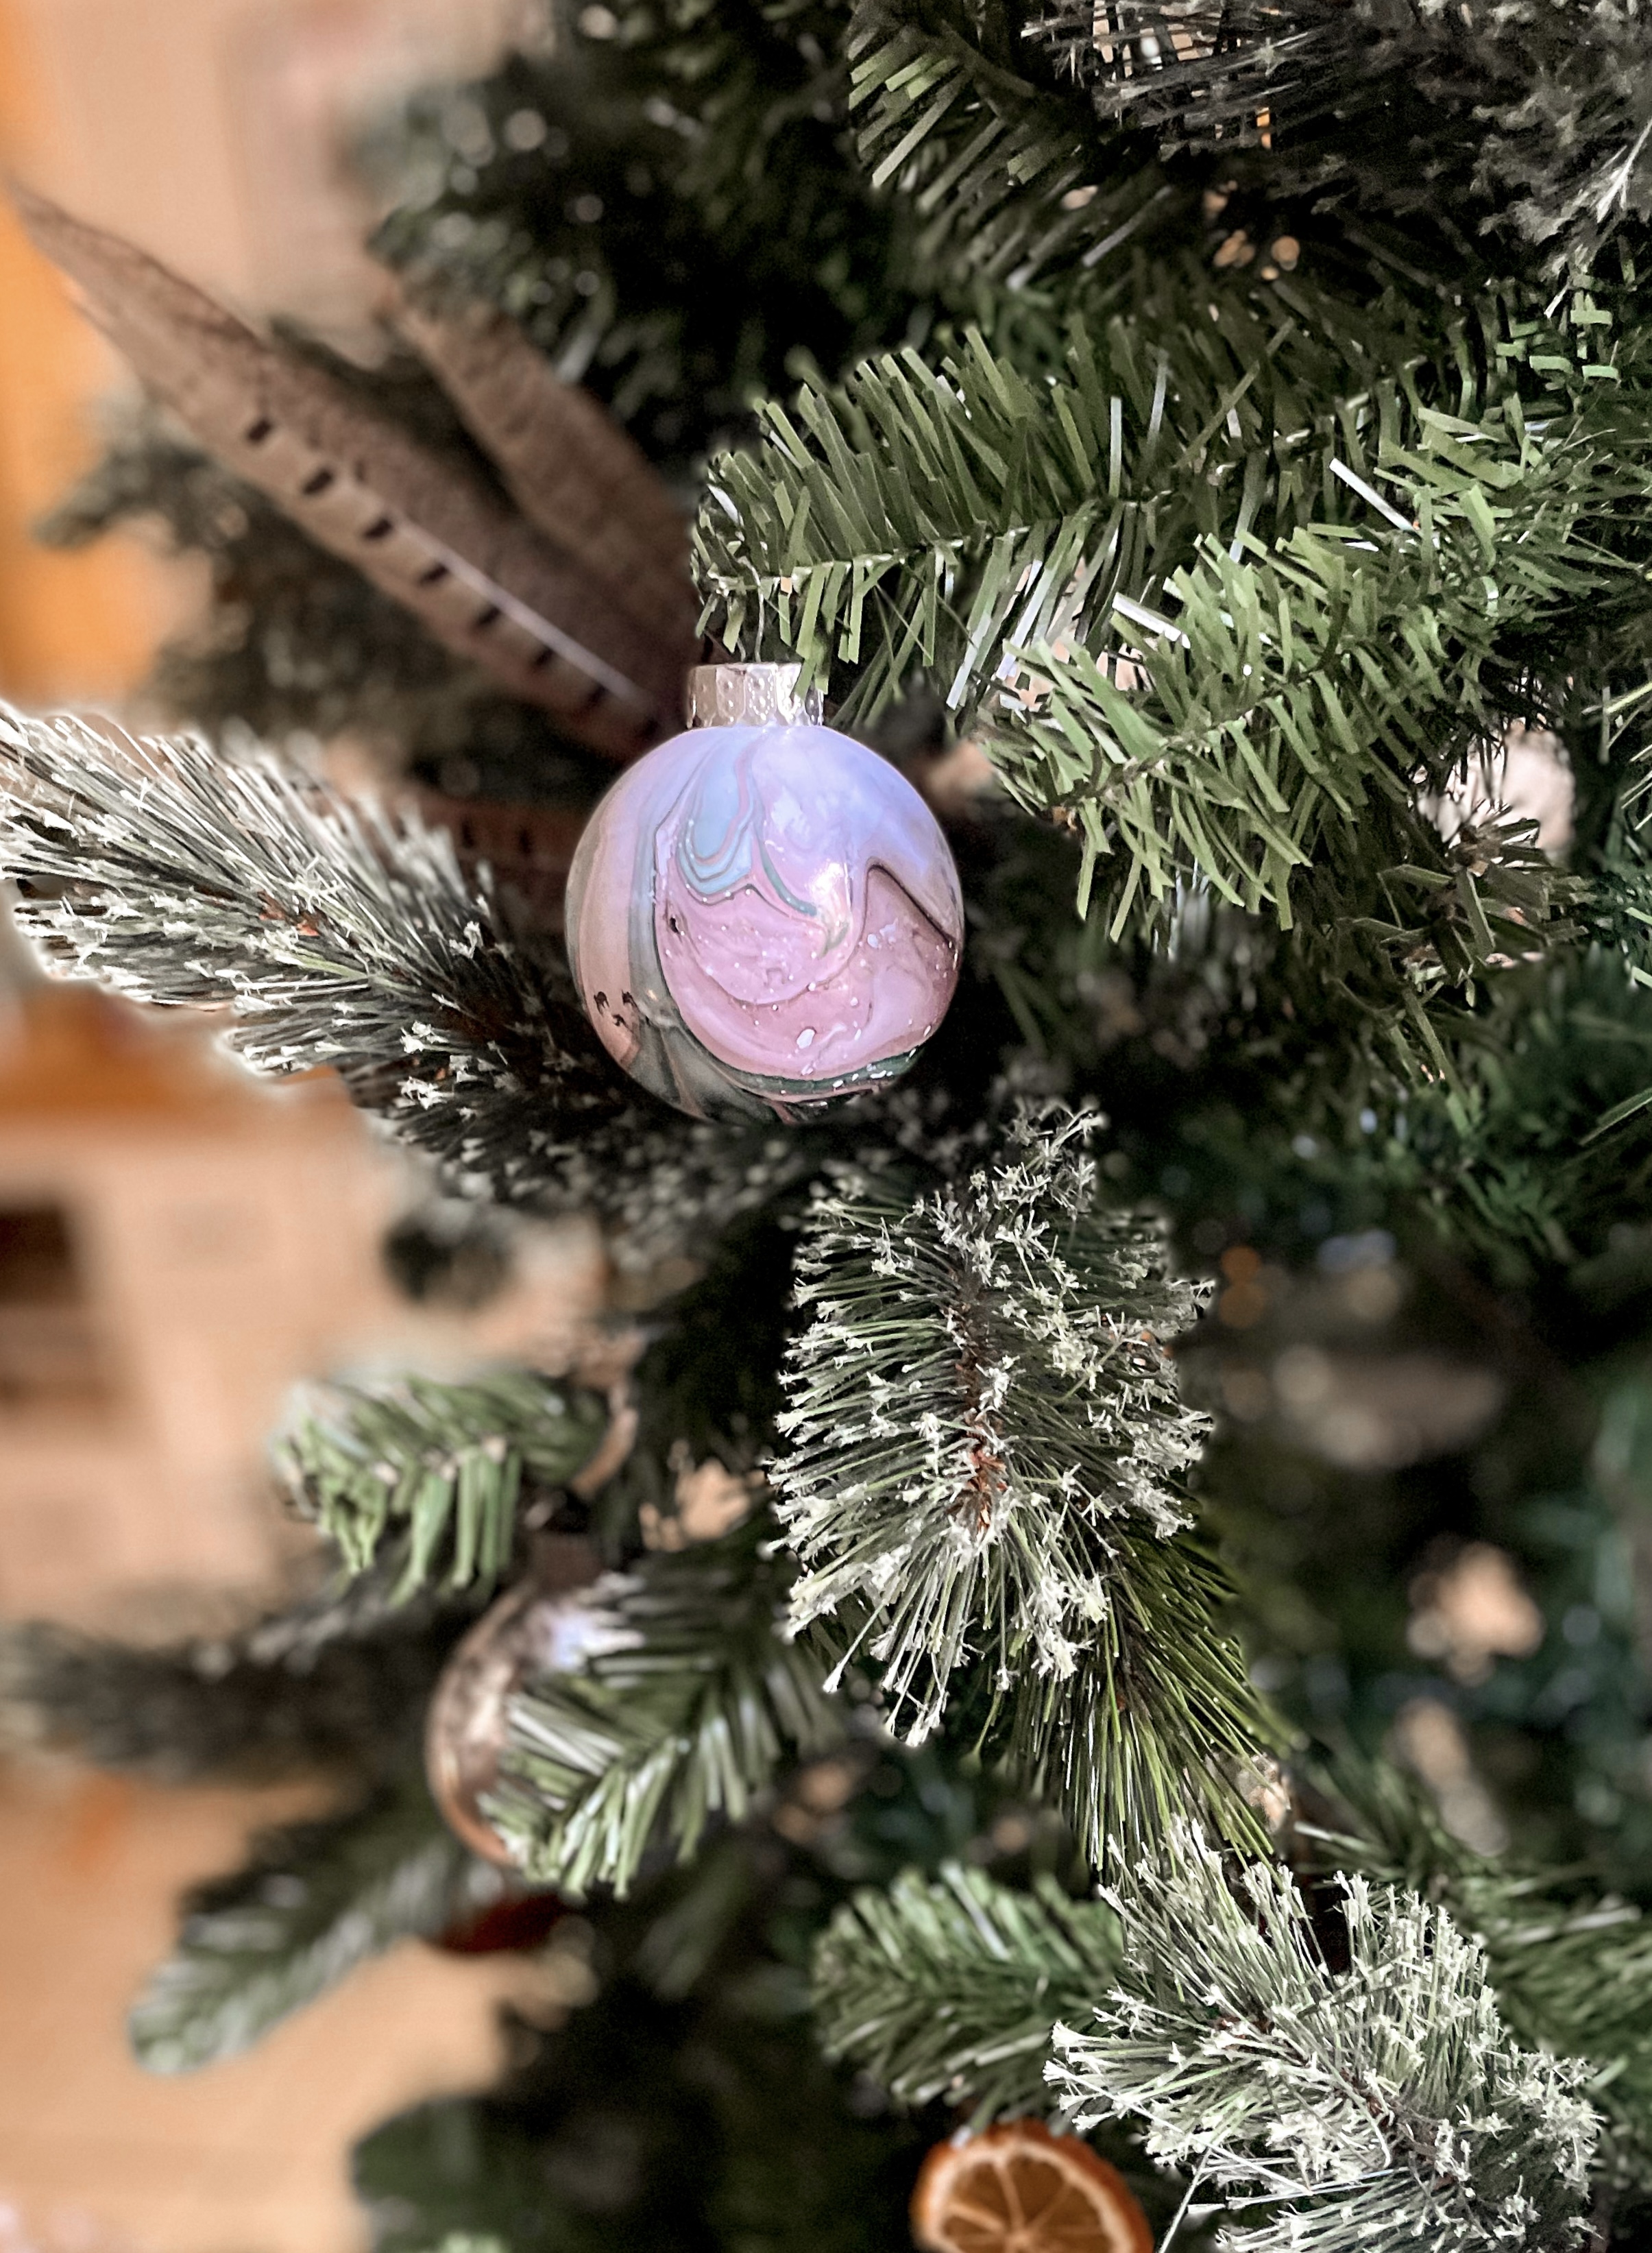
This year, I decided to DIY marbled Christmas ornaments and they turned out so well! Cheap and easy is always my goal, and these ornaments fit the bill. I’ll share the exact supplies I used, as well as the step by step tutorial so you can make your own.

This post contains affiliate links for your convenience which may reward me in the event of a sale. Note that I only recommend tools and products I have personally used and loved.
SUPPLIES TO CREATE DIY MARBLED CHRISTMAS ORNAMENTS
-White shatterproof Dollar Tree Ornaments
-A wide mouthed mug
-Water
-Various colors of nail polish
-Toothpicks
-Solo Cups (1 per ornament)
-Paper towels
-Acetone

STEP 1: Prep
Get your work station ready. First, cut slits in the top of your solo cups large enough that you can push the ornaments through to hold them while they dry.

Next, fill your wide mouth mug with water deep enough that you will be able to completely submerge your ornament. *Note: This is where I made my first mistake! The bowl pictured below was not deep enough for me to fully submerge the ornament, and you’ll see what happened. I found using a deep and large mug was best.

STEP 2: Pour the Nailpolish
Pour drops of your nail polish colors into the water. In my experience, the polishes did not mix. So I think you could easily use 2-3 different colors. I used old nail polishes I already had on hand in bronze and green.
Once you’ve poured the nail polish into the water, use your toothpick to stir the colors into a marbled, swirled pattern. There is no science to this, and you can’t mess it up so don’t overthink it.

STEP 3: Dip your Ornament
Next, you will dip your ornament into the water. The photos below are from my first mistake! I dipped them into the bowl I started out with, and you can see it was only deep enough to submerge half the ornament.


I tried to modify my mistake by dipping the other half, and it looked bad. It didn’t blend well, and had a stark contrast line between the two dips. But it’s ok, you live and you learn! And these ornaments were only $1 for a two pack. So I’m happy for you to learn from my mistakes.
This is when I switched to the deep and wide mug, and fully submerged the ornament. You can see the polish created such a pretty marbling effect!

As you continue, I also noticed that the nail polish was only good for one, maybe two ornament dips. Then I would recommend adding more nail polish to the water, and re-swirling it. That way you have plenty of color and fresh patterns each time.
STEP 4: Dry
After the ornament was dipped, I placed it bottom up into the slit I had cut in the solo cup to dry. Similar to how I made my DIY Vintage Mercury Glass Ornaments, you could use a hair dryer to speed up the drying process.

If you prefer to watch this process in real time, I made an Instagram reel to show the project as well!
STEP 5: Clean up
I used ceramic dishes I use daily for this project, so it was important everything got cleaned up well. I used Acetone on a cotton swab to wipe any surface that had nail polish on it, then ran it through the dishwasher. Good as new!

Enjoy your new DIY Marbled Christmas Ornaments!
These were so quick and easy, so I’ve had time to craft a few other holiday projects this year, including:
- DIY Christmas Swag Wreath
- Dried Oranges
- DIY Christmas Cards (for less than 50 cents a card!)
- Hosting a holiday wine party
- DIY Vintage Mercury Glass Ornaments
What do you think? I hope you feel this is a great shatterproof DIY alternative to more expensive, store bought versions.


