HOW TO UPDATE A VINTAGE CANE SIDE TABLE AND STYLE IT INTO A GLAM BAR CART.
This post combines two of my favorite things- vintage cane and bar carts! A bar cart is always a functional accessory that can be used to organize pretty glassware, wine and spirits. They can go in any room, but I had the perfect wall for one between two windows in my dining room. Read on to learn how I turned a $25 vintage side table from OfferUp (I negotiated $5 off :)) into a bar cart that matches my DIY refinished second hand dining room table and chairs!
Turn this… into THIS!


This post contains affiliate links for your convenience which may reward me in the event of a sale. Note that I only recommend tools and products I have personally used and loved.
Supplies
-Rag to clean the surface of your furniture
-70% water, 30% white vinegar solution for cleaning
–Howard Chalk-Tique powder additive
-Interior WATER based (latex) paint in your color of choice, finish does not matter. I used the color Asiago by Valspar
-Water
-Liquid measuring cup
-Paint brush- you have options. You can use a chalk paint brush, regular paint brush, or this Zibra paint brush (I have one in my Amazon cart now, I will let you know if I try it!)
-Damp cloth
-Drop cloth
–Paste Finishing Wax in the color “Natural”
STEP 1: Clean the surface of your table
As far as prep work goes, all that is required is to clean the surface of your furniture before applying the chalk style paint- I used a 70% water, 30% white vinegar solution to wipe my vintage cane side table down. The goal is to remove any dirt, grease, or substance that will affect the quality of paint application. You can sand the surface if you want, but it is not necessary. The general recommendation is if your piece is not smooth to the touch (think old wood, chipped paint, etc.) you may want to sand it so the surface feels smooth before applying paint.

STEP 2: Chalk Paint
Once your table is clean and smooth, its time to mix up your chalk style paint. See my post here to read details on how to mix this Howard Chalk-Tique powder additive into latex paint to create a custom, affordable chalk style paint. I’ve also used this product on my:
-Side table
-Bathroom vanity
Once your chalk style paint is mixed, you’re ready to paint! Using your brush of choice, begin painting. The chalk style paint is thicker and has more texture than typical interior latex paint. Brush strokes are visible when the paint is wet on the first coat. If you plan on a second coat (which I recommend), don’t worry about your brush strokes.
After the first coat dried (dry time is much quicker than typical latex paint as well), I painted a second coat on the wood parts of the vintage side table, I left the cane natural. After the second coat, my brush strokes disappeared and I got opaque coverage.

STEP 3: Antiquing Wax
I wrote about this product in a previous post outlining how I refinished my dining room table with Liming and Antiquing Wax (see the HUGE transformation here!). However, the way I finished this vintage bar cart is my preferred method to use the Antiquing Wax. It works so well over chalk paint and in my opinion can mimic a real wood finish over a painted surface. To use this product, I like applying it over white chalk paint. A little goes a long way, so get a small amount on the bristles of your chip brush and work it into the surface using long strokes. It dries in a minute or two, so it’s important to work in small sections. Work it in with the brush until you have a look and texture you like. I sometimes do a second coat in places once the first coat is fully dried.

I chose to leave the base of the table white chalk painted, and only applied the Antiquing Wax to the top part. The cane warms up the bottom while balancing and playing off the wood tones I added with the Antiquing Wax on top.
STEP 4: Seal
After the Antiquing Wax has dried, it’s time to seal your table with the Paste Finishing Wax in the color “Natural”. Note that a wax sealer does not provide the same “hard” finish as poly, but it still protects from scuffs, stains and scratches with a softer finish that feels smooth and resists water. After lots of research, it is my preferred finishing method. Numerous sources warn against the use of products such as polyurethane because they can cause white chalk painted surfaces to yellow over time or experience bleed-through of the wood stain underneath.
To apply the finishing wax, place a small ball of wax inside a thin clean cloth (such as cheese cloth). As you start to work the product into the furniture, the wax warms up and will work through the cloth. This is the recommended technique and allows for a thin, even coat of wax to protect your piece.
STEP 5: Decorate
Now for the hard part… I would much rather do the work to refinish a vintage piece than decorate! This part does not come easy to me. For inspiration, I always turn to Pinterest for ideas (see my bar cart inspiration board here!). I might not possess the ability to decorate something myself, but I know what I like and can re-create something all day long.
Something I feel is important is using personal, meaningful decor items when styling. It is so easy to go to Target and Home Goods and buy all the latest decor, but ultimately these are just pretty space fillers. They don’t spark joy, and I personally like for my house and everything in it to bring me joy.
“Simplicity is about subtracting the obvious and adding the meaningful.”
-John Maeda

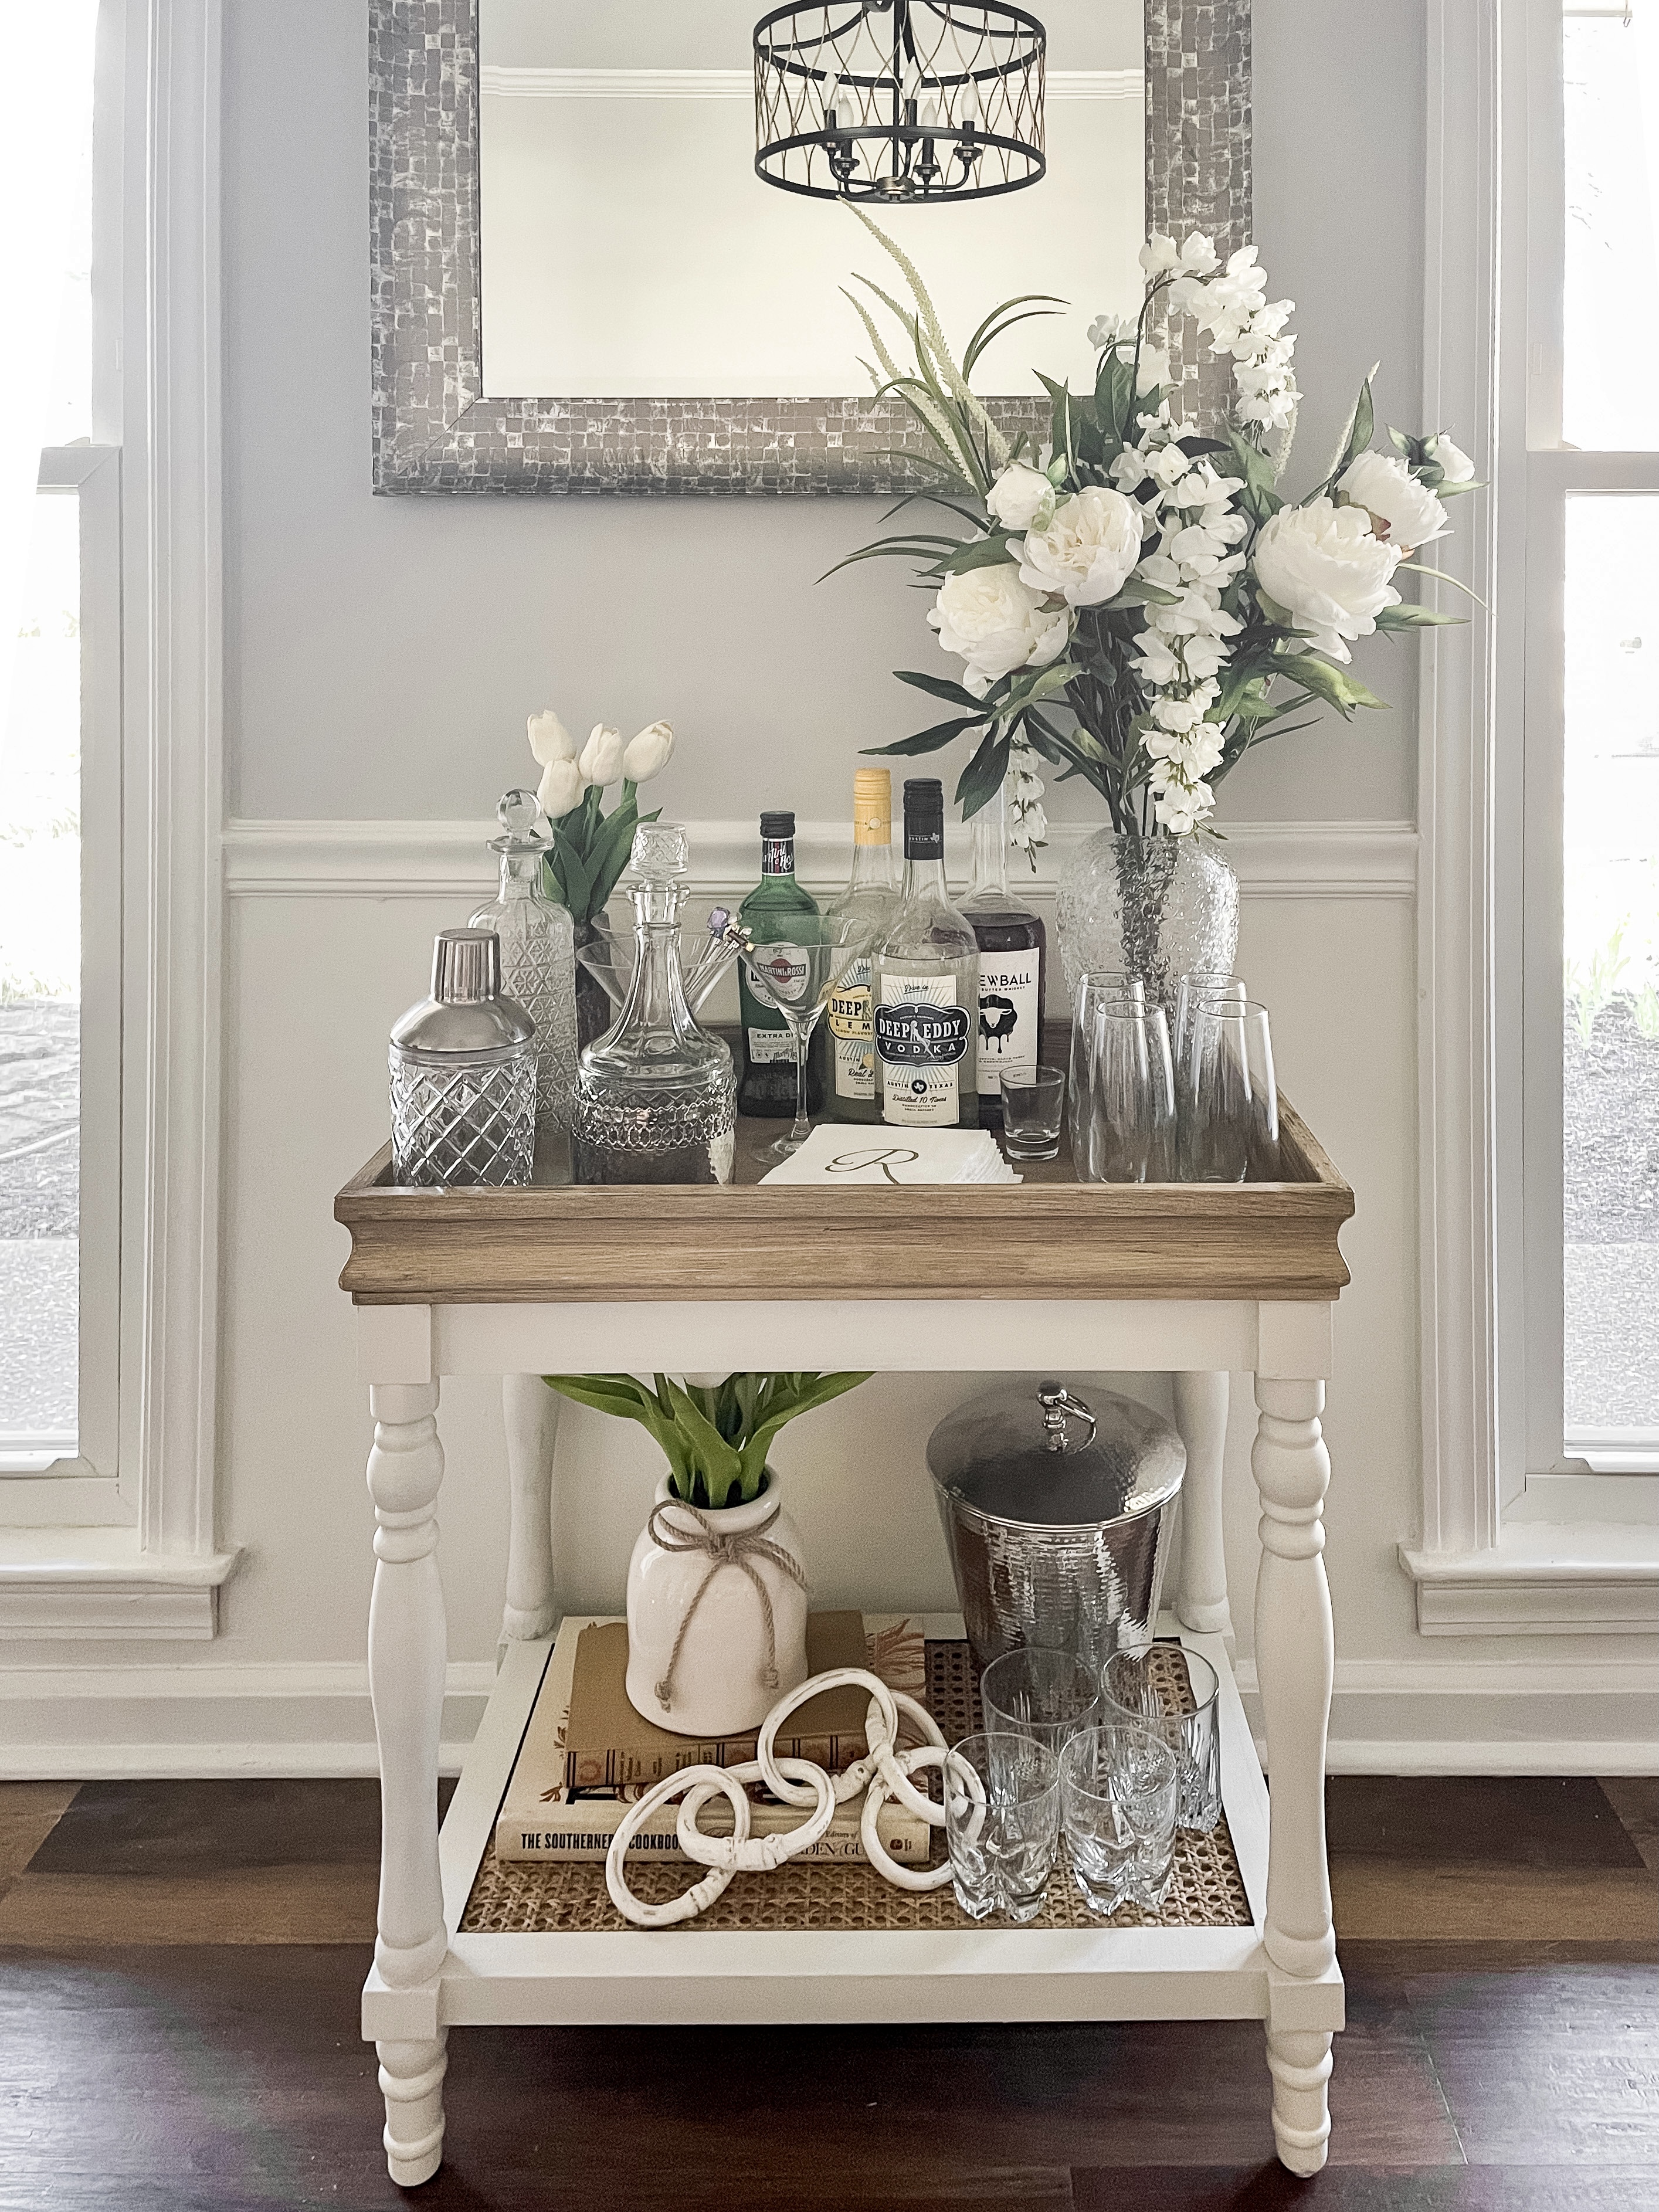
My bar cart decor consists of a seasonal piece or two that I rotate (small refreshes that change with the season bring me joy), necessities, and meaningful items like the piece of McCarty pottery my husband’s Nana bought me or the corks from some of my favorite bottles of wine. As far as necessities go, I think a glass shaker, set of bar tools, a variety of glassware and alcohol is a must. Most of these items were gifted to us from our wedding registry (you can shop here– don’t forget to hit the red “follow” button so you never miss a post to shop our Riverdale Ranch on LTK.it).
I’ve recently found some beautiful glass decanters at thrift stores and estate sales. You can read about how to find an eye for thrift here. And finally, an ice bucket and some decorative cocktail napkins add a nice touch.


What do you think about this $25 glow up? Don’t be afraid to see beyond the imperfections of something to the potential it has to not only fit in your space, but standout!


