Learn the best Christmas card display and storage hack! Stay with me as I walk you through this step-by-step tutorial to help you execute with ease.
I love making our Christmas cards every year. I always go with a face-in-hole theme, and for over 5 years had physically cut & paste photos out to make them. However as our circle expanded and we got older, I kept the same idea but used Canva to digitally create them instead. This has been a huge time saver. This year, I made mullet Christmas cards. Business in the front, party in the back.
If you are looking for more information (or inspiration) for Christmas card designs, you can find my complete tutorial here. Otherwise, let’s get into the reason you are here. Learning my favorite Christmas card display and storage hack.
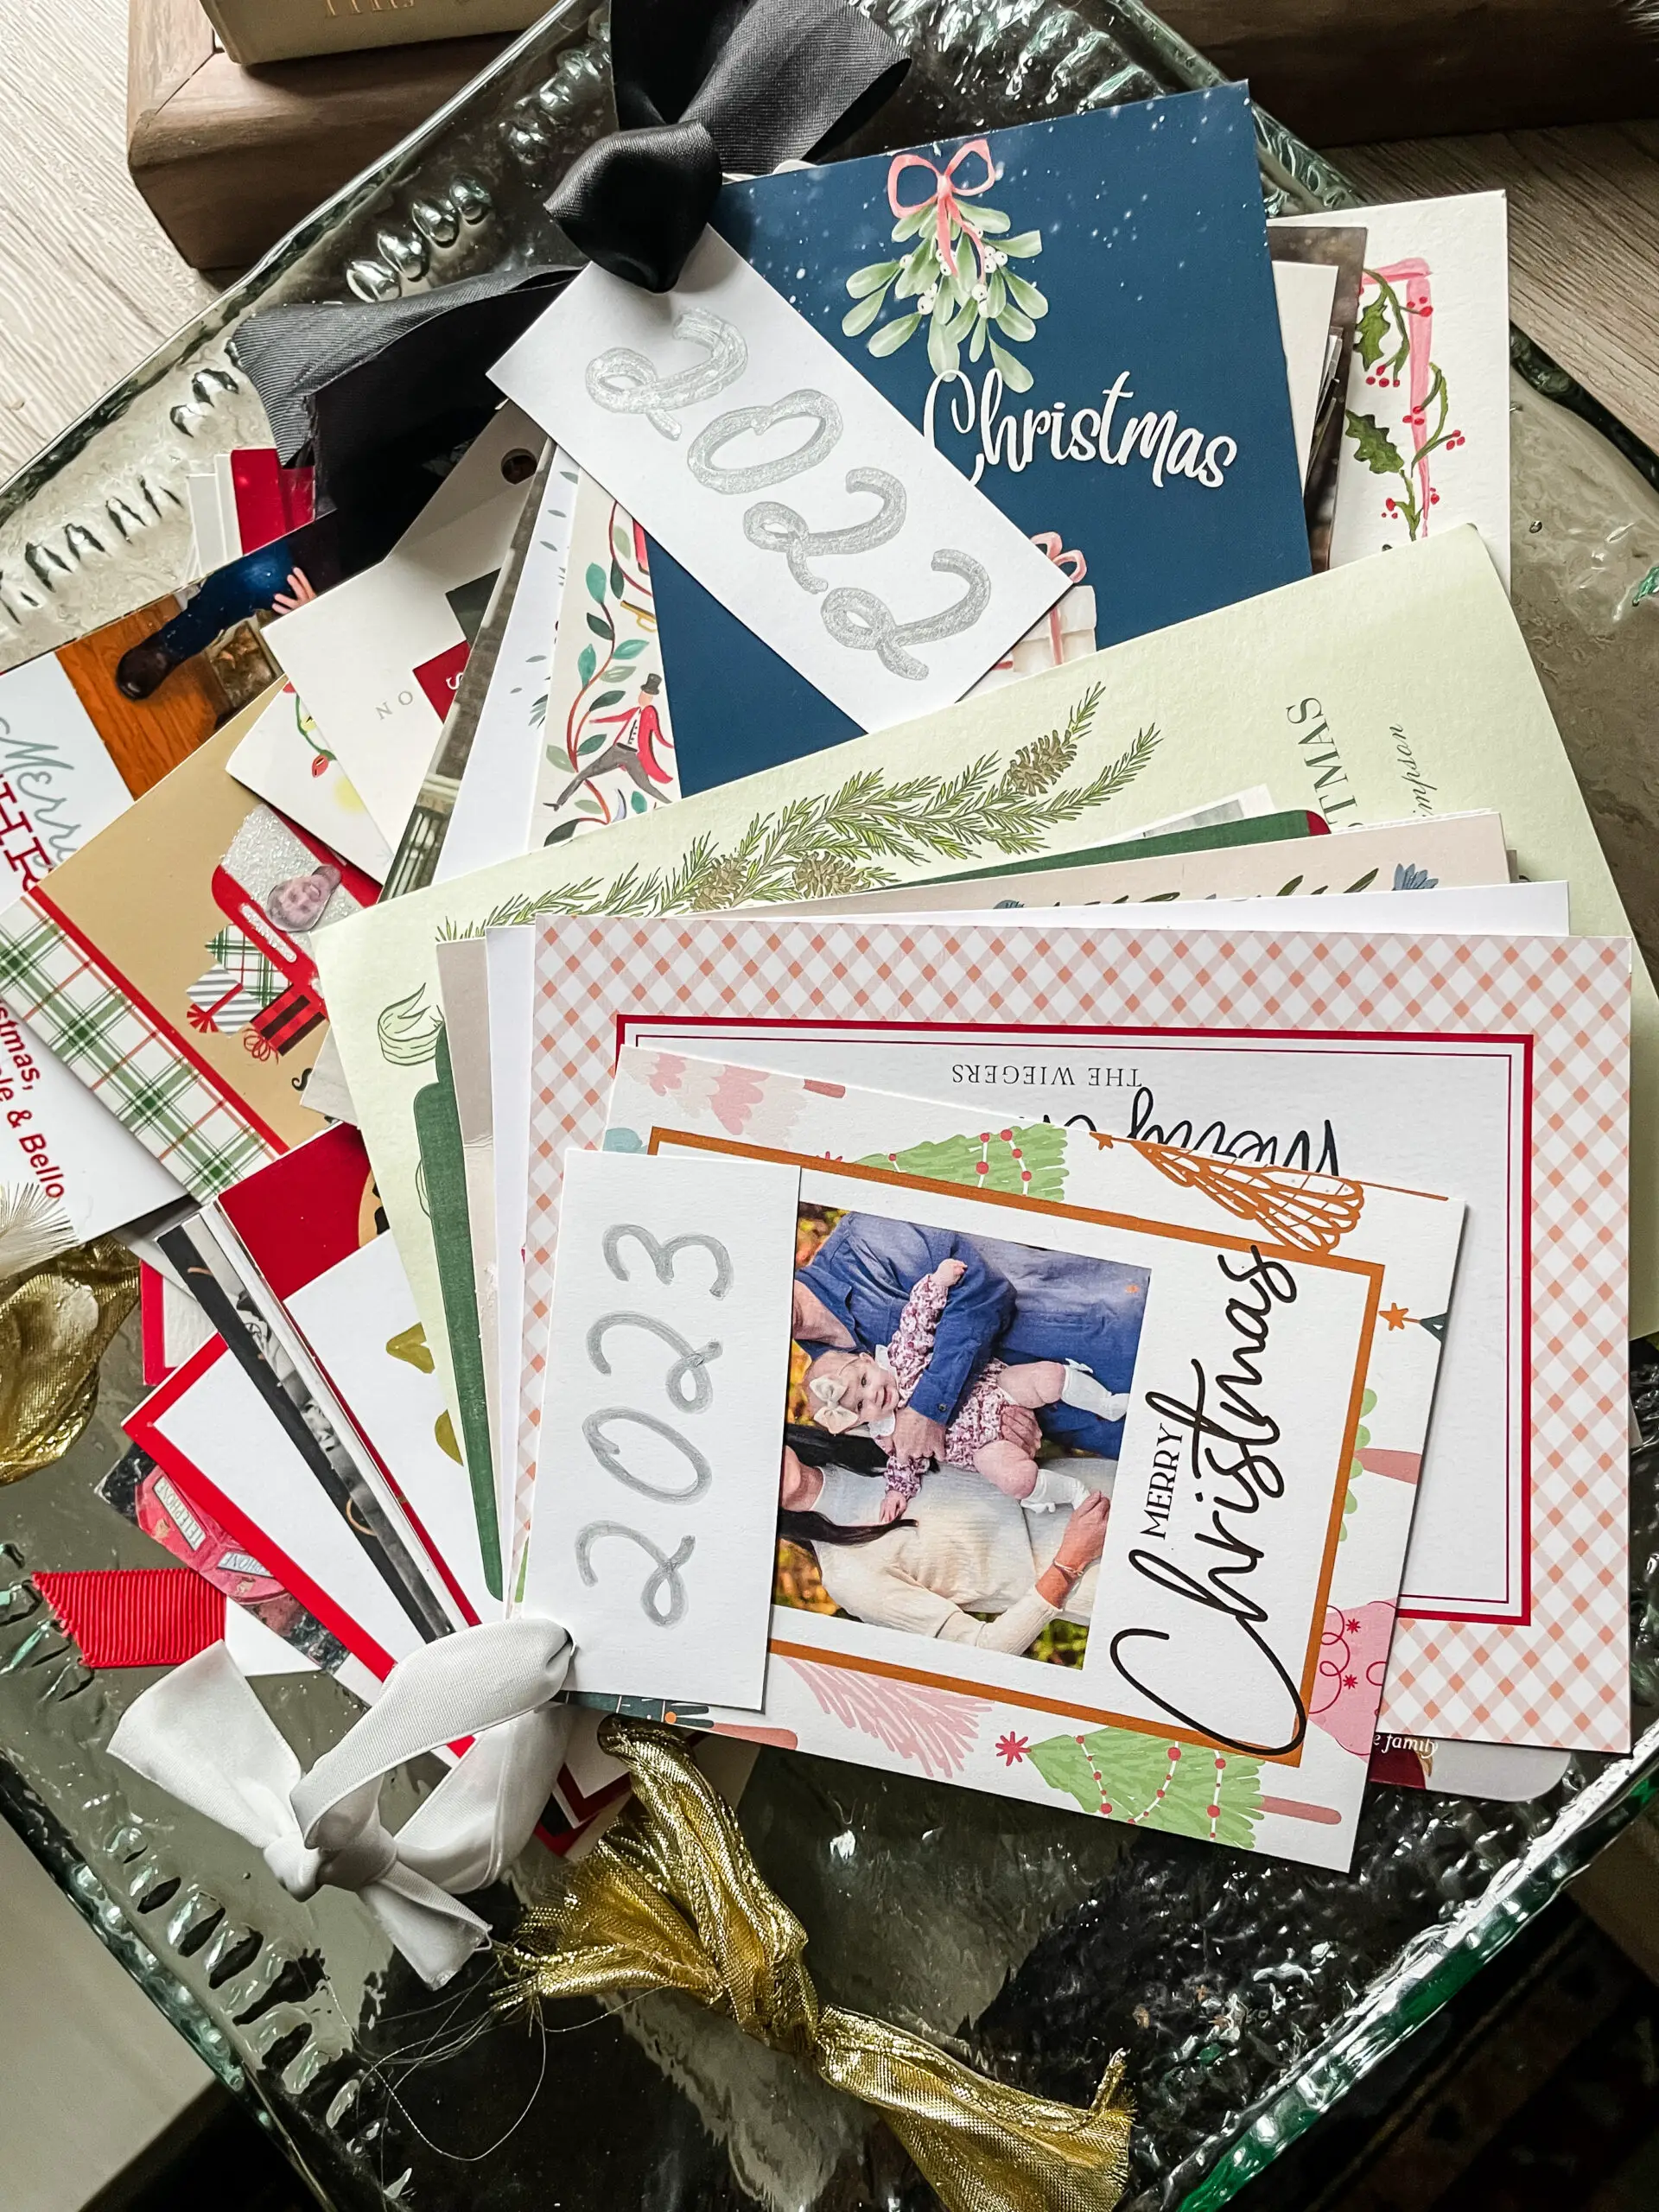
Since 2017, I have kept every Christmas card we have received. I needed an aesthetically pleasing and space saving way to keep them organized. I came up with this Christmas card display hack that keeps your cards bound, organized and flat to easily display in a large bowl each year. Let’s go through the supplies you need.
Want to save this idea for later? Pin it here!

Supplies to Execute the Best Christmas Card Display Each Year
-Hole Punch
-Cardstock
-Metallic Sharpie
-Scissors
Step 1: Hole Punch Your Cards
First, collect all your cards and hole punch the top left hand corner. I gather 3 or 4 cards at a time, make sure their top left corners are aligned and punch a hole. This takes a while depending on how many cards you have, but take your time and be precise with your punches.


Step 2: Tie Your Ribbon
I have used all different kinds of ribbon for the last 7 years and like the mismatched look. However, you can also use the same color and type for more uniformity. This year, I used my new favorite velvet ribbon that made an appearance on the tree and stockings as well! I have linked it here for you. It comes in so many beautiful colorways and is a great price. I used the 1″ width.

Feed the ribbon through all your hole punched cards to secure them together. Then, cut it with enough of a tail left for you to tie it in a bow or knot after step 3.
Step 3: Label the Year
Finally, using cardstock (or whatever paper you like), write the year and cut it out. I like to use metallic sharpies. You could also type and print the year if you aren’t confident in your handwriting.

Hole punch the top left corner as well, then feed the ribbon through the year label too. Tie it off in a knot or a bow. Your Christmas cards are ready to display for years to come! I gather mine and put them together in bowl to set on our island. They are a conversation piece and friends and family enjoy looking back at the cards over the years.

I wanted to share a few other holiday projects I’ve crafted over the years, including:
- DIY Christmas Swag Wreath
- Dried Oranges
- DIY Vintage Mercury Glass Ornaments
- Hosting a holiday wine tasting party
- DIY Marbled Ornaments
- Homemade Simmer Pot Gift Jars
- DIY Souther Tabasco Pepper Sauce to gift
- DIY Photo Tile Coaster Gifts
I hope you have a great holiday season, and enjoy this space saving and aesthetically pleasing way to create a Christmas card display!
Enjoy the process,


