Sharing before and after photos including all the details you need to DIY your way from a mismatched mess to the transitional kitchen of your dreams. I promise, I am no one special. Just your average gal with a full time 40+ hour/week job doing home improvements as a creative outlet. Read on to learn the 9 steps to a transitional kitchen remodel on a budget.

This post contains affiliate links for your convenience which may reward me in the event of a sale. Note that I only recommend tools and products I have personally used and loved.
Transitional Kitchen Remodel on a Budget Table of Contents
– Project 1: Updated Hardware
– Project 2: Paint
– Project 3: Updated Lighting
– Project 4: Decorate above the sink
– Project 5: Chalk Paint Kitchen Island
– Project 6: Hang Gallery Wall (the easy way!)
– Project 7: Bench cushion and pillows
– Project 8: Bar Cabinet Build
Project 1: Updated hardware
This one is so simple! I actually bought new hardware for the kitchen cabinets before we even closed on our Riverdale Ranch, knowing it was an affordable and easy first step.
Updating the hardware completely changes the look of cabinetry that you may otherwise see as dated. Choose a finish and carry it through the room or even the house for a cohesive look. Here’s the hardware I chose for our kitchen:

This was a great first project to achieve a transitional kitchen remodel on a budget. I chose an oil rubbed bronze finish in more modern looking handles and knobs. I think the darker color works better with the dark countertops.
After I removed the cup pulls, I measured the existing screw holes because hardware comes in different sizes. Buying handles with the same size holes saves you the hassle of filling the old holes, sanding, and drilling new ones. When measuring width for handles, measure from the the left line of each hole to get the most accurate measurement.
Project 2: Paint the walls
The power of paint is truly amazing, and imperative to achieving a transitional kitchen remodel on a budget. We removed everything from the walls including the boxes above the desk, the shelves above the sink, and the acrylic backsplash that was screwed into the walls. We finished the prep work and we were ready to paint.
I painted the kitchen Agreeable Gray by Sherwin Williams. The greige looks great, and honestly convinced me to keep our wooden cabinets wood tone instead of painting them white.


Project 3: Updated Lighting
We didn’t love the track lighting in the kitchen, or the industrial pendant light above the island. We are both tall, and the pendant light hung down too low. This is the only project we consulted a professional for.
We hired an electrician to come out and install LED recessed lighting. He installed two above the island area, and three in a single file line to replace the track lighting. This alone made the space feel bigger and brighter.

Project 4: Decorate above the sink
The previous homeowners added on a garage to the side of the house behind the wall that houses the kitchen sink. There used to be a window (as is traditional above kitchen sinks), but it got boarded over when they added on the garage.
Believe it or not, this was one of the hardest areas to decorate! There is not a lot of inspiration out there for what to put above a kitchen sink because it is usually a window. I decided on these black rods from IKEA, and styled with both functional items (cast iron skillets, measuring spoons), and decorative items (hanging dried lavender).

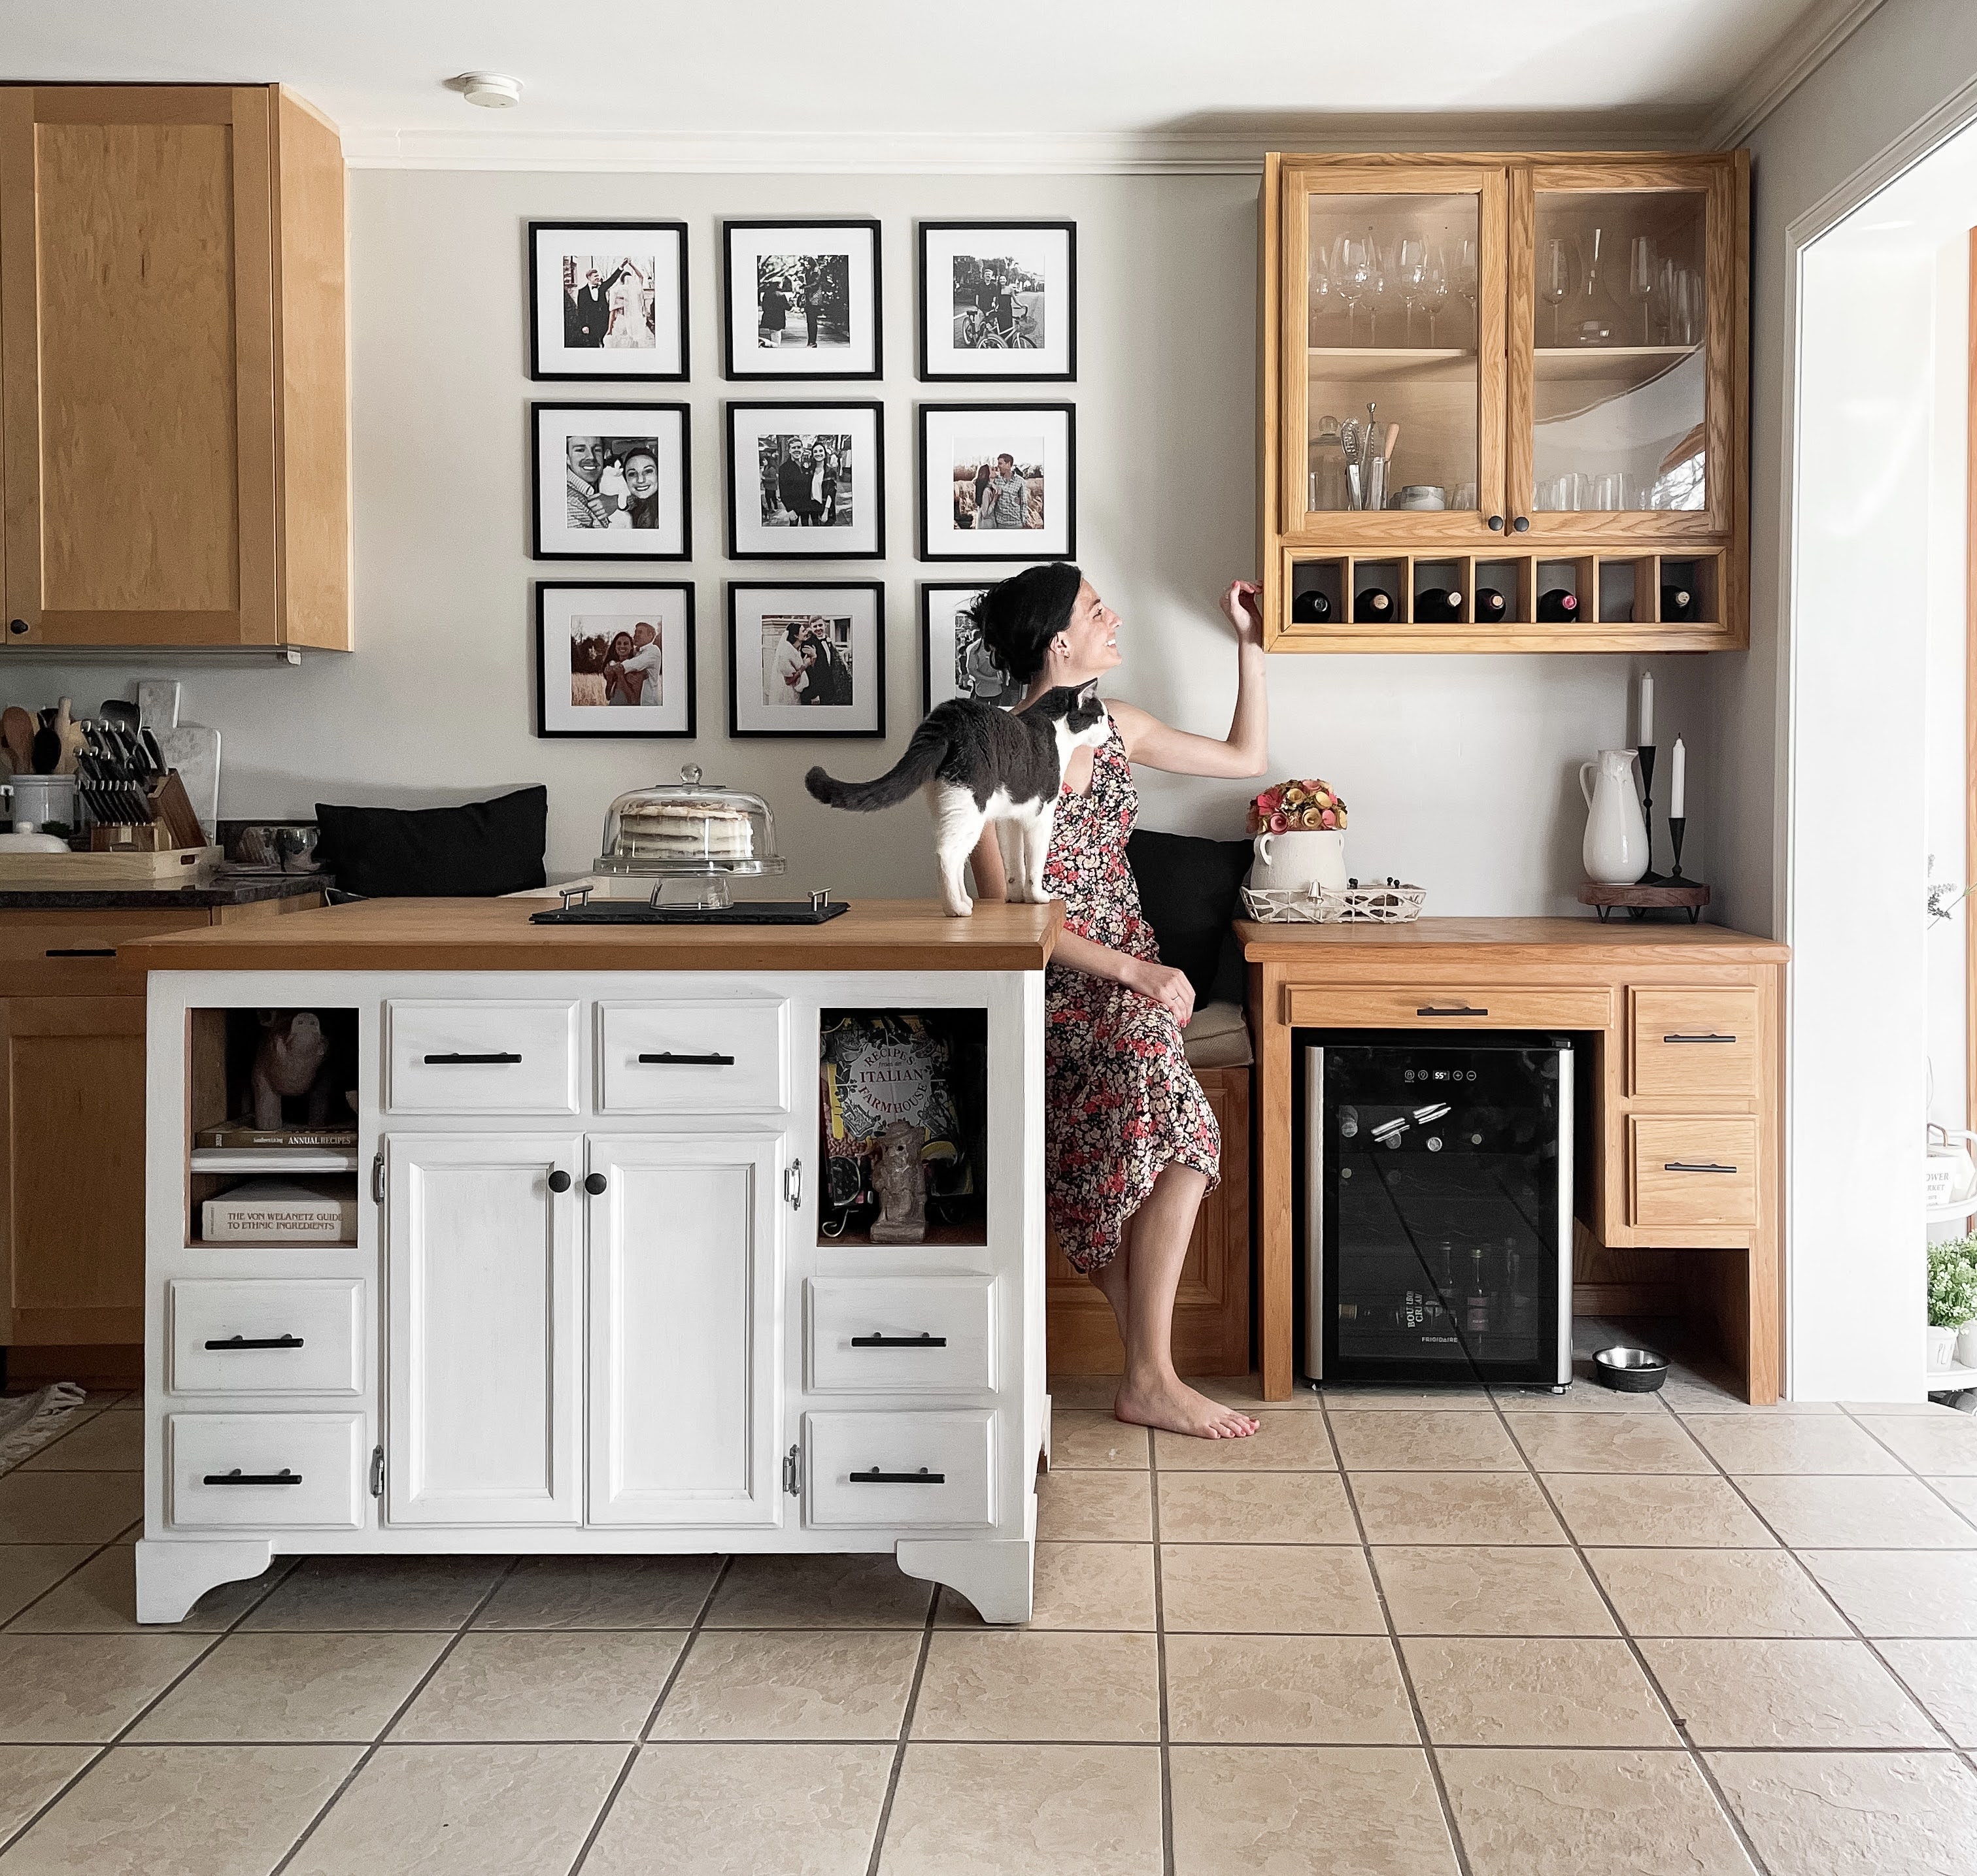
Project 5: Chalk paint kitchen island
I went back and forth about removing the kitchen island versus keeping it. We ultimately decided it was good counter space so we kept it. It ended up being where everyone gathers when we entertain.


However, the pink tinted wood tone had to go. Stripping and staining can be a pain, and I thought painting it white would brighten the space. Choosing to paint the island also added some visual relief from the weight of the wooden kitchen cabinets and butcher block top.
Mixing white and wood tones is actually on trend right now- read more about the top 10 trends this year. Follow along with the step by step tutorial to learn how I updated our island quickly and inexpensively with custom chalk paint to round out the fourth project to our transitional kitchen remodel on a budget.

Project 6: Gallery wall
The previous owner had a version of a gallery wall above the breakfast bench. When we moved in, it was a big empty space. This space is visible from the living room where we spend most of our time. I decided a gallery wall was still the best fit to fill the space, but made it more my style. See the step by step tutorial for how to easily hang your gallery wall, achieve, and maintain straight frames.

Project 7: Bench cushions and pillows
Did you know our Riverdale Ranch had been smoked in for 30+ years before we moved in? The first thing we did was dispose of any fabric or cloth that had been left in the house. Unfortunately, that included the breakfast bench cushion and pillows. We successfully rid our house of cigarette smoke smell naturally without hiring professionals.
After lots of research, I settled on this shop from Etsy to make this custom cushion for us. Our bench is longer than most, so I could not replace the cushion from a big box store. She has an amazing selection of fabric, and fair pricing. I chose an oatmeal woven fabric that is stain resistant- perfect for an eat in nook! I recovered some pillows I already had with black Amazon covers, and successfully refreshed that space.
Project 8: Bar cabinet with wine storage


After removing the mail center the previous owner had hung above the desk, I was left with another blank space. I took my time deciding what should go there, 9 months to be exact. I don’t want you to think this transition happened over night, or that everything magically comes together in one grand vision I execute all at once. Maybe interior designers can do that, but not little old me. I came across this inspiration picture on Pinterest one night.

See my Pinterest board for more inspiration if you are thinking about putting a bar cabinet somewhere in your home. I started the project by finding the perfect wine fridge to fit the hole under the desk. This one was on sale around the holidays at Lowe’s, and give it two thumbs up.
I figured building a wine cabinet to hang on the wall was above my skill level, so I contacted a local carpenter to get a quote for the project. TWENTY FIVE HUNDRED DOLLARS.
I didn’t want the cabinet that badly, at last not right this second to pay that price. It was around this time that I decided to start a blog, and wanted to begin with a big project to get people’s attention and prove my qualification for giving DIY advice.
I decided to DIY the wine cabinet. Find my step by step tutorial here for how I completed the project here, and a more detailed post here to specifically explain how to hang wall cabinets.


Project 9: DIY Backsplash
When we moved into our Riverdale Ranch, the first thing I removed was the leaf patterned acrylic backsplash (those are four words I never thought I’d string together) that was screwed into the walls. I had a quote to have backsplash done about 6 months ago, and the quote was thousands of dollars for a small kitchen area. No thank you!
I took my time researching and ultimately made the decision to DIY my tile backsplash. I kept my eyes open for inspiration for months. I loved the clean and classic look of Subway tile, and almost went that route. I’m so glad I kept looking!
I noticed a pattern in the kitchen backsplashes I was pinning on Pinterest, but didn’t know what to call the look I liked. After some research, I discovered the subway tile look alike is called Zellige.

With my tile chosen and ordered, grout color picked and layout decided upon, I got to work to figure out how to DIY this project. I chose to forego traditional mortar, borrowed a wet saw, and was able to complete the project with help from my husband in just ONE day! I wrote a project tutorial so you can read all the details.

And there you have it, 9 DIY projects and 10 months later, this space is night and day different from where it started. There is nothing quite like the pride I feel every time I look at this part of the kitchen and can say “I did that” without breaking the bank.


