1 room. 8 weeks. Countless DIYers coming together to encourage and inspire. Welcome to my One Room Challenge! Keep reading to see the FINAL reveal of my timeless gender neutral nursery, 2 months in the making!
I’m so excited to be participating as a guest in the 2023 Spring season of the One Room Challenge (ORC)!

This post contains affiliate links for your convenience which may reward me in the event of a sale. Note that I only recommend tools and products I have personally used and loved.
This spring, I transformed a guest bedroom into a nursery for our first baby. We are not finding out gender, so everything needed to be neutral!


Before & After
In case you are new, this was my One Room Challenge 8 week plan to get us to the “after” photos you’ll find below:
2. Chose a Sage Green Paint Color
3. Installed DIY Reeded Wall Moulding
5. Updated a vintage dresser into a changing table (without paint!)
Let’s do a quick re-cap of the last two months. It’s always fun to look back and remember where you started.
Week 1 was spent creating a mood board . You can read more about the planning/decorating process here. It was important to me to design a room that would work for both a boy and a girl since we decided not to find out the gender.

During Week 2, I executed my tried and true process to select a paint color. The color I chose creates such a relaxing and peaceful space while feeling healthy and natural.
Week 3 I remained focused on the walls and installed my custom DIY reeded wall moulding! This was an idea that only existed in my head, and I was so happy to see it come to life. I got to practice my woodworking skills, while learning new ones too (like how to cut trim to create an “inside” corner!).


I created DIY pinch pleat curtains during Week 4. I was so pleased with how affordably this project came together, as well as the quality of all of the Amazon purchases to make this vision come to life! (Linked here).
Week 5 I focused on how to customize a hand me down antique dresser into a changing table- without paint! I hate painting over wood when I don’t have to, so keeping this vintage piece in its natural state was important to me. Three small details made a big impact for this focal point!


During week 6, I shared all the small touches that made a big impact on the overall finished product. Sometimes its the attention to detail that takes a space from just good, to great.
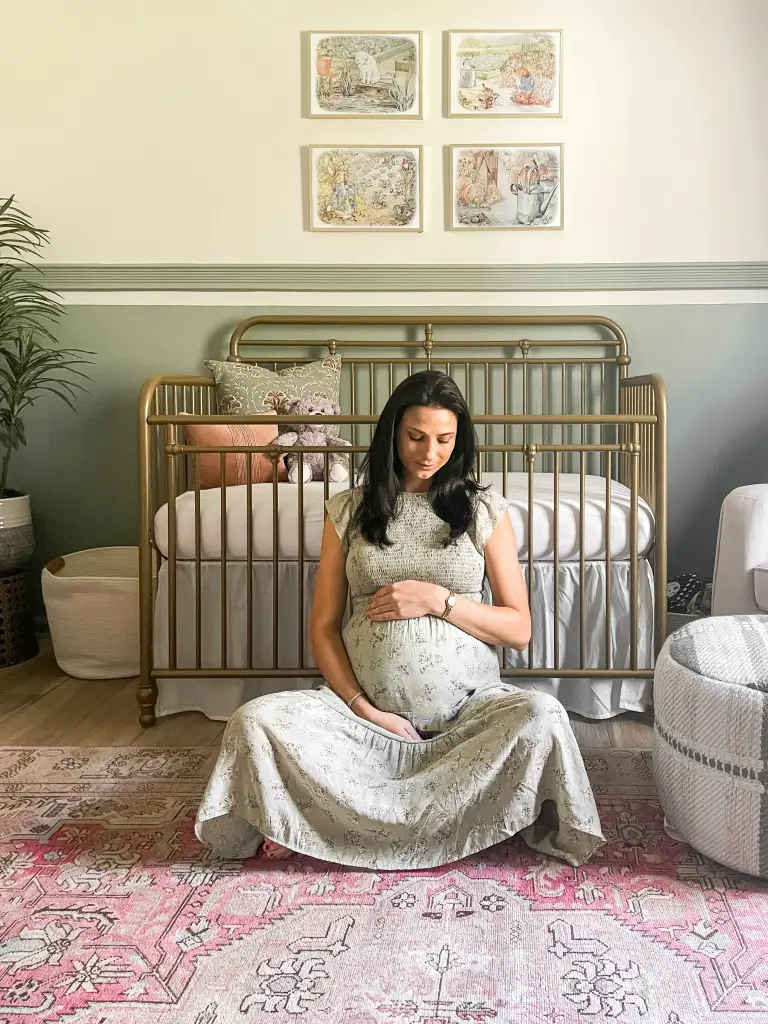
Week 7 I found a way to affordably print and frame a set of Peter Rabbit art prints above the crib. I love the whimsical feel, color palette and nostalgia evoked by these images. To download your own set (there are 12 to choose from) or find out more about why these Peter Rabbit prints mean so much to us, read on here!

And that brings us to the final room reveal, Week 8! I am so happy with how this space turned out, and think it will work perfectly for our new little one.
The walls started out painted Valspar Asiago. I painted the new trim, doors and bottom half of the walls Sherwin Williams Evergreen Fog. The crib and rocking chair were great affordable finds linked here. The rug is a vintage Turkish hand woven find purchased from one of my favorite sellers, Curated Provisions!


Planning a room for a brand new family member is exciting! But can also be overwhelming, especially with all the other baby related tasks that need to get done. I realize baby may not even make it to his or her own room for 4+ months. But as a first time mom, nesting and putting a room together feels like a right of passage.


I’m so glad this challenge gave me the motivation I needed to put together the perfect space for our little one. Until next time!
Enjoy the process,


