1 room. 8 weeks. Countless DIYers coming together to encourage and inspire. Welcome to the One Room Challenge! Keep reading to discover all the details as I continue to transform our guest room into a timeless gender neutral nursery.
I’m so excited to be participating as a guest in the 2023 Spring season of the One Room Challenge (ORC)!

This post contains affiliate links for your convenience which may reward me in the event of a sale. Note that I only recommend tools and products I have used and loved.
This spring I am transforming our guest room into a nursery for our first baby. We are not finding out gender, so am keeping everything neutral! I shared my vision during week 1, the perfect sage green paint color I chose during week 2, how to DIY custom reeded wall moulding in week 3, how to DIY pinch pleat curtains during week 4, and 3 ways to update a vintage dresser (without paint!) during Week 5.
This week, I’m focusing on adding all the details to make the space. Sometimes it’s the littlest things that make the biggest difference!
No time to read this whole post now? Pin it here to safely save it for later.

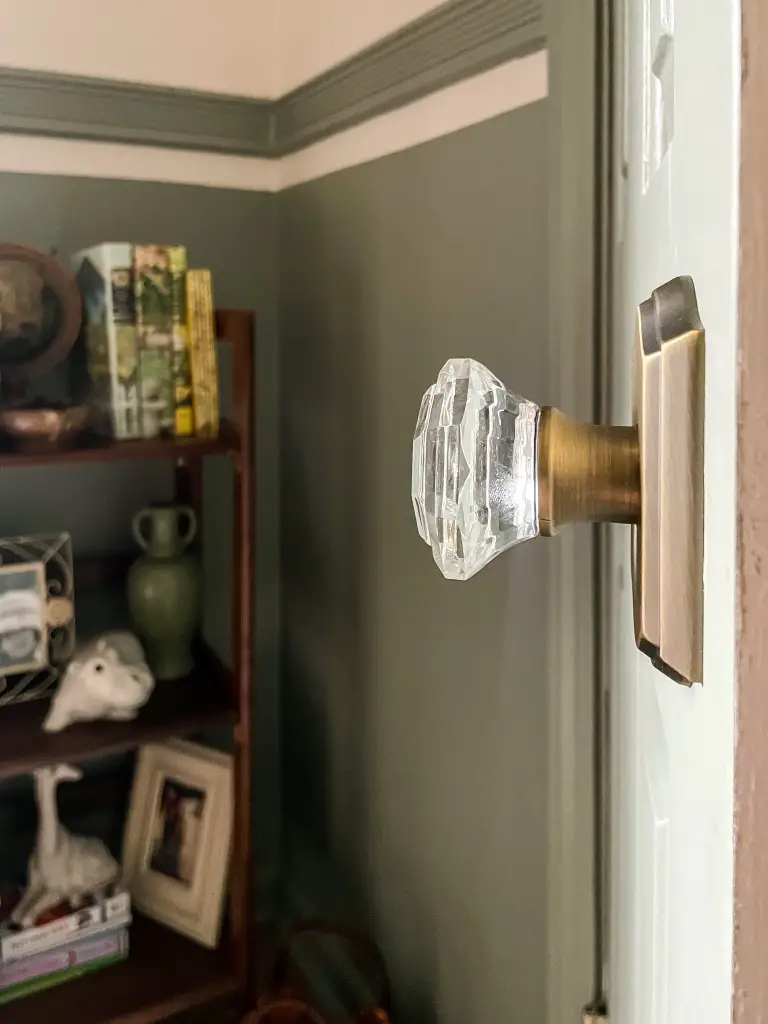
Replace the Closet Doorknobs
The closet doorknobs in this room have always bothered me. They are crooked! I took this opportunity to not only straighten them out, but add some vintage flare. I found these beautiful antique looking bronze glass doorknobs to replace the original builder grade knobs and couldn’t be happier with the swap.

To install the new knobs, we first had to remove the old ones. The new knobs required holes to be drilled through the door. I let my husband tackle this one, and he borrowed some tools from work to get the job done. Careful measuring meant the knobs are straight now!


Woven Moses Changing Basket
I love the look of this woven Moses changing basket. I think they are such a fun twist on a typical plastic looking changing pad. A changing basket adds a touch of texture and is more aesthetically pleasing.
The basket doubles as the perfect place to take monthly photos to document baby’s growth too! As a newborn they will look teeny tiny inside, and as the months continue to pass you’ll be able to compare just how much (and fast) they grow!


Lighting
Lighting in a nursery is important. In addition to the necessary Hatch night light and sound machine, I wanted a floor lamp too.
I wanted the floor lamp to have a pull cord to turn on and off so it could easily and quietly be done with one hand. I found this affordable lamp from Target that fit all my requirements. However, I didn’t love the shade.
Before my grandparents house sold, I was able to walk through it one last time and I took a few pieces that were sentimental to me. I actually took a pleated lamp shade from their living room that had probably been there since the 70’s. I thought this would be the perfect addition to spice up the otherwise plain floor lamp, and hold sentimental value reminding me of my grandparent’s house.

As for the light bulb, I came across these natural sleep aid light bulbs. According to the product description, the gentle amber color of the bulb is designed to simulate sunset and help with circadian rhythm. They emit a warm orange glow, and keep the room subtly lit when the floor lamp is on!

Shop links to all the details here!
Dried florals
My favorite place to shop dried florals is Afloral. I purchased a mix of mini palms, thistles, and a dried rose bundle to create a color coordinated arrangement that will be perfectly low maintenance.

Hooks
Pieces that are both functional and aesthetically pleasing always find their way into my rooms. I installed hooks on two walls to showcase pretty things and useful things.
To the left of the changing table I hung this set of gold gingko leaf hooks I found. I love how delicate they are, and it’s the perfect spot to hang an outfit or two.

To the right of the closet, I hung wooden accordion hooks. The wood provides warmth and ties in with the vintage wood changing table, and takes up wall space in a useful way.

Next week, I am planning to share my hack for affordable wall prints. I chose original Peter Rabbit prints and fun gold frames.
Just to recap, here is the plan for this entire ORC 8 Week process:
COMPLETED
2. Choose a Sage Green Paint Color
5. Update a vintage dresser into a changing table (without paint!)
6. All the small details
TO DO:
7. DIY nursery art prints
8. Final reveal!
Enjoy the process,