1 room. 8 weeks. Countless DIYers coming together to encourage and inspire. Welcome to the One Room Challenge! Keep reading to learn how to update a vintage dresser without paint as I continue to transform our guest room into a timeless gender neutral nursery.
I’m so excited to be participating as a guest in the 2023 Spring season of the One Room Challenge (ORC)

This post contains affiliate links for your convenience which may reward me in the event of a sale. Note that I only recommend tools and products I have used and loved.
This spring I am transforming our guest room into a nursery for our first baby. We are not finding out gender, so am keeping everything neutral! I shared my vision during week 1, the perfect sage green paint color I chose during week 2, how to DIY custom reeded wall moulding in week 3, and how to DIY pinch pleat curtains during week 4.
This week, I want to update a vintage piece of family furniture to use as our changing table. It’s a beautiful warm wood color, so I don’t want to paint it! But I do want to bring this antique into this century.
No time to read this whole post now? Pin it here to safely save it for later.

There is nothing quite like sturdy, wooden and worn antique furniture. I had been scouring facebook marketplace for the perfect dresser, and I just hadn’t found anything right yet.
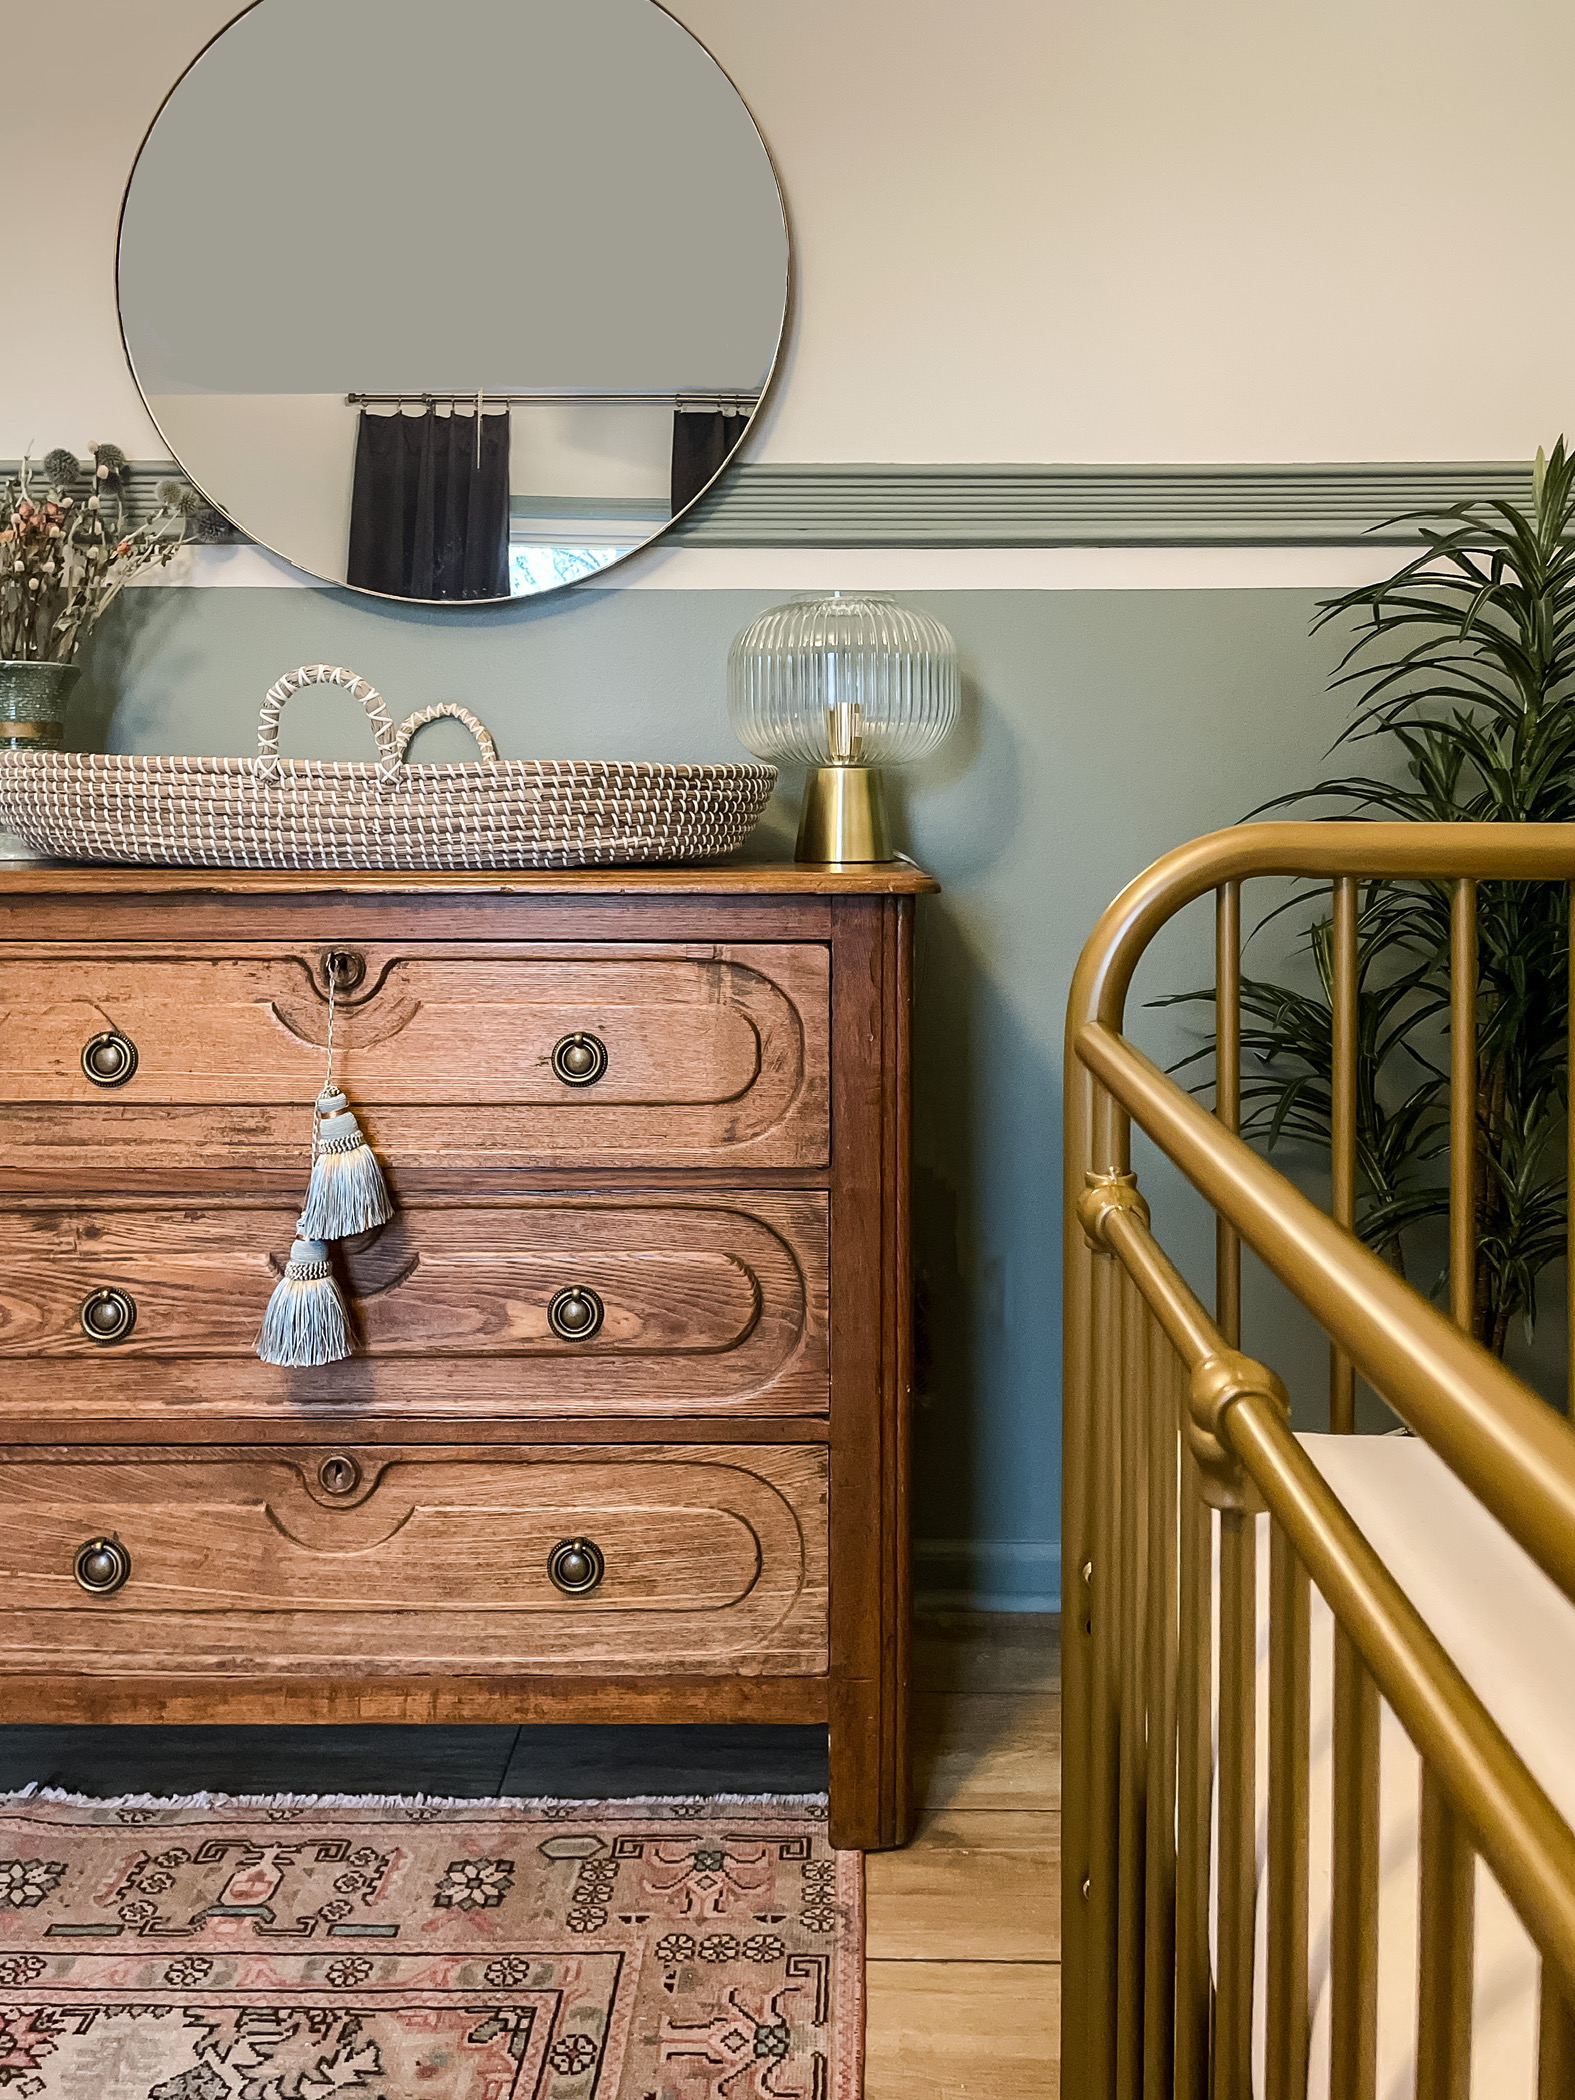
According to my research, I was looking for a small dresser that was at least 36 inches tall, 18 inches deep, and 35 inches wide to use as a changing table.
When we were home for Christmas, my mother-in-law offered this antique chest of drawers that was just about the perfect size! You can’t beat free, or furniture passed down through family. It was great as is, but I decided to do a few things to make it feel like my own and fit the space.
How to Update a Vintage Dresser

Update the Hardware
First, I decided to order new hardware. The existing hardware consisted of 6 wooden knobs. They were fine, but blended into the rest of the piece. The dresser was going in our gender neutral nursery with a brushed bronze crib and rocker, so I decided to pull in more metal elements to match.

I found antique pulls from Etsy that were the perfect size and finish. It was quick and easy to remove the old wooden knobs, and replace with the new hardware. I like the contrast and the way it makes the piece feel customized to match the space.
Add A Key + Decorative Tassel
Next, I wanted to find a key and tassels to fit in the keyhole to add color and texture. You can read more about how to choose the right key and learn about the history and use of tassels here.
Today, you can find antique skeleton keys priced around $10 or cheaper, while older, ornate skeleton keys may cost as much as $1,000. You can find them at estate sales, antique shops, or online. I purchased two different keys for under $5 a piece.

The most traditional way to use a tassel is to hang it from a skeleton key in a chest of drawers (or any piece of furniture) with a lock. It’s a simple way to add color or style to an otherwise dull or dated piece. Some other ways to use tassels include on window treatments as curtain tie backs, on wall tapestry rods, from the edges of pillows, on dining room chair backs, or from lamp pulls. The possibilities are endless! Here are the tassels I purchased that come in a pack of 2 for less than $10.
Clean + Line Drawers
Last, I chose to give the dresser a thorough cleaning and line the inside drawers to get rid of the must and restore them to glory.
Bacteria or mold are typically the culprits that cause wood to smell old, so first use a damp cloth with a 50/50 mix of vinegar and water to wipe the whole piece down, inside and out. Be sure to remove the drawers so you can get inside and underneath as well.
Next, you can fill a bowl with an odor lifting agent such as vinegar, coffee grounds, cat litter, or baking soda and leave it inside the closed drawers for several days to help absorb even more odor if you feel there is still some lingering.
After a thorough cleaning and odor removal, I lined the tired inside of the drawers to create a smooth, even and clean surface to store all the baby goods in. I chose an affordable, marbled print linter.

Next week, I am planning to share all the fun details that go into creating the finished product. Some touches I have planned are unexpected, but all are budget friendly and sure to add charm to this sweet nursery.
Just to recap, here is the plan for this entire ORC 8 Week process:
COMPLETED
2. Choose a Sage Green Paint Color
5. Update a vintage dresser into a changing table (without paint!)
TO DO:
6. All the small details
7. DIY nursery art prints
8. Final reveal!
Enjoy the process,