I have been loving the fluted trend, and have been dying to add a touch somewhere in my home. Luckily, turning out guest bedroom into a nursery was the perfect blank slate to get creative and add custom details (including fluting!). Keep reading to discover how I installed wooden fluted wall moulding for a unique and elevated touch.
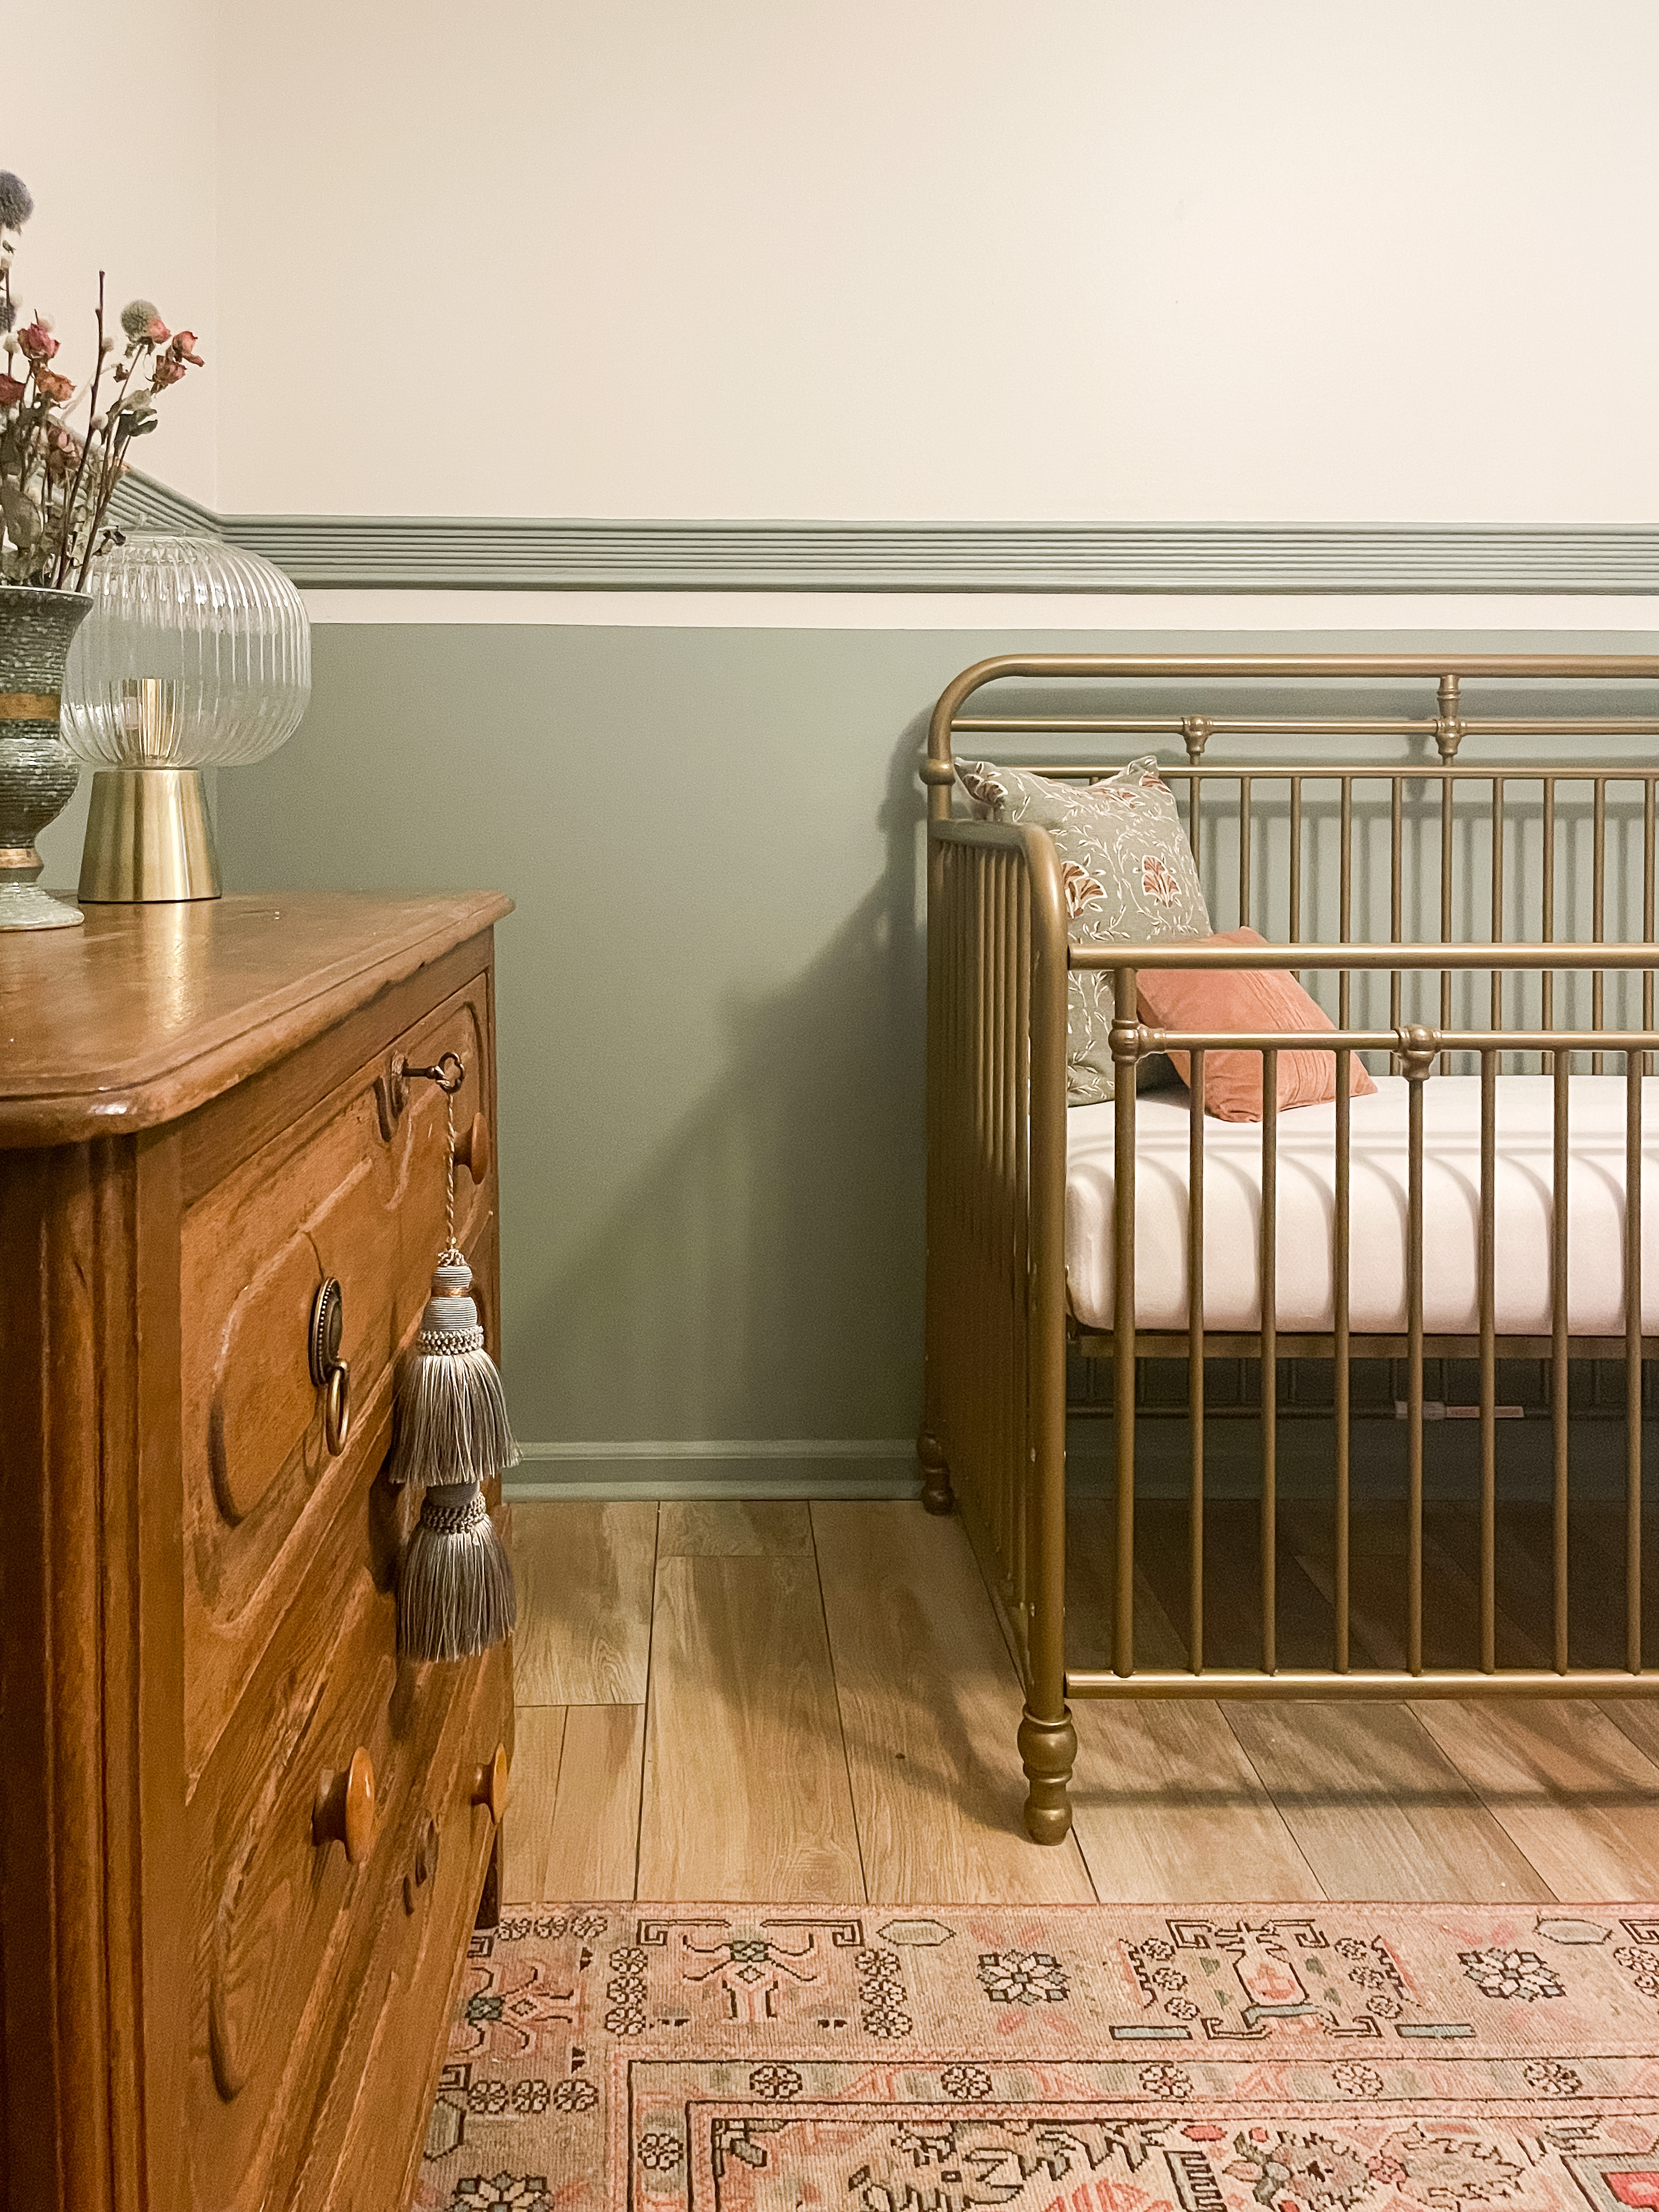
Designing and creating a DIY nursery has been something I’ve dreamed of in the back of my mind for quite some time. When the time came to turn these dreams to a reality, I couldn’t have been more excited! We decided to keep the new addition’s gender a surprise, so I dreamed up a sage green space anchored by a muted red, green and brown Turkish vintage rug.
I wanted to add custom touches unique to their room since it’s not often I get the chance to totally start a new room project from scratch in our 1800 sq. ft. Riverdale Ranch. When I was completing the mood board, I incorporated 6 timeless elements including the rug, paint, antique dresser, woven Moses changing basket, window treatments and wall moulding. Let me share the step by step tutorial of how I achieved fluted wall moulding trim, as well as materials and product links to help you DIY your own!

This post contains affiliate links for your convenience which may reward me in the event of a sale. Note that I only recommend tools and products I have personally used and loved.
Materials for DIY Wooden Fluted Wall Moulding
Paint– I chose SW Evergreen Fog
Phew, that’s quite a list! If this is your first woodworking project, the supply list may seem overwhelming. But the more you DIY, the more of these basic tools you will accumulate and use time and time again! So think of it as an investment. I have used all of these supplies more times than I can count in the last 2 years.
Now that you have all the supplies, lets get started!
STEP 1: Make a Plan
I gathered inspiration in part from the DIY dream team (Angela Rose Home, Making Pretty Spaces and Frills & Drills) when the did a quick 48 hour nursery makeover for Nicole at Living on One Percent. I loved the simple stripe color block detail they incorporated along with their custom trim work, so decided to also incorporate this as well.

As previously mentioned, I’ve been dreaming of adding fluted detail somewhere in my home since I wrote this top trends of 2021 post. It is now 2023, and far past time I incorporated fluted wood in one of my DIY’s. I started browsing Home Depot and Lowe’s online to see which store had more options, and narrowed down the aisle numbers I would search once I got in store.


Our Lowe’s had the best trim options for fluted wood, so I started there. I pieced together two pieces of pine base cap above and below the piece of fluted casing to create a custom fluted piece of moulding. You could also see if any local hardware or woodworking stores have good inventory! I have linked the exact trim pieces I used here for your convenience.


STEP 2: Tape Off Walls
First, I decided how far up I wanted the paint, stripe, and moulding to go. I have 8 ft walls, and chose to begin the tape halfway up at 4 ft. The portion of wall below the paint was going to be painted Sherwin Williams Evergreen Fog, and the portion above the tape would be for the fluted wall moulding, and the rest of the wall remain painted Valspar Asiago.

To be honest, I hate painter’s tape. But after seeing the crisp lines and sharp stripe the DIY dream team achieved, I thought I could do it too. Unfortunately, I still hate painter’s tape and honestly don’t know what I’m doing wrong. I occasionally got crisp lines, but also had lots of places with a little paint leakage, and some places with a lot of paint leakage.
Per Frog Tape’s website, they recommend:
1. Clean your surface
2. Apply your tape either by unrolling the tape in one long sections or applying the tape in shorter sections to avoid stretching the tape.
3. Go over the edge of the tape with a firm plastic tool like a putty knife or card to seal.
TO REMOVE
1. Remove the tape while the paint is still wet
2. Pull the tape off slowly at a 45-degree angle. If you hear ripping, it means you’re going too fast.
However, anywhere I had two pieces of tape that met or overlapped, I had significant bleed through. I also had a hard time removing the tape without ripping or taking some of the latex paint with it. So I would recommend:
– Apply in long strips, avoiding areas of overlap or breaks in your tape line to decrease chances of bleed through
-Seal the edge of the painters tape by painting down across the border of the tape before you roll the walls (after you have also used a plastic edge to press it down).
-For removal, you may have better luck scoring the tape with razor blade or sharp edge for the tape against the trim
-Remove tape BEFORE you caulk any seams. I’ve heard lots of mixed advice for this one, but have only had bad experiences caulking while tape is still on


STEP 3: Measure, Cut and Install Moulding
Once your tape is in place to create the sharp stripe below, measure and install the moulding on the upper tape border. I had three layers of moulding to install, and nailed them in from the bottom piece, then the middle and finally the top.


I was also thrown off when I got to the corners- I had to cut what are known as “inside corners” where the trim met in the corners between the walls. I had only ever cut “outside corners”, and it took a while to figure out the angles with my pregnancy brain.


To cut angles for an inside corner, keep the trim standing up (not lying flat), to cut your 45* angles! I used my miter saw for this, as it was easier to keep the trim straight up and down than it was with my miter shears. However, miter shears are still a great option for flat cuts on the smaller pieces of pine base cap.

I used my stud finder to mark the location of the studs with X’s along the line of painter’s tape. I then made sure to secure the trim to the walls using my brad nailer and sending the nails into the studs. If you are going for permanence, you could also use adhesive to apply the trim to the walls. But I always like to leave the option for easy removal in the future, and nails will do the job just fine. In fact, all the trim in your house (baseboards, crown moulding, door casings) are just nailed on!

STEP 4: Spackle & Sand
Once your trim is secured to the wall with nails, use spackle to fill in all the nail holes. This is my favorite spackle to use! It is fast drying, and goes on easily with your finger. It is the consistency of cake frosting and covers everything from small nail holes and big gaps in the corners. Wipe off any excess with baby wipes.

Once the spackle is dry, use a sanding sponge to lightly clean up the surface of your trim. This creates a smooth and seamless finish that will look great painted.
STEP 5: Prime
Since the trim I chose was unfinished wood, priming was the best option to seal it and cover the grain and any imperfections to ensure smooth paint application. Priming also enhances the durability of the paint and protects against the wood soaking in some of the color leading to a dull finish. I used KILZ interior latex primer, and painted it on with my favorite Wooster paint brush. One coat is enough!

STEP 6: Paint
I painted the trim SW Evergreen Fog to match the lower portion of the wall below it. I used the same Wooster paint brush that has an angle to easily get into the crevices in the fluted moulding. For full coverage, the trim needed a two coats of paint with a third to touch up in certain spots. Remember to allow plenty of dry time in between coats for best results (around 4 hours).

STEP 7: Remove Tape
As previously mentioned, it did not work out in my favor to apply caulk with the painters tape still on. So I would advise removing the tape after painting, but before caulking. To remove, I had the best luck gently cutting the edges of the tape with a box cutting before pulling it off at a 45* angle.
STEP 9: Caulk & Touch Up
Once your tape is removed, use your caulk gun and paintable latex caulk to fill in all the seams between the trim and the wall, and the upper, middle and lower trim to make your fluted wall moulding look seamless. This was my first time using the Dap Cap, and I’m sold! I hate using my finger to press in the caulk, and much preferred to use this tool instead. The lines were also very clean. Then, use baby wipes to clean up the excess.


Unfortunately, you will have to touch up the paint over the caulk again. So you can either apply more tape once the caulk is dry, or paint the trim and wall slowly by hand to cover the caulk line. I personally chose to slowly and carefully paint the caulk by hand. It was tedious, but necessary.


I hope you love the fluted wall moulding as much as I do! Let me know if you have any questions. This could be a beginner project, but have lots of patience and expect mistakes and hiccups! But that’s always the way DIY goes, and your skills sharpen with every completed project.
Enjoy the process,


