Sharing before and after photos including all the details you need to DIY your way from an unappealing formal dining area to a room you will want to eat every meal in. I promise, I am no one special. Just your average gal with a full time 40+ hour/week job doing home improvements as a creative outlet. Read on to learn the 6 beginner friendly DIY projects to makeover your dining room.


This post contains affiliate links for your convenience which may reward me in the event of a sale. Note that I only recommend tools and products I have personally used and loved.
Beginner Friendly DIY Dining Room Makeover Project List
Phase 1
Project 1: Paint
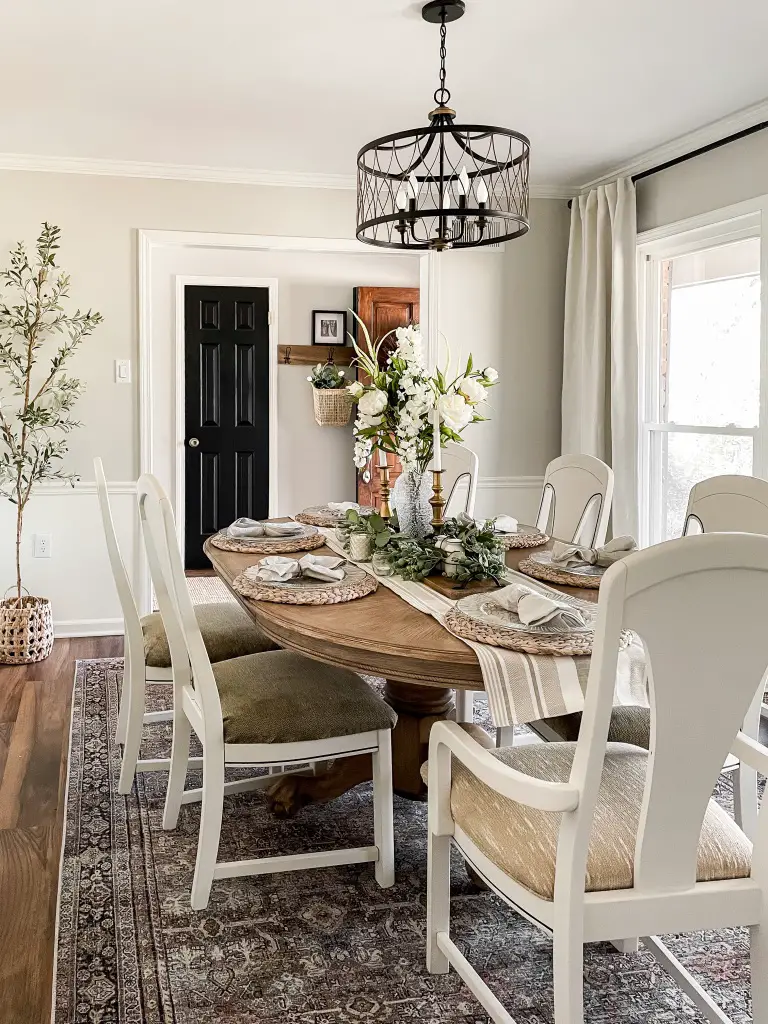
Project 2: Dining Room Table
Project 3: Dining Room Chairs
Project 4: Bar Cart
Phase 2
Project 5: Re-upholster Dining Room Chairs
Project 6: Install Picture Frame Moulding
Project 1: Paint
Oh, the power of paint. I’m not the first one to discover this, but I sure can vouch for it. When we purchased our Riverdale Ranch, it had been smoked in for 30+ years and you could tell. We had to clean, prime and paint the entire house- walls, trim and doors. See my detailed post here if you need to know hot to get rid of interior cigarette smoke smell naturally.

After painting lots and lots of samples on the walls, I decided to go with Agreeable Gray by Sherwin Williams. This greige looks so perfect and creates a warm, neutral base to start from. I decided I liked a white color below the chair rail, and used Alabaster by Sherwin Williams to match the trim. To learn more about painting an interior room, read the step by step tutorial here.

Project 2: Dining room Table
We were moving from a very small apartment, so we didn’t have formal dining furniture. I was given advice to not rush through decorating our first home, to take our time and carefully choose pieces we loved and would continue to love for years to come. I agree with this advice to an extent, but also disagree .


I did not want our dining room to sit completely empty for months, so I searched for secondhand pieces that would get us through the time being. Who knew it would end up completing the room in a way I would love so much, and want to keep for years. Here’s my advice- DIY until you have a home you love! I fund this large, sturdy wood table on Facebook Marketplace for $80. The dark stain was definitely not my personal taste, so here comes the solution. Refinishing with wax instead of stain to maintain the wood grain, but easier to use and work with than stain with more control over the final finish. See the full tutorial here to learn my technique.

Project 3: Dining Room Chairs
Think your dining room table and chairs have to come as a matching set? Think again. I found these solid wood chairs for $10/piece. With a little creativity, they transformed into the perfect compliment to our light wood dining table. What do you think? Find the tutorial here.


I used my favorite custom chalk paint product to paint the chairs white with minimal prep work! Find out more about this affordable, customizable chalk paint product here.
Project 4: Bar Cart
To round out this second hand room, see how I refinished this $25 vintage side table as a bar cart to match my new dining set. I used techniques from both the table and chairs to make the bar cart match. You’d think everything came together instead of from 3 different homes across 3 different cities. I love giving old pieces with character new life! Read more about this vintage cane side table refresh here.


Project 5: Re-upholster Dining Room Chairs
You read about how I finished these dining room chairs during phase 1 about a year ago. The chairs are solid wood and well built. Much better than anything I could find in that price range brand new.
Although I had fun refreshing the chairs, refinishing furniture is a LOT of work. After the big reveal, I settled with well enough and enjoyed the dining room furniture for about a year just as it was.

I finally had a new stroke of inspiration and decided to try my hand at recovering the captain chairs after working to recover the camper cushions during my pop-up flip. Using the same staple gun and in much the same manner, I recovered two of the cushions. I like the new fabric so much better than the old, stained beige fabric that was original to the chairs. This is such a doable DIY, and very beginner friendly.
Project 6: Install Picture Frame Moulding
This project is an overall inexpensive way to add custom architectural elements to your dining room. Picture frame moulding is exactly what it sounds like. It is thin pieces of trim, installed in a rectangle or square resembling a “picture frame”. There is so much creative freedom to this type of frame approach!
I really can’t decide if I think it makes my room look bigger or smaller. But I can say it completes the room. The picture frame moulding brings so much character and formality to a room dedicated to “formal dining”. I love it. You can read more about the project as well as a step by step tutorial post here.

Don’t be scared! Furnish and update your dining room on a budget with these 6 beginner friendly DIY projects. Give secondhand furniture a second chance, add custom wall elements and create a unique space perfectly designed by you.


