There will always be parts of a house that don’t fit your personal taste, needs or wants when buying instead of building. And that’s where DIY comes in. When you look at a space and break it down into one project at a time, I promise your vision is doable. Even for a beginner. I had never held a paintbrush before buying our Riverdale Ranch in 2020, so if I can do it, anyone can. Read on to learn 6 easy ways to remodel your bathroom yourself.
This guest bathroom probably caused me the biggest headache out of our whole Riverdale Ranch. There were so. many. elements that did not go together (in my humble opinion). The gold walls. The orange wood vanity. The beige laminate countertop. The pink and purple tinted tile floor. My head was spinning.

I’m not an interior decorator, designer, or any type of formally trained eye. But I knew none of the features in this bathroom added up. My challenge was to keep this project all DIY using zero professionals and turn this guest bath into a room that flowed with the rest of the house on a budget. Other room transformation in our Riverdale Ranch since purchasing in 2020 included:
I’m not really sure which category my style falls into. After researching, I think I’m somewhere between farmhouse and transitional. I’m not sure how important it is to be able to label your style v.s knowing what you do and don’t like. All I know is I did not like that bathroom.
Sure, I would have loved to rip it all out and start over with the bright white marble counters and tile you see all over Pinterest. But that was not in the budget. Let me show you how six DIY projects changed this space from the before photo to the after. It’s still not perfect, but boy is it an improvement from where we started, especially considering the budget.
Project 1: Paint
When in doubt, always start with paint. Paint is the most powerful tool in a DIY’ers toolbox. It can automatically change the look and feel of a space for relatively little time and money.

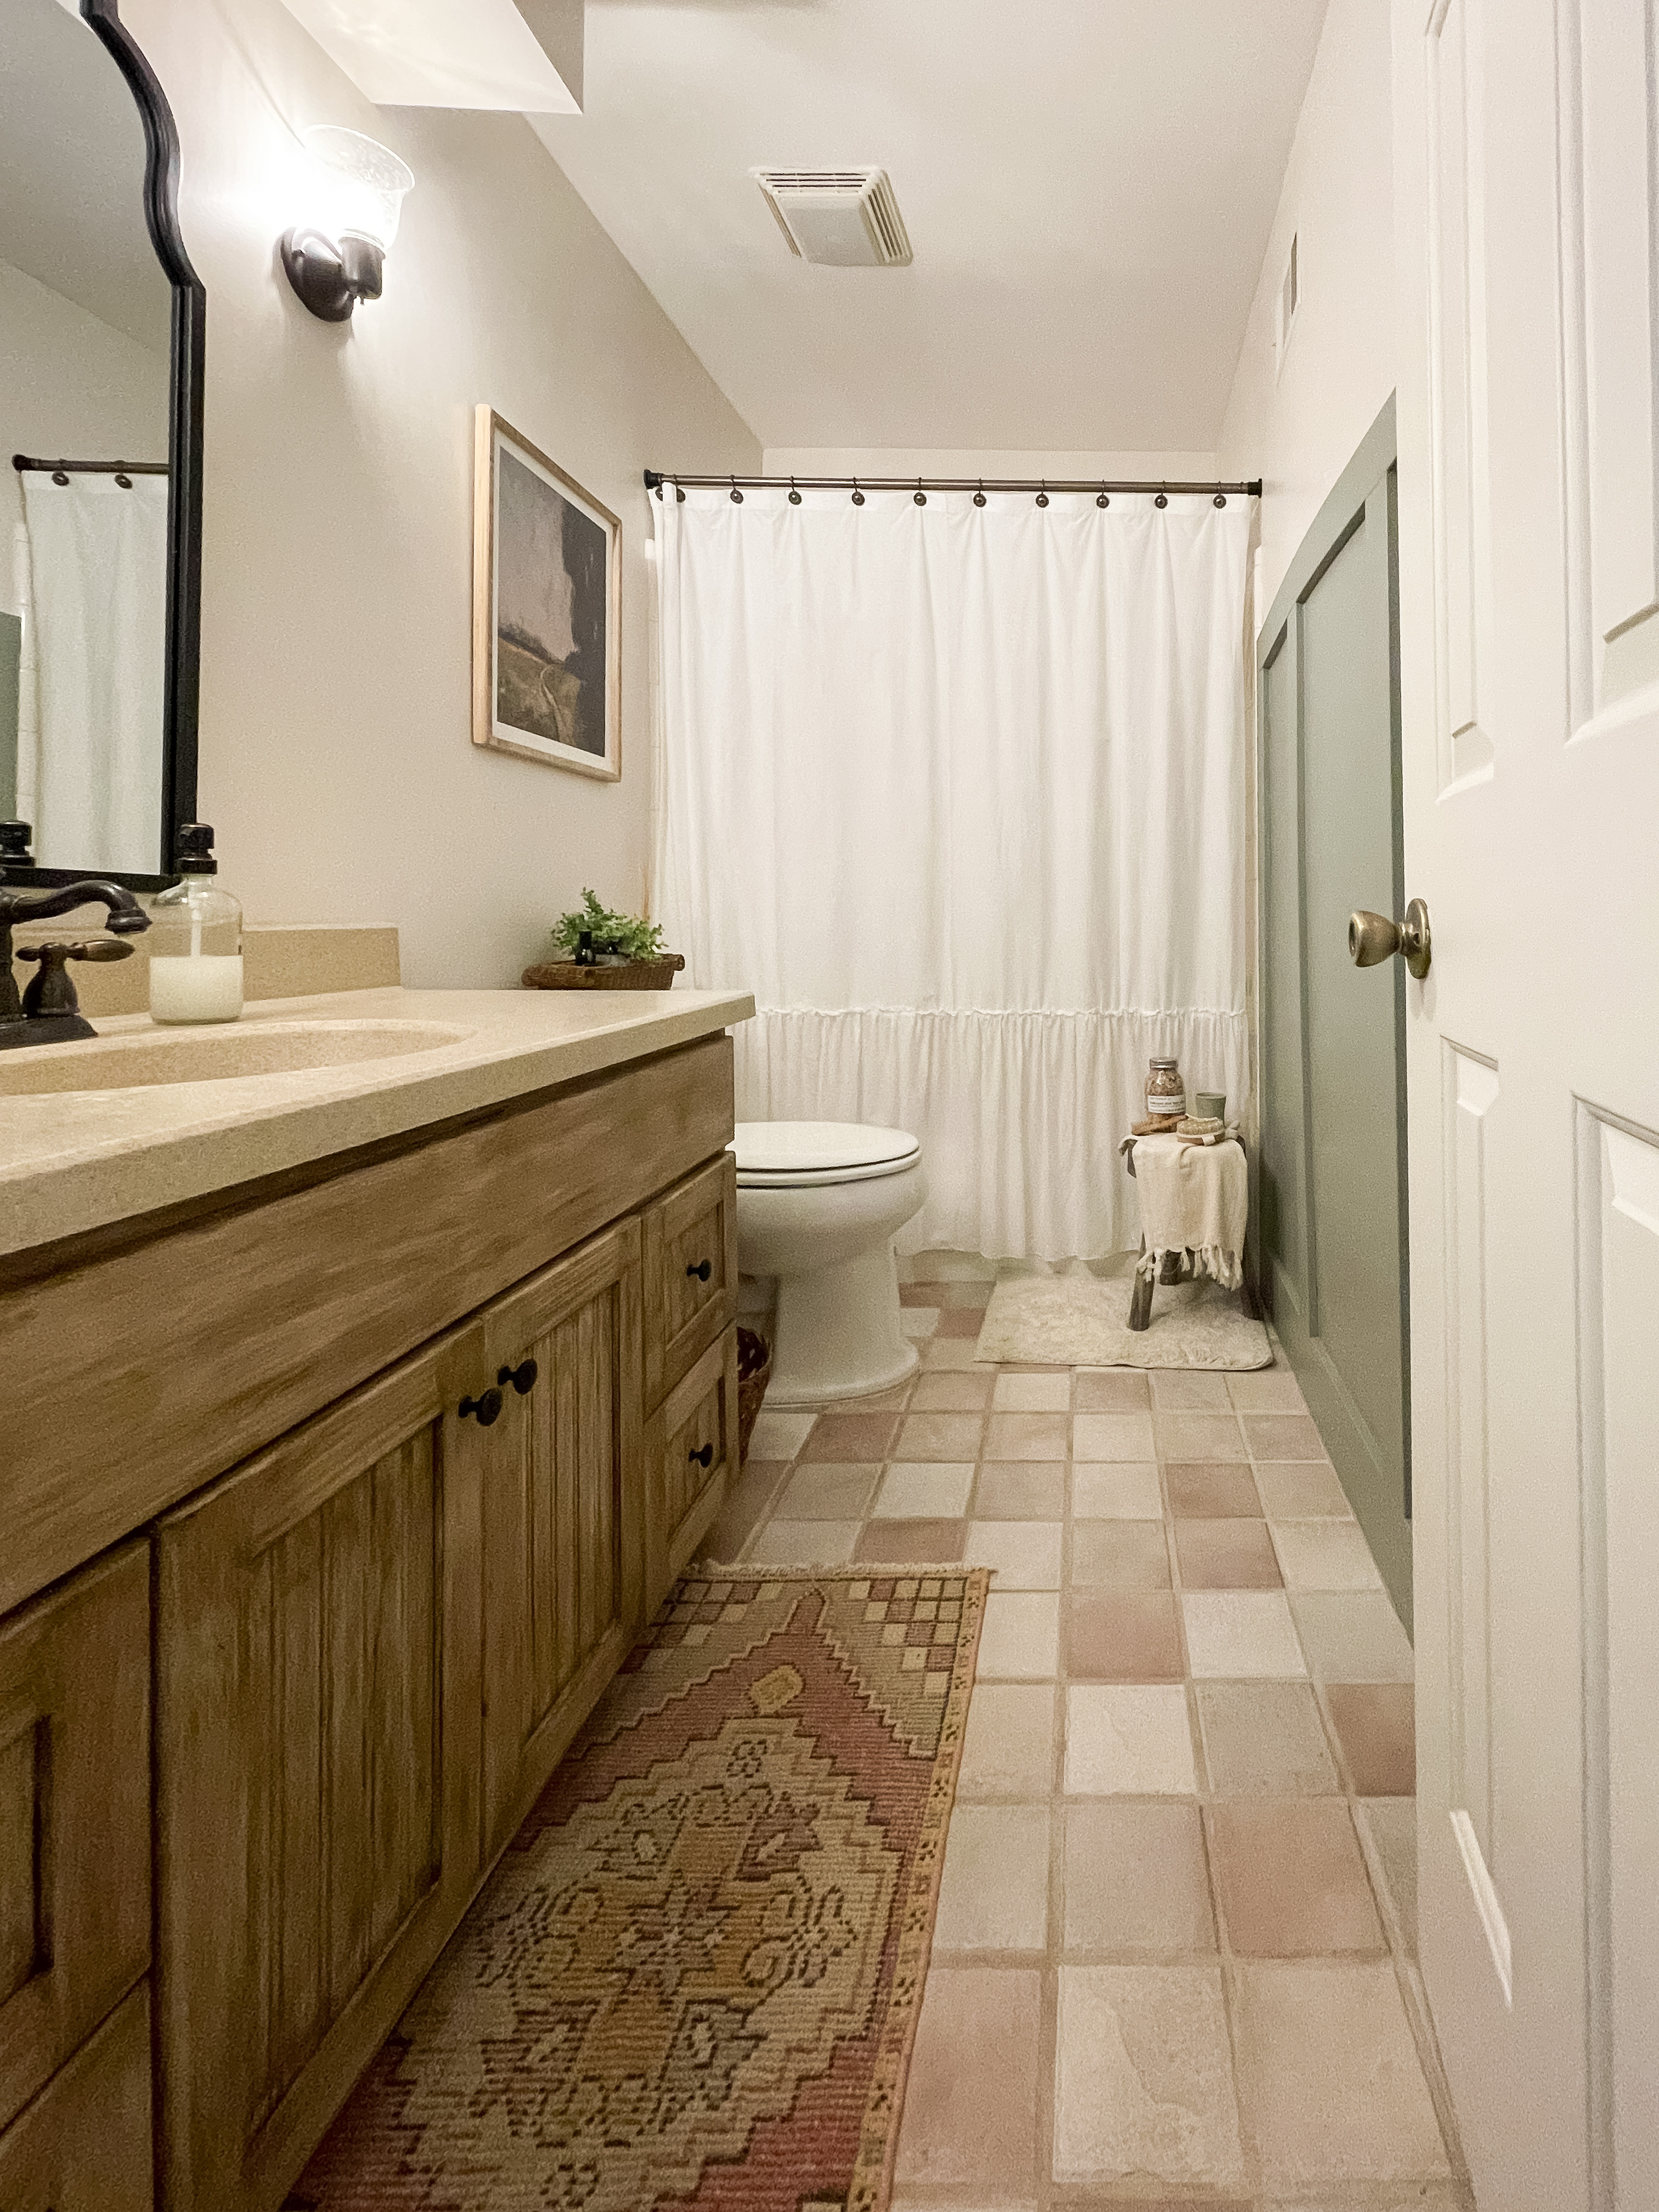
I chose Asiago by Valspar for the bathroom walls. It’s a creamy white that helped me like the floors a little better. I’ve written a couple posts to share my painting process if you are a beginner, or just looking to learn more.
Project 2: Updated Mirror
Next, the mirror had to go. I tried to give it a DIY update with spray paint and Rub n’ Buff. But the shape and style still wasn’t quite right. Keep in mind, styling a room let alone your whole house, doesn’t happen overnight. I am a very visual person, and sometimes it takes me a minute to decide if I like something. I tried a round, black mirror first. Nothing wrong with it, but it wasn’t the “one”. I decided to keep shopping.

I had been eyeing this mirror for a while, and finally pulled the trigger. Low and behold, it was the perfect size, shape and color for the space. I once received advice that every room should contain one black element for contrast. Turns out, the mirror was the perfect touch of black for this bathroom.

3. New light fixtures and hardware
This small refresh comes with a big impact. Changing out light fixtures and hardware is actually one of my 5 recommendations to implement as soon as you close on your house. I’m all for budget friendly, DIY hacks to personalize your space.
Updated lighting, especially in a bathroom, can make a huge impact on your space and instantly add perceived value. Basic light fixtures can easily be over looked, but carefully chosen light fixtures can bring a whole new style to a space. These range in prices, but I have found affordable options that fit my taste at Lowe’s, Home Depot and Amazon. I love these brass and black shaded bathroom wall sconces.

The existing faucet was fine, so I chose to let it stay. To match, I chose oil rubbed bronze hardware. This updated hardware helped the new cabinet finish (coming next) to pop.
I chose to carry the same knobs throughout the kitchen, entryway, pantry area and this guest bath. Buying hardware like this in bulk is really affordable.
*Did you know? If you are buying a handle, always measure the existing screw holes because the hardware comes in different sizes. Buying handles with the same size holes saves you the hassle of filling the old holes, sanding, and drilling new ones. When measuring width for handles, measure from the the left line of each hole to get the most accurate measurement.

4. DIY Weathered wood finish vanity
It’s no secret that I love real wood features in a home. I wrote about 5 reasons to NEVER paint wooden cabinets to help spread awareness that not all wood is bad and needs to be painted white. It was even one of the top 10 trends of the year! But, what if the wood tone is dated and pulls a bit too orange for your taste?
This was my first attempt at using this DIY weathered wood technique. I decided to give it a try after getting such great results using the same chalk paint additive to paint the kitchen island. This bathroom vanity would get the same chalk paint base, but with Antiquing Wax added on top using a chip brush. For a supply list and step by step tutorial, you can find the original post here.
Although technically I “painted” the wood, the tone and weathered finish is much more my style and helps all the different elements in the guest bath flow now that the orange tone is eliminated.

5. Wall moulding (Board & Batten)
This was the biggest DIY project I had attempted to date. I knew I wanted to add color and texture to the bare bathroom wall, and wanted it to double as towel storage with hooks. But I was so nervous to execute this wall moulding idea all by myself.
Spoiler alert, there will always be hiccups and you may have to problem through unexpected bumps in the road but you CAN do it! I used my trusty DIY strategy from start to finish, and executed a successful board & batten wall.
The first road block occurred when removing the white tile trim at the base of the wall. As I chiseled the first tile off, the drywall crumbled off with it. I had to modify my technique and work more slowly to remove only the tile while leaving the drywall intact.


I decided to install a chunky baseboard across the bottom, with five vertical “battens” and a thinner horizontal piece across the top with two hooks.You constantly learn lessons with DIY, and I can attest first hand if you are going to install any type of wall moulding (board & batten, picture frame moulding, beadboard, etc.)invest in a nail gun. Seriously. This project was made exponentially more difficult by having to manually hammer in all the finishing nails. A nail gun is actually also one of my first 5 tools I recommend to a beginner DIY’er.

And lastly, the wall got a coat of paint in Pigeon by Farrow & Ball. The green was a bold move, but I hoped it would provide some type of coordinating contrast to the pinky purple floors. And I think it worked.

6. Vintage Decor
Last but not least, it’s time for the finishing touches. Decor breathes life and personality into a space. I love adding hints of vintage decor and antiques to mingle with current Target or TJ Maxx finds. As an avid thrift store shopper, I have 10 must buy items to keep your eye out for when browsing second hand shops. It can be overwhelming when shopping to have to sift through all the “junque”, but the diamond in the rough is there if you have a trained eye.

Some of my favorite vintage decor pieces in this bathroom are rugs, brass trays, and baskets.
First, the vintage mini Turkish rug pulls the bathroom of many colors together. There is nothing I love more than a vintage rug in any space, but especially a bathroom. A mini rug is a great place to get your feet wet in the world of vintage rugs, especially knowing a purchase like this is always an investment. I’ve created an Ebook to go into even more detail and find links to shop rugs at 10 of my favorite sellers, a general pricing guide and information on how to keep your rug in pristine condition to last throughout the generations.

More vintage decor found a spot on the toilet lid, paired with a modern landscape framed canvas above the toilet. I gathered 9 more nearly brilliant ways to decorate above your toilet to help that tricky household space that everyone has but nobody talks about.
Other quick decor fixes include a new shower curtain, and one of the first five things I recommend doing after you close on a house… buying a new toilet seat.

A total DIY face lift in 6 steps is actually doable and budget friendly. Which project do you think had the biggest impact on this bathroom remodel? I don’t know if I can pick just one, but I am so grateful I found a way to love what I already had.


